How Do You Sharpen a Chef’s Knife? A Step-by-Step Guide
Quick Answer
To sharpen a chef’s knife, secure a suitable whetstone on a stable surface, hold the blade at a consistent angle of roughly 15–20 degrees per side for many Western knives, and move the entire cutting edge across the stone with controlled strokes. Sharpen both sides until the edge becomes consistent, refine it with a finer stone if needed, and wash and dry the knife before use. For a deeper understanding of stone selection, see this guide to choosing the right chef knife sharpening stone grit.
The essential sharpening steps
- Prepare the stone: Follow its instructions for soaking or adding water, and secure it so it cannot slide.
- Set the angle: Start near 15–20 degrees per side for a typical Western chef’s knife, unless the manufacturer specifies otherwise.
- Sharpen one side: Use controlled heel-to-tip strokes while keeping the angle steady.
- Repeat on the other: Work both sides until you form a consistent, fine burr along the edge.
- Refine the edge: Use a finer stone and lighter alternating strokes to remove the burr.
- Clean and test: Wash and dry the blade, then test it carefully on paper or a ripe tomato.
One important safety tip
- Keep your fingers away from the cutting edge, use light pressure, and never sharpen with a stone that moves across the counter.
A sharp chef’s knife makes everyday cooking more controlled, from slicing onions to cutting ripe tomatoes without crushing them. I’m Michael, and in this guide, I’ll explain how to sharpen a chef’s knife at home, choose the right tools, maintain a consistent angle, and avoid mistakes that can damage the blade.
You don’t need an expensive sharpening setup to get started. The key is understanding what the edge needs and using a method that matches your knife.
What Does Sharpening a Chef’s Knife Mean?
Sharpening a chef’s knife is the process of removing a small amount of metal to restore the blade’s cutting edge. An abrasive stone or suitable sharpening system reshapes the bevel until the two sides meet at a clean, effective edge.
Sharpening differs from honing, which mainly realigns a slightly bent or rolled edge rather than removing enough metal to rebuild a dull one. Understanding this difference helps you choose the right tool instead of repeatedly honing a knife that needs genuine sharpening.
What Tools Do You Need to Sharpen a Chef’s Knife?
 Save
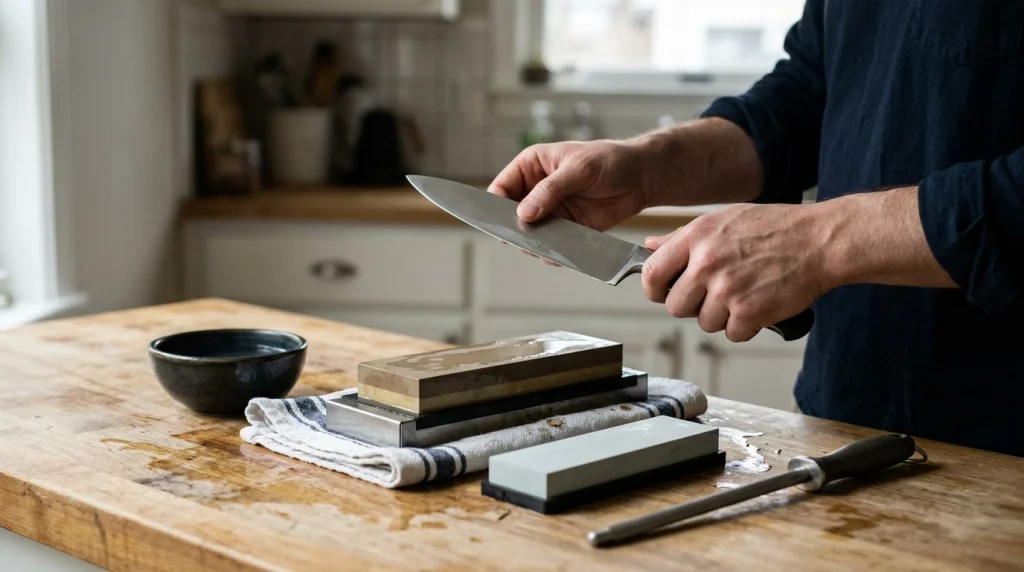
For most home cooks, a medium-grit whetstone, a stable work surface, and a little patience are enough to restore a moderately dull chef’s knife. Optional finishing tools can improve the result, but you don’t need a large collection.
- Whetstone: A 1,000-grit stone is a practical starting point for ordinary dullness.
- Fine-grit stone: A 3,000–6,000-grit stone can refine the edge after sharpening.
- Non-slip base: A stone holder or damp towel helps prevent movement.
- Water or sharpening oil: Use only the lubricant specified for your stone.
- Clean towel: Keep the work area dry enough to maintain a secure grip.
- Honing rod: Useful for routine edge maintenance between sharpening sessions.
Before starting, inspect the blade for chips, cracks, or severe damage. A badly chipped knife may need a coarse stone or professional repair rather than routine sharpening.
How Do You Sharpen a Chef’s Knife With a Whetstone?
A whetstone gives you direct control over the blade angle and the amount of metal removed. For a typical home kitchen knife, start with a medium-grit stone and work methodically across the full cutting edge.
Step 1: Prepare and Secure the Whetstone
Read the stone manufacturer’s instructions before adding water or oil. Some waterstones require soaking, some need only surface wetting, and oilstones require a compatible lubricant.
- Place the stone in a stable holder or on a damp, non-slip towel.
- Position it on a level counter with enough room to move the knife comfortably.
- Keep your hands and the handle clean enough to maintain a firm grip.
- Make sure the stone remains stable throughout the process.
A slipping stone can cause a serious cut. Stop immediately if the setup moves, and secure it before continuing.
Step 2: Find the Correct Sharpening Angle
The sharpening angle is the angle between one side of the blade and the stone. Many Western chef’s knives work well around 15–20 degrees per side, while some Japanese knives use a narrower angle.
Check the knife manufacturer’s guidance whenever possible. The original edge geometry and steel type matter more than following a universal number.
- Start with a visual guide: Hold the blade at approximately 45 degrees, then halve that angle twice to estimate about 11 degrees; open it slightly for a 15-degree target.
- Keep your wrist steady: Avoid raising or lowering the spine midway through a stroke.
- Follow the existing bevel: If you can see the original bevel, use it as your guide rather than creating a new angle unnecessarily.
Consistency matters more than perfection on your first attempt. A steady angle produces a more even edge than repeatedly changing the blade position.
Step 3: Sharpen the First Side
Place the heel of the blade on the stone and position the cutting edge at your chosen angle. Move the knife across the stone so the abrasive contacts the edge from heel to tip.
- Grip the handle securely with your dominant hand.
- Use the other hand to apply gentle, controlled pressure to the flat of the blade, keeping fingertips clear of the edge.
- Move the knife along the stone while maintaining the angle.
- Adjust your hand position as needed to follow the curve toward the tip.
- Repeat with controlled strokes, checking your progress rather than counting strokes alone.
Use moderate, even contact rather than forcing the blade into the stone. Heavy pressure can make angle control harder and remove more steel than necessary.
Step 4: Check for a Burr Along the Edge
A burr is a tiny lip of metal that forms on the opposite side as sharpening reaches the cutting edge. It provides a useful sign that you’ve worked through the edge rather than merely polishing the bevel above it.
With the blade stationary and pointed away from you, carefully check for a fine burr by moving a fingertip from the blade’s flat toward the edge only if you can do so safely. Never slide a finger along the cutting edge, and stop if you’re unsure how to check it.
Work in small sections if necessary, especially around the heel and curved tip. The goal is a consistent edge, not the largest possible burr.
Step 5: Sharpen the Other Side
Turn the knife over and sharpen the opposite bevel at the same approximate angle. Use controlled strokes and work along the entire edge, matching the progress you made on the first side.
- Keep the blade angle consistent.
- Pay attention to the heel and tip instead of sharpening only the middle.
- Reduce pressure as the edge comes together.
- Use fewer strokes when only minor refinement remains.
Some knives have asymmetric or single-bevel edges, so don’t automatically sharpen both sides equally. Follow the design of your particular blade.
Step 6: Refine and Remove the Burr
Once the edge is established, use a finer stone if you want a smoother finish. Alternate sides with progressively lighter strokes to reduce the remaining burr and refine the apex.
For everyday kitchen preparation, a clean, functional edge matters more than a mirror-polished bevel. Avoid unnecessary polishing or aggressive grinding once the knife cuts reliably.
Step 7: Clean and Test the Knife
Rinse or wipe the blade according to the manufacturer’s care guidance, then dry it thoroughly. Clean the stone and allow it to dry or store it as directed.
- Paper test: Carefully slice through a sheet of paper held away from your body.
- Tomato test: See whether the blade starts cutting the skin with light pressure.
- Food-prep test: Make a controlled cut through a suitable vegetable on a stable cutting board.
Never test sharpness by running a finger along the edge or trying to catch the blade against your hand. If the knife catches or tears, return to the stone for light refinement rather than pressing harder.
What Sharpening Angle Should You Use for a Chef’s Knife?
The correct angle depends on the knife’s design, steel, and intended use. For a general starting point, many Western chef’s knives use about 15–20 degrees per side, while some Japanese knives are designed for approximately 10–15 degrees per side.
The figures below are practical starting ranges, not universal specifications. Check the maker’s recommendations before changing an established edge.
| Knife style | Approximate angle per side | Practical consideration |
|---|---|---|
| Western chef’s knife | 15–20° | A versatile edge for everyday chopping and slicing. |
| Japanese double-bevel knife | 10–15° | A narrower edge may improve precision but can require more careful handling. |
| Single-bevel Japanese knife | Manufacturer-specific | Follow the original bevel and the maker’s sharpening method. |
| Damaged or chipped knife | Depends on repair needs | Assess the damage before selecting a coarse abrasive or professional service. |
Angle and durability work together. A thinner edge can cut with less resistance, while a more supported edge may tolerate rougher use better.
For a deeper look at abrasive choices, the chef knife sharpening guide explains how stone choice, blade steel, and edge geometry affect the process.
Which Whetstone Grit Should You Use?
Grit describes the relative coarseness of a sharpening abrasive. Lower numbers generally remove metal faster, while higher numbers refine the scratches left by coarser stones.
For most home cooks, a 1,000-grit stone is a sensible starting point, followed by a finer stone if the knife needs additional refinement. You don’t need to use every grit available.
| Grit range | Main purpose | When to use it |
|---|---|---|
| 200–400 | Coarse grinding and edge repair | Significant dullness, chips, or reshaping when appropriate. |
| 800–1,200 | General sharpening | Routine restoration of a dull kitchen knife. |
| 3,000–6,000 | Edge refinement | Finishing an edge after medium-grit sharpening. |
| 8,000 and above | Fine polishing | Specialized finishing when the knife and intended cutting style benefit. |
These ranges are general guidance, and stone manufacturers may use different abrasive standards. For a more detailed breakdown, read the chef knife sharpening stone grit guide.
Whetstone vs. Pull-Through Sharpener vs. Electric Sharpener
Each sharpening method offers a different balance of control, convenience, and learning effort. Choose one that suits your knife and your willingness to practice.
| Method | Advantages | Limitations |
|---|---|---|
| Whetstone | High control over angle and metal removal. | Requires practice and proper stone setup. |
| Manual pull-through | Simple and quick for compatible knives. | Fixed angles may not suit every blade; some models remove excess metal. |
| Electric sharpener | Convenient and consistent when properly matched to the knife. | Costs more and can remove too much steel if used incorrectly. |
| Professional sharpening | Useful for valuable knives, difficult edges, and substantial damage. | Requires finding a suitable service and may involve a fee. |
My practical recommendation is to start with a whetstone if you want control and don’t mind learning the technique. If speed matters more, choose a reputable sharpener explicitly compatible with your knife’s edge geometry.
For delicate Japanese knives, check the manufacturer’s guidance before using an aggressive pull-through or electric system. A tool designed for a different edge angle may damage the blade.
How Do You Hone a Chef’s Knife Between Sharpenings?
 Save
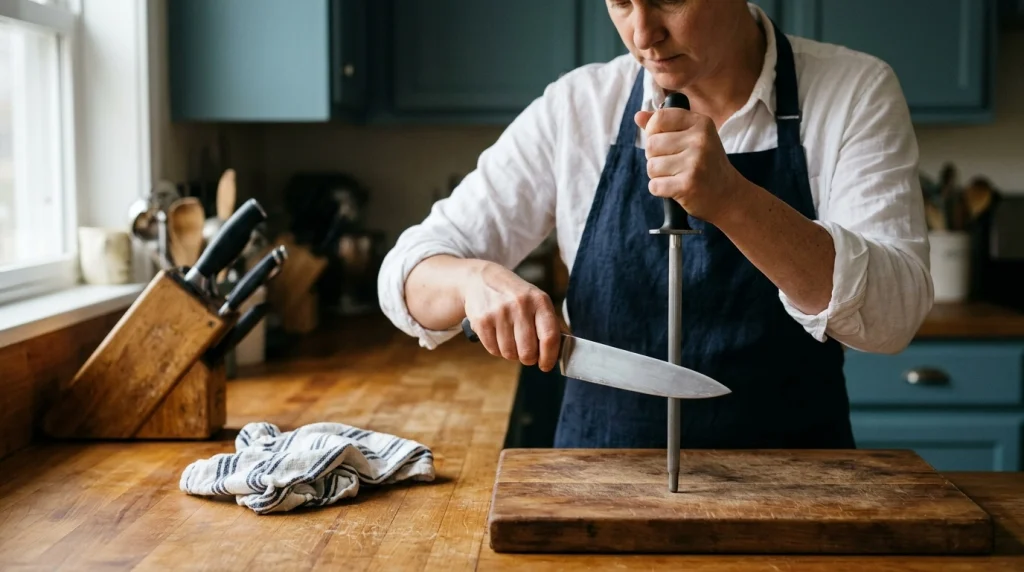
Honing helps maintain an edge that has become slightly misaligned during normal cutting. It doesn’t replace sharpening when the blade has become genuinely dull.
- Place the tip of a suitable honing rod on a stable cutting board or work surface.
- Hold the rod firmly with its tip directed away from your body.
- Position the knife at the angle recommended for the blade, commonly around 15–20 degrees for many Western knives.
- Move the blade along the rod with slow, controlled strokes.
- Repeat on the other side with light pressure, then clean the knife.
Don’t swing the knife quickly across the rod to imitate a professional chef. Slow strokes provide better control, especially for beginners.
Use a rod suited to your knife’s steel and edge. A smooth steel, ceramic rod, and diamond-coated rod can behave differently, so check compatibility before use.
What Mistakes Should You Avoid When Sharpening a Chef’s Knife?
Most beginner problems come from inconsistent angles, excessive pressure, or choosing an abrasive that doesn’t match the condition of the edge. A few careful adjustments can make sharpening more predictable.
- Using the wrong angle: Follow the original bevel or the manufacturer’s specification rather than forcing a new geometry.
- Pressing too hard: Let the abrasive do the work and maintain controlled contact.
- Sharpening only the middle: Follow the full edge, including the heel and curved tip.
- Starting too coarse: Use a coarse stone only when the edge condition justifies the extra metal removal.
- Ignoring the burr: Confirm that the sharpening process reaches the edge before moving to finer grits.
- Using an unstable stone: Secure the stone before touching the blade to it.
- Skipping cleanup: Remove metal residue and dry the knife before storing it.
One useful troubleshooting rule is to change one thing at a time. If the knife still struggles to cut, check the angle, edge condition, and burr before adding more pressure.
How Often Should You Sharpen a Chef’s Knife?
Sharpen your chef’s knife when it no longer cuts cleanly, even after appropriate honing. The right interval depends on how often you cook, the cutting board you use, the knife’s steel, and the foods you prepare.
- Frequent home cooking: Check the edge regularly and sharpen when cutting performance declines.
- Occasional cooking: You may go longer between sharpening sessions if the knife stays sharp.
- Professional kitchen use: Inspect and maintain the edge more often because of heavier daily use.
Don’t sharpen simply because a calendar says it’s time. A knife that still cuts well may need only routine maintenance, while a frequently used knife may need attention sooner.
For more general care advice, see North Carolina Cooperative Extension’s kitchen knife care guidance and the University of Nebraska’s guide to using and caring for a chef’s knife.
How Can You Keep a Chef’s Knife Sharp Longer?
Good daily habits reduce unnecessary wear and help preserve the edge you worked to restore. Cutting surfaces, cleaning, and storage all affect how well a knife performs over time.
- Choose the right cutting board: Use wood or a suitable plastic board instead of glass, stone, or other hard surfaces.
- Cut with control: Avoid twisting the blade while it’s buried in firm food.
- Clean after use: Wash by hand when recommended and dry the knife promptly.
- Store safely: Use a knife block, blade guard, or magnetic strip that protects the cutting edge.
- Maintain the edge: Hone when appropriate and sharpen only when needed.
Never leave a knife hidden in a sink full of soapy water. Clean it where you can see the blade clearly, and keep it away from other utensils that could damage its edge.
The BC Centre for Disease Control’s knife-care resource also explains basic sharpening and safe handling practices.
Which Chef Knife Sharpening Tools Are Worth Considering?
If you’re ready to set up a sharpening station, I’d prioritize a stable stone and a compatible honing tool before buying a complicated collection. Here are three options to investigate, depending on your experience and preferred method.
BEST STARTING POINT
KING KW65 1000/6000 Combination Whetstone
A combination stone offers a medium-grit sharpening surface and a finer finishing surface. I’d consider this type of setup for learning edge control and refining a kitchen knife at home; confirm the exact model and compatibility before purchasing.
FOR GUIDED SHARPENING
Work Sharp Precision Adjust Elite
This guided sharpening system helps maintain a repeatable angle and uses interchangeable abrasives. I’d consider it if freehand sharpening feels difficult, while checking that its settings suit the knife’s original edge.
FOR ROUTINE MAINTENANCE
Wüsthof 9-Inch Sharpening Steel
A traditional honing steel can help maintain a compatible knife between sharpening sessions. I’d choose this type of tool for routine upkeep, not as a substitute for restoring a genuinely dull or damaged edge.
These are equipment suggestions, not claims of hands-on testing or verified current customer ratings. Check the latest model specifications, included accessories, and manufacturer instructions before choosing.
Frequently Asked Questions
Can you sharpen a chef’s knife at home?
Yes, you can sharpen most conventional chef’s knives at home with a suitable whetstone or compatible sharpening system. Secure the tool, follow the knife’s recommended edge angle, and use controlled strokes. For major chips, cracks, or unfamiliar single-bevel designs, consider professional sharpening.
How many strokes does it take to sharpen a chef’s knife?
There is no fixed number of strokes that works for every knife. A slightly dull blade may need only a few careful passes, while a badly neglected edge can take much longer. Check progress along the entire cutting edge and stop when it cuts cleanly.
Should you wet a whetstone before sharpening?
It depends on the stone. Some waterstones need soaking, others require only surface wetting, and oilstones use a compatible sharpening oil. Follow the manufacturer’s directions, and never switch between water and oil unless the stone explicitly supports both.
Is a honing rod the same as a knife sharpener?
No. A conventional honing rod mainly realigns a slightly rolled edge, helping a knife retain its cutting performance between sharpening sessions. A whetstone removes metal to create a fresh edge. Some abrasive rods can remove metal too, so their exact function depends on the material and design.
How do you know when a chef’s knife is sharp enough?
A sharp chef’s knife should cut paper smoothly and begin slicing a ripe tomato without excessive pressure. Test carefully with the blade directed away from your body, and never run your finger along the edge. If the knife catches or tears, inspect the edge and refine it if necessary.
Final Takeaway: Sharpen Your Chef’s Knife With Control
Learning how to sharpen a chef’s knife comes down to three things: using a suitable abrasive, maintaining a consistent angle, and checking the edge as you work. A medium-grit whetstone is a practical starting point for many home cooks.
Take your time, use light and controlled strokes, and avoid removing more metal than necessary. With regular care and safe handling, your chef’s knife can remain a reliable tool for everyday meal preparation.
Affiliate disclosure: This article contains affiliate links. If you purchase through these links, CookingFlavour may earn a commission at no additional cost to you.