Chef Knife Sharpening Stone Grit Guide | 1000, 3000 & 6000
Quick Answer
For most chef knives, start with a 1000-grit stone. It is coarse enough to restore a dull edge and fine enough not to waste steel. Finish on 3000 to 6000 grit for a smoother, cleaner-cutting edge, and use a coarse 200 to 400-grit stone only for chips, major dullness, or reshaping.
A chef knife does not need every grit on the shelf. It needs the right starting grit, a sensible step up for refinement, and a stopping point that suits how you cook.
What a Grit Number Really Means
Grit describes the size of the abrasive particles on the stone. A lower number means larger, more aggressive particles that cut steel quickly and leave deeper scratches. A higher number means smaller particles that cut slowly and leave a smoother surface.
That is why grit is a sequence, not a score. A coarse stone creates the edge shape. Each finer stone then removes the scratches left by the one before it. Jumping straight from a coarse repair stone to a very fine polishing stone does not save time. The fine stone must work much harder to remove deep scratches, and the edge can feel smooth while still having weak, uneven spots underneath.
A knife finished at 1000 grit can be genuinely sharp. A higher finish is smoother for delicate slicing, but not automatically better for every job.
The Grit Ranges, at a Glance
Different makers use slightly different boundaries, but the practical ranges are consistent enough to use as a guide:
| Range | Typical grit | Best use |
|---|---|---|
| Coarse | 200–400 | Repair chips, remove damage, reshape a very dull edge |
| Medium | 800–2000 | Regular sharpening and restoring a working edge |
| Fine | 3000–6000 | Refining, deburring, and polishing after sharpening |
| Ultra-fine | 8000 and above | Mirror polish for precision slicing, not everyday kitchen work |
Think of 1000 grit as the centre of this system. That is why a 1000/6000 combination stone is a common starting point: routine sharpening on one side, refinement on the other.
Which Grit Should You Start With?
 Save
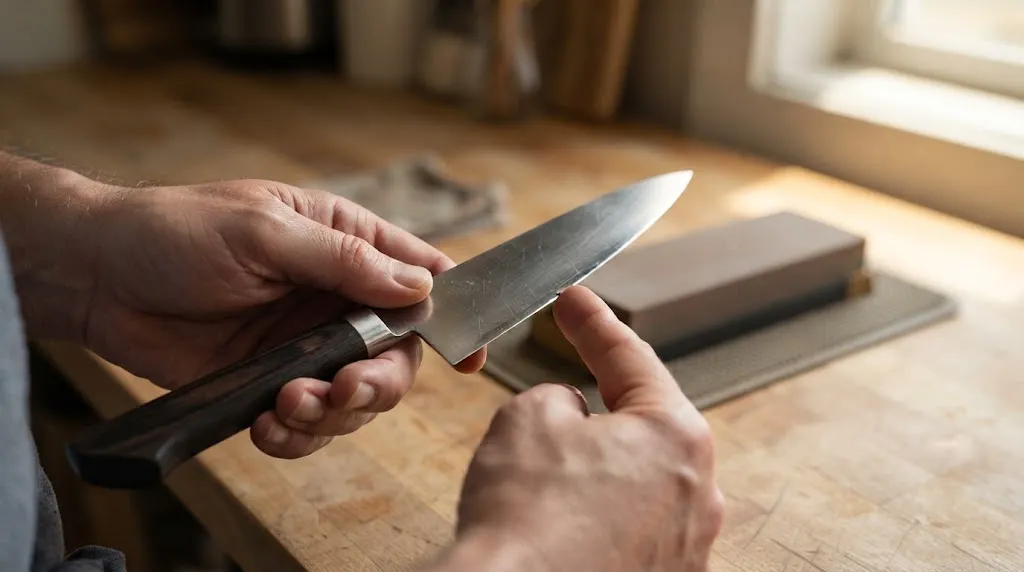
Start with the knife, not the stone collection. The condition of the edge tells you where the progression should begin. Starting too coarse removes steel for no benefit. Starting too fine wastes time and can leave damage untouched.
| Knife condition | Start here | Then use |
|---|---|---|
| Chipped, nicked, or reshaped edge | 200–400 | 1000, then 3000–6000 |
| Very dull, slips on a tomato skin | 1000 | 3000–6000 |
| Still cuts, but feels draggy | 1000 | 3000–6000, or stop at 1000 for a toothier edge |
| Sharp, just needs a touch-up | 3000–6000 | Nothing coarser |
A useful rule is to use the finest stone that can still fix the problem. If a few careful passes on 1000 grit raise a consistent burr along the edge, that stone was enough. If the edge still has visible chips after patient work, drop to a coarser stone rather than pressing harder on the medium stone.
For the full motion and burr-checking process, see this guide to how to sharpen a chef knife. A steady angle matters just as much as grit: an uneven angle leaves part of the edge refined and another part untouched.
Toothy or Polished: When Should You Stop?
This is the decision most guides gloss over, yet it changes how the knife behaves on food. A finish around 1000 to 2000 grit leaves microscopic teeth along the edge. Those teeth bite into tomato skins, pepper skins, and crusty bread, so the blade starts the cut instead of sliding across the surface.
A finish at 3000 grit and above smooths those teeth away. The result is a cleaner push cut through boneless meat, soft fruit, and raw fish, where tearing matters more than grip. For a general-purpose chef knife, a 3000 to 6000-grit finish is a practical middle ground: smoother than a working edge, but not so polished that it loses bite on everyday ingredients.
Stopping earlier is not a failure. For vegetables, bread, and tougher skins, a toothier edge may last longer. For precise, delicate slicing, the extra polishing step earns its place. Match the finish to the cutting you actually do.
Key Insight
Higher grit does not mean a stronger edge. A very fine edge can feel sharper at first and dull sooner on a hard board or against bone, while a slightly toothier edge often keeps cutting well for longer.
How Steel and Knife Style Change the Choice
Western-style chef knives are usually softer stainless steel, sharpened at a wider angle, often around 20 degrees per side. Stopping at 1000 to 3000 grit is often sensible: the steel may not hold an ultra-fine edge for long, so polishing to 8000 grit adds work without lasting performance.
Harder Japanese-style knives can support a finer edge, and a 3000 to 6000-grit finish is commonly worthwhile, provided the knife is not forced through bone or frozen food. Steel hardness explains the tradeoff: harder steel stays keen longer, but can chip more easily if the edge is too thin or polished for rough work.
Single-bevel Japanese knives are a separate case, with asymmetrical geometry that needs specific guidance. Serrated knives also need different treatment: a flat whetstone cannot follow each serration, so do not run a serrated blade across a coarse stone to restore it.
A Practical Grit Sequence That Works
For a dull but undamaged chef knife, this sequence covers most home sharpening:
- Prepare the stone. Follow the maker’s instructions: some stones need soaking until bubbles stop, while others are splash-and-go. Secure the stone so it cannot slide.
- Start on 1000 grit. Hold a consistent angle, use light to moderate pressure, and work heel to tip until you feel a burr along the full edge. Repeat on the other side.
- Refine on 3000 to 6000 grit. Use lighter pressure and fewer strokes. The goal is to remove the previous scratches and the burr, not to reshape the edge again.
- Deburr and test. Finish with very light, alternating strokes. Then test on a ripe tomato or a sheet of paper: the knife should start the cut easily, without tearing or needing force.
Keep the angle consistent across grits. Changing it creates a new bevel on top of the old one and makes the edge feel uneven. This chef knife edge angle guide explains the common Western and Japanese ranges. Do not judge a stone by speed alone: on a knife that only needs maintenance, fast steel removal becomes wear.
Mistakes That Make Grit Choice Seem Like the Problem
 Save
Many disappointing results are not caused by the wrong grit number. They are caused by how the grits are used together.
- Skipping grits. Going from 400 straight to 6000 leaves deep scratches under a polished surface. The edge may look refined and still cut poorly.
- Starting too coarse for routine sharpening. A 400-grit stone on a slightly dull knife removes years of useful steel over time and shortens the knife’s life.
- Polishing before the edge is formed. If no burr has been raised on the medium stone, a fine stone will only polish a dull edge. It will shine, but it will not cut better.
- Leaving the burr in place. A burr feels sharp at first, then folds or breaks off in use, leaving a ragged edge. Light finishing strokes matter.
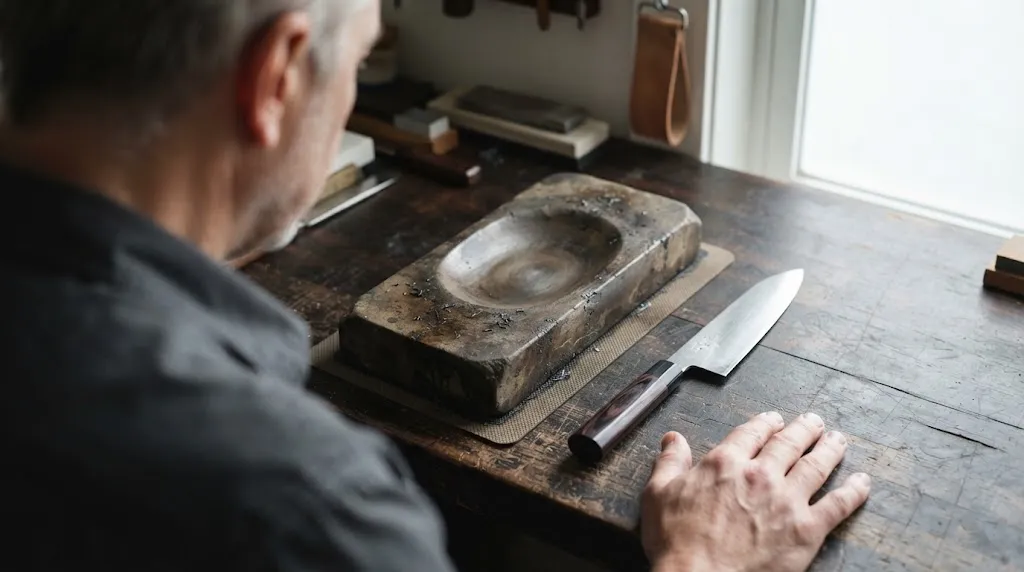
- Sharpening on a dished stone. A hollowed stone changes the contact between blade and abrasive, making the angle inconsistent even when your hands are steady.
If a knife still fails a tomato test after careful work, check the angle and burr before buying a finer stone. Finer grit refines an edge; it does not correct geometry.
How to Tell If You Picked the Right Grit
The tomato test separates grip from brute force. A good working edge bites into the skin with little downward pressure; a polished edge slices cleanly but feels smoother and less grabby. Neither is automatically wrong.
Also check the edge along its full length. A knife that cuts well near the heel but drags near the tip was not sharpened evenly, even if the grit sequence was correct. Revisit that section, rather than running the whole blade over a finer stone again.
Edge life is another clue. If a very fine edge dulls unusually fast, try stopping at 3000 grit next time. If a 1000-grit edge feels rough on delicate slicing, add a fine finishing step. For when sharpening is actually needed versus simple upkeep, see this whetstone guide and the guide to how often to sharpen kitchen knives.
Stone Care That Affects How Grit Performs
A stone’s labelled grit only works as expected when its surface is flat and clean. Water stones wear during use and can develop a hollow in the middle. Flattening restores even contact and keeps the stated grit behaving predictably across the whole blade.
Soaking rules also vary: some stones must be soaked, some only need a splash of water, and soaking the wrong type can damage it. Check the maker’s instructions for your specific stone.
After sharpening, rinse away metal slurry and let the stone dry before storing it. A clogged surface cuts more slowly and can feel finer than its grit number suggests. The Sharpening Supplies grit chart is a useful reference for how grit relates to particle size and edge finish.
Tip
If you are buying your first stone, choose a 1000/6000 combination stone before adding a coarse repair stone. Most home cooks need routine sharpening far more often than chip repair.
Related Product
Chef Knife Sharpening Stone, 1000/6000 Grit
A combination stone covers the two grits most home cooks use most: 1000 for restoring a dull chef knife and 6000 for refining the edge.
As an Amazon Associate, we earn from qualifying purchases.
Frequently Asked Questions
What grit is best for a chef knife?
For most chef knives, 1000 grit is the best starting point for regular sharpening. Finish on 3000 to 6000 grit if you want a smoother edge, and stop at 1000 to 2000 grit if you prefer a toothier edge for tomato skins and crusty bread.
Is a 1000/6000 combination stone enough?
Yes, for most home cooks. The 1000-grit side restores a dull edge, and the 6000-grit side refines it. You only need a separate coarse stone if you regularly repair chips or reshape damaged edges.
Should I use 8000 grit on a chef knife?
Usually not for everyday cooking. An 8000-grit finish can be excellent for delicate precision slicing, but it adds time and may dull sooner in normal kitchen use. A 3000 to 6000-grit finish is more practical for most chef knives.
Can I go straight from 400 grit to 6000 grit?
It is not recommended. The 6000-grit stone would have to remove deep scratches left by the coarse stone, which is slow and often incomplete. Use 1000 grit as a bridge so each step removes the previous scratches.
Why does my knife still feel dull after a fine stone?
Usually because the edge was never fully formed on the medium stone, the angle changed between stones, or a burr was left in place. A fine stone polishes an existing edge; it does not create one from a dull blade on its own.
Does a higher grit damage a knife?
No, higher grit alone does not damage a knife, but unnecessary coarse sharpening does remove steel. The risk comes from starting too coarse, pressing too hard, or sharpening far more often than the knife needs.
Conclusion
Start with the edge you have, not the largest grit collection you can buy. For most chef knives, 1000 grit does the real sharpening work, 3000 to 6000 grit refines it, and coarse stones stay in reserve for chips and serious dullness. Choose a toothier edge for grip on skins and crusts, or a smoother finish for delicate cuts. Keep the angle steady, remove the burr, and flatten the stone when needed.