Chef Knife Edge Not Sharp After Sharpening? Here’s How to Fix It
Quick Answer
If your chef knife edge is not sharp after sharpening, the most common causes are an inconsistent sharpening angle, a remaining burr, insufficient sharpening, or a damaged edge. Check the blade under bright light, feel for a burr carefully, and test it on a tomato or a sheet of paper. Use a consistent angle on both sides, remove the burr with light finishing strokes, and inspect the edge again before returning to food preparation.
What to check first
- Sharpening angle: Keep the blade at a consistent angle throughout each stroke.
- Burr removal: Use light alternating strokes to remove the thin metal lip left by sharpening.
- Enough sharpening: Work until the abrasive reaches the full length of the edge.
- Stone condition: Check that your sharpening stone is clean and suitable for the blade.
- Edge damage: Look for chips, dents, or reflective flat spots along the cutting edge.
A quick verification tip
- Try a gentle paper-cutting test or slice through a ripe tomato. Keep your fingers clear of the edge and never run a finger along the blade.
A chef knife can look freshly sharpened and still struggle to cut through an onion, tomato, or carrot. I’ve found that the key to troubleshooting this problem is to identify what happened during sharpening instead of immediately grinding away more steel.
This guide explains how to diagnose a dull edge, correct common sharpening mistakes, and choose the right tools for maintaining a reliable kitchen knife. You’ll also learn when honing is enough and when the blade needs more substantial sharpening.
Why Is My Chef Knife Edge Not Sharp After Sharpening?
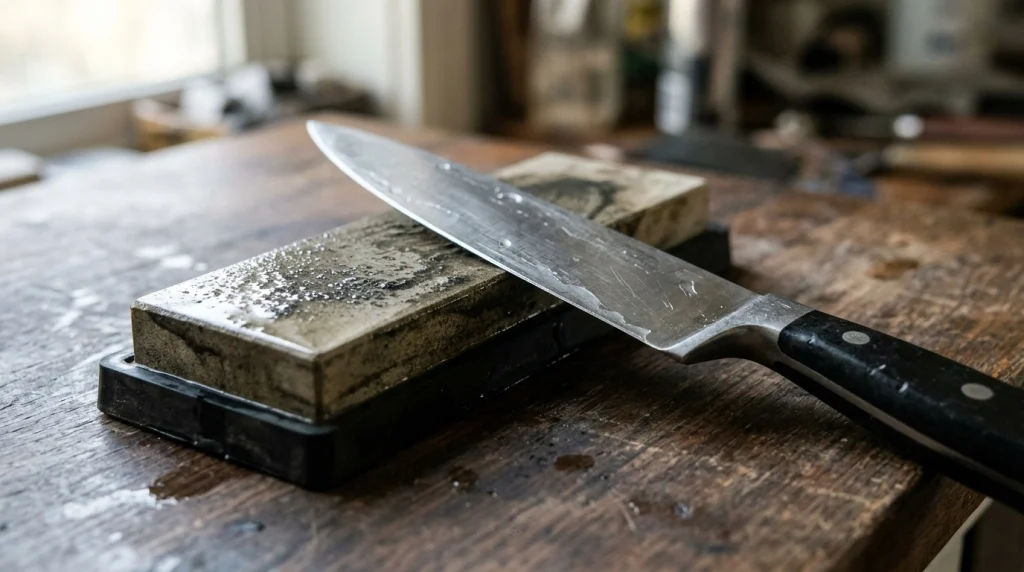 Save
A chef knife that remains dull after sharpening usually has an inconsistent edge, a remaining burr, or damage that the sharpening process hasn’t removed. The solution depends on which of these problems is preventing the blade from cutting cleanly.
Sharpening removes metal to create two surfaces that meet at a narrow cutting edge. If those surfaces don’t meet properly, the knife may feel smoother without becoming noticeably sharper.
1. The sharpening angle keeps changing
Changing the blade angle during sharpening can produce a rounded or uneven edge instead of a clean cutting apex. This often happens when you lift or lower the handle unconsciously during each stroke.
For many Western-style chef knives, an angle around 15–20 degrees per side is a reasonable starting point, although the manufacturer’s recommendation should take priority. Some Japanese knives use narrower angles, and the correct geometry varies by model.
2. A burr is still attached to the edge
A burr is a thin curl of metal that forms along the edge as an abrasive removes steel. It can make a knife feel sharp from one direction while the opposite side performs poorly.
A large burr may also fold over during cutting, creating the impression that the knife was sharp briefly before becoming dull again. The remedy is controlled burr removal, not simply adding more pressure.
3. The edge never became fully sharp
If you stop sharpening before the abrasive reaches the entire cutting edge, some sections remain dull. The knife may cut well near the heel but slide across food near the tip.
Check the heel, middle, and tip separately. Consistent performance across all three areas matters more than a polished appearance.
4. The blade has chips or a rounded edge
A damaged edge needs more work than routine sharpening. Small chips, worn spots, and a heavily rounded cutting edge may require a coarser abrasive or professional repair.
Look for tiny bright reflections along the cutting edge under a strong light. These can reveal flat or damaged areas that are difficult to see from the side.
How Can I Fix a Chef Knife That Is Still Dull After Sharpening?
Start by inspecting the edge, then sharpen with a consistent angle and finish by removing the burr. Don’t repeat the entire process blindly, because unnecessary sharpening wastes steel and may make the edge geometry worse.
- Clean the blade. Wash away metal particles and residue, then dry the knife thoroughly.
- Inspect the cutting edge. Use bright light to identify chips, flat spots, or sections that reflect light.
- Prepare the abrasive. Follow the stone manufacturer’s instructions for soaking or wetting, if applicable.
- Set a consistent angle. Use the knife manufacturer’s recommended angle whenever available.
- Sharpen both sides. Apply controlled strokes, covering the heel, middle, and tip without twisting the blade.
- Check for a burr. Inspect carefully and keep your fingers away from the cutting edge.
- Remove the burr. Finish with light alternating strokes using an appropriate fine abrasive.
- Test the edge. Use paper or a ripe tomato, keeping your hands safely away from the blade’s path.
Work slowly and make small adjustments. If the knife still performs poorly after a careful attempt, reassess the edge instead of applying more force.
How Do You Know Whether the Knife Is Sharp Enough?
A sharp chef knife should start a cut without excessive force and slice through food without crushing or tearing it. No single test proves everything, so combine a simple cutting test with a visual inspection.
A blade can also feel smooth while remaining dull, especially if its edge has a rounded section or a burr that folds over during cutting.
- Paper test: Hold a sheet of paper away from your body and try making a controlled cut. A sharp edge should cut cleanly instead of catching or tearing repeatedly.
- Tomato test: Use the knife’s own weight and a gentle slicing motion to begin cutting the skin of a ripe tomato.
- Onion test: Check whether the blade slices through the outer layers without repeatedly slipping or crushing them.
- Visual inspection: Examine the edge under bright light for shiny flat spots or visible chips.
Never test sharpness by running a finger along the cutting edge, catching the blade against your palm, or dropping it onto food. Those methods can cause serious cuts.
Is the Problem the Whetstone, Honing Steel, or Sharpening Angle?
The right tool depends on whether the edge is dull, misaligned, or physically damaged. A honing steel cannot reliably repair an edge that never became sharp, and a fine polishing stone may take too long to correct significant damage.
| Tool or issue | Best use | Main limitation |
|---|---|---|
| Medium-grit whetstone | Creating a new edge on a normally dull knife | Requires consistent angle control |
| Coarse sharpening stone | Repairing substantial dullness or minor edge damage | Removes steel quickly if used unnecessarily |
| Fine finishing stone | Refining an edge after sufficient sharpening | Cannot efficiently correct a badly rounded edge on its own |
| Honing steel | Maintaining a slightly rolled or misaligned edge when compatible with the blade | Will not fix significant chips or a missing cutting apex |
| Guided-angle sharpener | Helping beginners maintain a repeatable angle | Must match the blade’s geometry and design |
For more guidance on choosing the correct sharpening method, read this guide to sharpening a chef knife with the right tools and angles.
What Sharpening Angle Should You Use for a Chef Knife?
The correct angle depends on the knife’s original edge geometry, steel, and intended use. Many Western chef knives work well around 15–20 degrees per side, while some Japanese knives are designed for narrower angles.
These figures are starting points, not universal specifications. Follow the manufacturer’s guidance when available, especially for thin, hard, or single-bevel blades.
How can you maintain a consistent angle?
- Use an angle guide: A compatible guide can help beginners maintain a repeatable angle across each stroke.
- Mark the bevel: Apply a removable marker to the existing bevel and make a few gentle passes. The pattern of removed ink can reveal whether the abrasive is contacting the intended surface.
- Keep your wrist steady: Move the blade smoothly while adjusting your hand position to follow the curve toward the tip.
- Use light pressure: Let the abrasive do the work instead of forcing the blade into the stone.
Changing the angle repeatedly can create a wider, uneven bevel and make the edge harder to refine. Consistency matters more than chasing a particular number without understanding the blade.
Why Does My Chef Knife Feel Sharp but Still Not Cut Properly?
A knife can feel sharp to the touch yet fail during food preparation because a burr, an uneven edge, or a rounded section interferes with the cut. A brief tactile impression is not a reliable substitute for a controlled cutting test.
Check whether a burr remains
After sharpening one side, a small burr may form on the opposite side of the edge. This is a normal part of many sharpening methods, but leaving it attached can make the edge unstable.
Instead of sweeping your finger along the blade, inspect the edge under a bright light and use careful, low-risk checks. If you are experienced, follow the sharpening stone manufacturer’s recommended burr-checking method while keeping your fingers away from the cutting edge.
Finish with lighter strokes
Once the edge has reached the apex on both sides, reduce pressure substantially. Make a few controlled alternating strokes on a suitable finishing abrasive to help remove the remaining burr.
A leather strop can help refine an edge, but it is not a substitute for proper sharpening. Excessive stropping pressure or an incorrect technique can round the apex and reduce cutting performance.
Can a Whetstone Be the Reason Your Knife Is Still Dull?
Yes. A clogged, uneven, or unsuitable stone can make sharpening less effective, even when your technique seems correct.
- Check for clogging: Metal swarf and debris can reduce the stone’s cutting performance.
- Check for unevenness: A dished stone can make it difficult to maintain consistent contact along the blade.
- Use the right preparation: Some stones require soaking, others need only water on the surface, and oilstones require a different approach.
- Match the grit to the job: A medium-grit stone suits routine sharpening, while a coarse stone is more useful for significant dullness or repair.
- Secure the stone: Place it in a suitable holder on a stable work surface so it cannot slide during sharpening.
Don’t soak every sharpening stone automatically. Follow its manufacturer’s instructions, because the wrong preparation can damage certain types of stones or make them less effective.
When Should You Stop Sharpening and Get Professional Help?
Stop if the knife has deep chips, a bent tip, a severely uneven edge, or damage that does not improve with careful sharpening. Continuing to remove metal without a clear plan may shorten the blade’s life or alter its geometry.
Professional sharpening is also worth considering if you have repeatedly tried to sharpen the knife but cannot produce a consistent cutting edge. A skilled sharpener can assess whether the blade needs ordinary sharpening, edge repair, or more extensive work.
For a valuable Japanese knife, a thin specialty blade, or a single-bevel knife, choose someone familiar with that specific style. Ask about the sharpening method before handing over the blade.
How Can You Keep Your Chef Knife Sharp After Fixing It?
Once your knife cuts properly, regular care helps preserve its edge and reduces how often you need to remove metal. Good maintenance begins with the cutting surface, cleaning routine, and storage method.
- Use a suitable cutting board: Wood and knife-friendly plastic are generally better choices than glass, stone, or ceramic surfaces.
- Clean after use: Hand-wash the blade with mild soap and water, then dry it completely.
- Hone when appropriate: Use a compatible honing tool with light pressure when the edge begins to lose its bite.
- Store it safely: Use a knife guard, suitable block, or properly installed magnetic strip to prevent the edge from striking other utensils.
- Sharpen when needed: Let cutting performance guide your schedule rather than following a rigid calendar.
For a broader maintenance routine, see how to clean, sharpen, and maintain kitchen knives. If the blade has accumulated food residue during troubleshooting, review the steps for cleaning a chef knife safely.
Which Tools Can Help You Sharpen a Chef Knife Correctly?
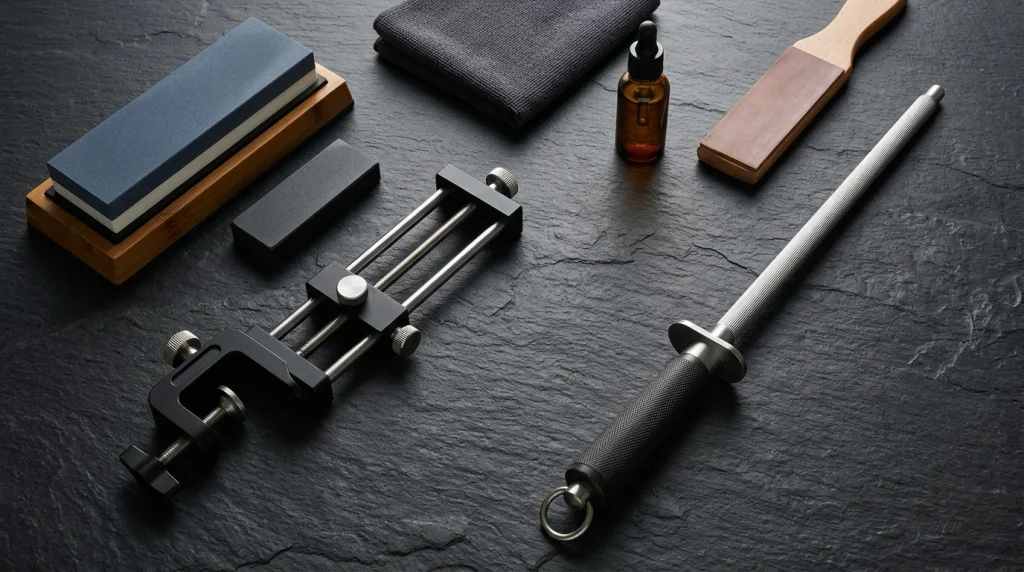 Save
If your knife remains dull after troubleshooting, a suitable sharpening tool can make it easier to achieve a consistent edge. The best choice depends on your skill level, the knife’s construction, and the amount of edge repair required.
For most home cooks, a whetstone offers control, while a guided sharpener can simplify angle consistency. A honing steel is useful for routine maintenance, but it cannot replace sharpening when the cutting edge needs to be rebuilt.
BEST FOR MANUAL CONTROL
KING Combination Whetstone 1000/6000
A two-sided stone provides a medium-grit sharpening surface and a finer finishing surface. It is a useful option for cooks who want to learn angle control and burr removal rather than rely on a pull-through sharpener.
BEST FOR ANGLE CONTROL
Work Sharp Precision Adjust Knife Sharpener
This guided sharpening system helps maintain a repeatable angle while working along the blade. It can suit beginners who struggle with freehand sharpening, provided the model and setup are appropriate for their knife.
BEST FOR ROUTINE MAINTENANCE
Victorinox Honing Steel
A traditional honing steel can help maintain a compatible knife’s edge between sharpening sessions. Choose the correct type for your blade, and use gentle, controlled strokes rather than pressing hard against the steel.
These are tool options rather than hands-on product test results. Before buying, check compatibility with your knife and follow the tool manufacturer’s instructions.
Frequently Asked Questions
Why is my chef knife still dull after using a whetstone?
Your angle may be inconsistent, the abrasive may not have reached the cutting edge, or a burr may remain attached. Inspect the blade under bright light, check the heel and tip separately, and repeat the sharpening process only where needed. Finish with light strokes to remove the burr.
Can a honing steel make a completely dull chef knife sharp again?
Usually not. A honing steel can realign a slightly rolled edge on a compatible knife, but it cannot reliably rebuild a rounded or substantially worn cutting edge. If honing does not restore cutting performance, use an appropriate sharpening abrasive or consult a professional.
How many strokes does it take to sharpen a chef knife?
There is no universal stroke count. The time and number of passes depend on the knife’s condition, steel, abrasive, and sharpening angle. Focus on creating a consistent edge along the entire blade instead of stopping after an arbitrary number of strokes.
Should I use a coarse or fine whetstone if my knife is still dull?
Use a medium-grit stone for routine sharpening when the edge is intact but dull. A coarse stone can help with substantial wear or minor damage, while a fine stone refines an edge that is already sharp. Starting with an overly fine stone can make correcting a rounded edge unnecessarily slow.
How can I tell whether my knife has a burr after sharpening?
A burr is a thin metal lip created as sharpening reaches the edge. Inspect the blade under bright light and use a cautious checking method recommended by your sharpening tool’s manufacturer. Never run your fingertip along the cutting edge to search for one.
Final Takeaway: Fix the Cause, Not Just the Symptoms
When a chef knife edge is not sharp after sharpening, the answer is rarely to keep grinding without checking your technique. Start with the angle, confirm that the abrasive has reached the full edge, and remove any remaining burr with light finishing strokes.
If those steps don’t restore clean cutting performance, inspect the stone and blade for unevenness or damage. A suitable sharpening tool or experienced professional can help you recover a reliable edge without removing unnecessary metal.
The goal is a consistent, stable cutting edge that works safely and predictably. Once you’ve achieved it, good cutting boards, careful cleaning, and sensible storage will help keep your chef knife performing well.
Affiliate disclosure: This article contains affiliate links. If you purchase through these links, Cooking Flavour may earn a commission at no additional cost to you.