Chef Knife Sharpening Creates an Uneven Edge: Causes and Fixes
Quick Answer
When chef knife sharpening creates an uneven edge, the usual causes are inconsistent sharpening angles, uneven pressure, a worn or dished whetstone, and incomplete burr removal. Stop grinding, inspect the bevel along the blade, and correct the specific problem before removing more steel. For a reliable starting point, follow this chef knife sharpening guide.
Common signs and what they mean
- Uneven bevel width: Your sharpening angle or pressure may change along the blade.
- Dull sections: The abrasive may not be reaching the cutting edge consistently.
- Rounded tip: You may be lifting the handle too much near the blade’s curved end.
- Sharp briefly, then dull: A remaining burr may be folding or breaking away.
- Different bevels on each side: Unequal grinding or an intentionally asymmetric factory grind may explain the appearance.
Before sharpening again
- Check that the stone is flat, clean, and properly prepared.
- Use a consistent angle and controlled pressure.
- Inspect the edge safely and remove any remaining burr before testing the knife.
When chef knife sharpening creates an uneven edge, it can be tempting to make more passes and hope the problem disappears. That often wastes steel without addressing the real cause.
I’m Michael, and this guide focuses on the practical checks that help distinguish an uneven sharpening technique from a worn stone, a stubborn burr, or unusual blade geometry. You’ll learn how to diagnose the problem and restore a more consistent cutting edge without unnecessary grinding.
What Does an Uneven Chef Knife Edge Mean?
 Save
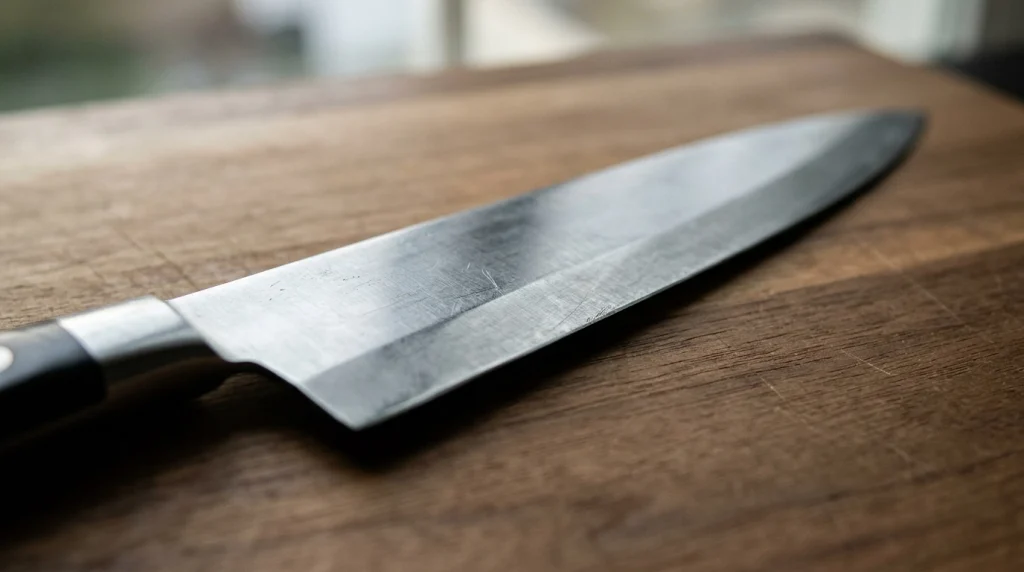
An uneven chef knife edge has inconsistent bevel geometry, inconsistent sharpness along its length, or both. The bevel is the sloping surface ground into the blade to form its cutting edge.
These problems can look similar, but they need different fixes. A blade might have a visibly wide bevel near the heel and a narrow bevel near the tip, or it might look uniform while failing to cut properly in certain sections.
How to recognize the problem
- Uneven bevels: One section of the sharpened strip looks wider than another.
- Inconsistent cutting: The knife cuts well near the heel but struggles near the middle or tip.
- Asymmetric edge: One side has a noticeably wider bevel than the other.
- Rounded tip: The tip has lost its original shape because the sharpening motion changed near the end.
- Recurring dullness: The blade feels sharp initially but loses its cutting ability quickly.
Remember that a wider bevel does not automatically mean the edge is damaged. Some knives have asymmetric grinds, and bevel width can change naturally as the blade tapers toward its tip.
Why Does Chef Knife Sharpening Create an Uneven Edge?
The main causes are changes in angle, inconsistent contact with the stone, excessive pressure, and incomplete sharpening. Identifying the cause first helps you avoid removing unnecessary metal.
1. Changing the sharpening angle
The sharpening angle is the angle between one side of the blade’s edge bevel and the sharpening surface. If you raise or lower the handle during a stroke, the angle changes and different parts of the bevel receive different amounts of abrasion.
For example, you might hold the knife steadily near the heel but raise the handle as you move toward the tip. The resulting bevel can become inconsistent, and the tip may develop an unwanted shape.
Start by following the existing bevel rather than choosing a completely new angle. The manufacturer’s guidance is the best reference when available.
2. Applying too much or uneven pressure
Uneven pressure can remove more steel from some sections than others. Pressing harder near the middle while barely contacting the heel and tip can create an inconsistent bevel.
Heavy pressure also makes angle control more difficult. Use controlled pressure appropriate to the stone and sharpening stage, then reduce it during finishing and deburring.
3. Using a dished or uneven whetstone
A whetstone gradually wears during use. If its center becomes hollow while the edges remain higher, the blade may contact different parts of the stone unevenly.
This can make consistent sharpening difficult even when your hand movements seem correct. Check the stone against a suitable flat reference and flatten it with a compatible lapping tool when necessary.
4. Failing to sharpen the entire edge
A chef knife has a heel, a relatively straight middle section, and a curved belly leading toward the tip. Each section needs proper contact with the abrasive surface.
Short strokes that repeatedly miss the same section can leave dull patches. Move along the blade deliberately, repositioning your hands and adjusting the stroke to follow its existing curve without changing the intended bevel.
5. Leaving a burr on the cutting edge
A burr is a thin wire of displaced metal that forms when sharpening reaches the apex, where the two bevels meet. It indicates progress, but it is not the finished edge.
A remaining burr can make a knife feel sharp for a short time before folding or breaking away. Learn to recognize and remove it with this guide to chef knife sharpening burrs.
How Can You Fix an Uneven Chef Knife Edge Step by Step?
The safest approach is to diagnose the blade before sharpening again. Start with inspection, correct the underlying problem, and remove only the steel needed to restore the edge.
Step 1: Clean and inspect the blade
Wash and dry the knife, then inspect it under good lighting. Keep your fingers away from the cutting edge and never slide them along it to check sharpness.
- Look for chips, dents, and visibly rounded sections.
- Compare the bevel width along the heel, middle, and tip.
- Check whether the blade itself appears bent or warped.
- Determine whether the two sides are meant to have matching bevels.
If the blade is significantly bent, cracked, or deeply chipped, stop and seek professional assessment. Repeated sharpening will not safely correct every form of damage.
Step 2: Check the whetstone
Place the stone on a stable surface and inspect its condition. A dished stone needs flattening before you can rely on it for consistent contact.
Prepare the stone according to its manufacturer’s instructions. Some waterstones require soaking, while splash-and-go stones and diamond plates generally need different preparation.
Step 3: Identify the existing bevel angle
Use the manufacturer’s recommended angle when possible. If you cannot find it, inspect the existing bevel and use a suitable angle guide or a marker test to help identify where the abrasive contacts the edge.
Coloring the bevel with a marker can be useful: make a few light strokes and inspect the removed ink. Contact across the intended bevel suggests that your angle is close, while ink removal only at one boundary indicates that you may need to adjust it.
Do not deliberately change the edge angle simply to make both bevels look identical. That can remove considerable steel and alter the knife’s original geometry.
Step 4: Sharpen in controlled sections
Use an appropriate abrasive for the condition of the knife. A medium stone around 1,000 grit is a practical starting point for many routinely dull chef knives, while coarse stones are better reserved for substantial dullness, chips, or reshaping.
- Secure the stone so it cannot slide.
- Hold the blade at the chosen angle.
- Work the heel, middle, and curved tip deliberately.
- Maintain consistent contact without forcing the blade into the stone.
- Check your progress before continuing to remove steel.
Avoid counting strokes as your only measure of progress. Different sections and steels may respond differently, so inspect the edge rather than assuming an equal number of passes guarantees an equal result.
Step 5: Raise and remove the burr
Sharpen one side until a small burr forms along the intended length of the edge, then work the opposite side as appropriate for the knife’s geometry. A symmetric double-bevel knife generally requires work on both sides.
Finish with light, controlled alternating strokes on a suitable fine abrasive. A strop can help with final refinement, but it should not replace correcting an improperly formed bevel.
Never run a fingertip along the edge to check for a burr. If you need to assess it, use a safe method that keeps your fingers away from the cutting edge.
Step 6: Test the finished knife
Wash and dry the knife after sharpening, then test it cautiously on suitable food. A ripe tomato is useful because its skin reveals whether the edge starts a cut without excessive pressure.
Check the heel, middle, and tip separately. If one section still performs poorly, diagnose that section instead of grinding the entire blade again.
How Can You Tell Which Part of the Sharpening Process Is Wrong?
Match the visible symptom to its likely cause before changing your technique. The following table summarizes the most useful checks.
| Symptom | Likely cause | Recommended fix |
|---|---|---|
| Bevel widens toward the tip | Changing angle or blade geometry | Check the original bevel and adjust the stroke. |
| Center remains dull | Missed contact or dished stone | Inspect stone flatness and contact across the edge. |
| Edge feels sharp, then dulls quickly | Remaining burr or unstable apex | Refine the edge and deburr carefully. |
| One bevel looks wider | Unequal grinding or asymmetric design | Check the intended grind before changing it. |
| Tip becomes rounded | Incorrect movement around the blade curve | Slow down and preserve the original tip profile. |
| Deep scratches appear | Coarse grit, debris, or accidental face contact | Clean the station and reassess the abrasive. |
Whetstone vs. Guided Sharpener vs. Pull-Through Sharpener
Different sharpening tools offer different levels of control. The best choice depends on your experience, the knife’s geometry, and how much correction the edge needs.
| Tool | Main advantage | Main limitation | Best suited to |
|---|---|---|---|
| Whetstone | Flexible control over angle and edge finish | Requires consistent technique | Users learning controlled sharpening |
| Guided sharpening system | Helps maintain a repeatable angle | Setup and blade compatibility vary | Beginners seeking consistency |
| Pull-through sharpener | Simple and quick to use | Limited control over geometry | Compatible everyday knives |
| Professional sharpening | Experienced assessment and repair | Requires a service appointment and fee | Severe damage or valuable knives |
For home cooks who want maximum control, a whetstone is a versatile choice. A guided system can make angle consistency easier, while a pull-through sharpener may be convenient when its design suits the knife.
Which Sharpening Mistakes Should You Avoid?
 Save
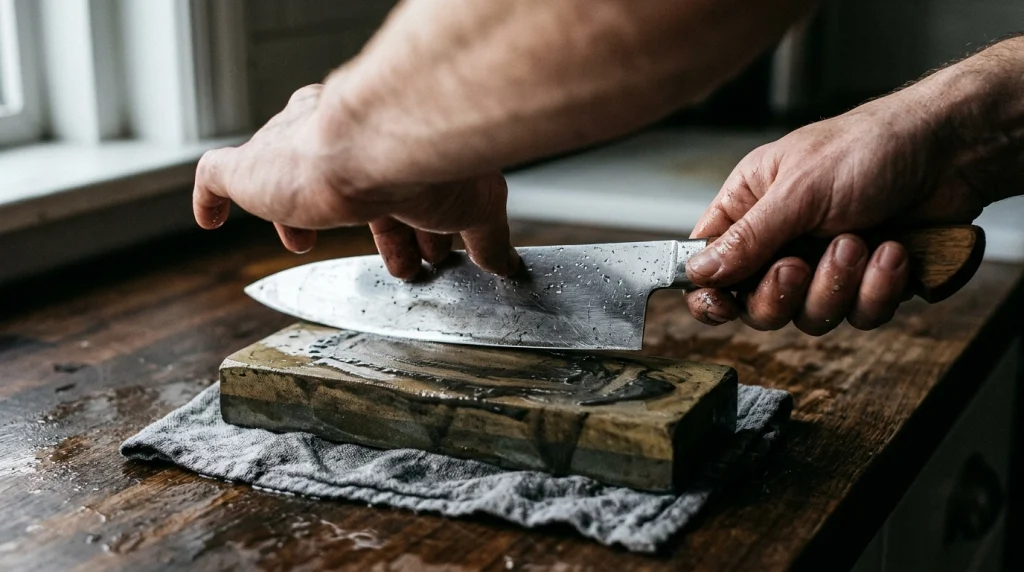
Most uneven-edge problems become harder to fix when you keep removing steel without checking your progress. Avoid these common mistakes.
- Grinding harder to compensate: More pressure will not correct a changing angle or a dished stone.
- Switching angles repeatedly: This can create several overlapping bevels rather than one consistent edge.
- Starting with an unnecessarily coarse stone: Coarse abrasives remove metal quickly and can make a minor issue worse.
- Ignoring the burr: A remaining wire edge can disguise a poor finishing result.
- Chasing perfectly equal bevel widths: Some knives have intentional asymmetry or changing geometry along the blade.
- Testing with your fingers: Use a suitable cutting test instead of touching or dragging skin along the edge.
For more consistent results, review your chef knife sharpening pressure before your next session. Controlled pressure and a repeatable angle are more useful than rushing through extra strokes.
How Can You Prevent an Uneven Edge in the Future?
Prevention starts with a consistent setup and regular inspection. You do not need an elaborate sharpening station, but your tools must be stable and appropriate for your knife.
- Secure the stone: Use a stable holder or nonslip base.
- Keep the surface flat: Inspect and flatten the stone as needed.
- Follow the existing geometry: Avoid changing the angle without a clear reason.
- Work systematically: Pay attention to the heel, middle, and tip instead of concentrating on one convenient section.
- Use suitable abrasives: Choose a grit that matches the amount of work required.
- Finish carefully: Reduce pressure and remove the burr before judging sharpness.
- Store the knife safely: A knife block, suitable sheath, or magnetic holder can help protect the edge between uses.
As of 2026, these basic principles remain useful regardless of whether you sharpen manually or use a guided system. Tool-specific instructions still matter, especially for specialized Japanese knives and unusual blade geometries.
When Should You Stop and Seek Professional Sharpening?
Some edge problems need more than a small adjustment in technique. Professional sharpening is worth considering when a knife has deep chips, a bent blade, substantial asymmetry you cannot explain, or a tip that has lost its original profile.
Single-bevel Japanese knives also deserve special care because their geometry differs from that of ordinary double-bevel chef knives. A general-purpose sharpening method can change their intended cutting behavior.
Stop if correcting the edge would require removing a large amount of steel or if you cannot determine whether the blade is damaged. A professional can assess the geometry before attempting a repair.
Recommended Tools for More Consistent Knife Sharpening
If you are ready to improve your setup, choose equipment that helps you control the angle, inspect the edge, and maintain the stone. These options are starting points to research, not a claim that one tool suits every chef knife.
Best for manual control
KING KW65 Combination Whetstone
Research product specifications before buying
A combination waterstone is worth considering for routine sharpening and edge refinement. Check the exact grit, preparation requirements, and compatibility with your knife before purchasing.
Best for angle consistency
Work Sharp Precision Adjust Elite
Research product specifications before buying
A guided sharpening system can help reduce angle variation during sharpening. Confirm that its clamps, abrasives, and available angle range suit your blade’s size and geometry.
Best for stone maintenance
Atoma Diamond Lapping Plate
Research product specifications before buying
A compatible diamond lapping plate can help flatten worn waterstones. Check the plate size and manufacturer’s maintenance guidance before using it with your stone.
Frequently Asked Questions
Why does my chef knife have a wider bevel on one side?
A wider bevel can result from unequal sharpening, a changing angle, or the knife’s original geometry. Some blades have intentionally asymmetric bevels, so compare the edge with the manufacturer’s design before attempting to make both sides look identical.
Can an uneven chef knife edge be fixed at home?
Minor unevenness can often be corrected with a suitable whetstone, a stable setup, and consistent technique. However, deep chips, bent blades, major tip damage, and specialized single-bevel knives may require professional sharpening to preserve their intended geometry.
Why is my knife sharp near the heel but dull near the tip?
The sharpening strokes may be reaching the heel more consistently than the tip. The blade’s curve also requires careful movement to maintain the correct angle. Inspect the stone for wear and adjust your technique so the abrasive contacts the full intended edge.
Does a finer sharpening stone fix an uneven edge?
Not by itself. A fine stone refines an edge that has already been formed, but it cannot efficiently correct major geometry problems or deep damage. Correct the angle and contact first, then use an appropriate finer abrasive to refine and deburr the cutting edge.
How can I tell whether my whetstone is uneven?
Inspect the stone against a suitable flat reference or use a straightedge to look for a hollow in its surface. A dished stone may contact the blade unevenly and make consistent sharpening difficult. Flatten it with a compatible tool before continuing.
Final Takeaway
When chef knife sharpening creates an uneven edge, the solution is to identify the cause before removing more steel. Check your angle, pressure, stone flatness, blade geometry, and burr rather than relying on extra strokes.
Work carefully, inspect each section, and use a suitable cutting test to confirm the result. With a stable setup and consistent technique, you can avoid unnecessary wear and maintain a more reliable chef knife edge.
Affiliate disclosure: CookingFlavour may earn a commission from qualifying purchases made through affiliate links, at no additional cost to you. Product availability and specifications can change, so verify the details with the retailer before purchasing.