Chef Knife Sharpening Burr: Feel It, Fix It, Remove It
Quick Answer
A sharpening burr is a thin, bent wire of steel pushed over the edge when one side of a chef knife has been ground all the way to its apex. It is a useful sign, not the finished edge: feel for it, flip the knife and raise it on the other side, then remove it with light, alternating strokes on a fine stone and, if needed, a strop. Left in place, it may feel sharp at first, then dull quickly as the fragile wire folds or breaks off.
If a freshly sharpened knife feels keen for a few cuts and then struggles through a tomato, the burr is the most likely explanation. This guide explains what it is, how to feel for it safely, how to remove it, and how to fix the two common problems: no burr, and a burr that will not come off.
What a Burr Actually Is
 Save
A burr is a very thin strip of steel at the cutting edge. When you grind one bevel, the abrasive removes metal until the two sides of the edge meet. The last, thinnest layer then bends or curls slightly toward the opposite side.
Think of it as the edge overshooting by a fraction. The bevel has reached the apex, but instead of ending in a clean, supported point, it ends in a tiny flap. That flap is often too small to see clearly, yet it is usually easy to feel. It is not a chip or a crack, and it does not mean you have damaged the knife. It is a normal by-product of grinding steel to a fine edge. The problem is only when it is left in place or mistaken for the finished edge.
Key Insight
A burr proves you reached the apex on that side. It does not prove the knife is ready to use.
Why It Forms on the Opposite Side
The burr forms opposite the side being ground because the abrasive pushes the final layer of metal across the edge. Sharpen the right bevel and the tip folds to the left. Flip the knife and sharpen the left bevel, and the burr should move back to the right.
That movement tells you both bevels have met at the apex, rather than one side being polished while the other remains short of the edge. It is also why counting strokes alone is unreliable: ten strokes may raise a burr on a lightly dulled knife and barely affect a very dull one. Softer steel can form a larger, more flexible burr that folds back and forth; harder steel may form a finer, more brittle one.
How to Feel for a Burr Safely
 Save
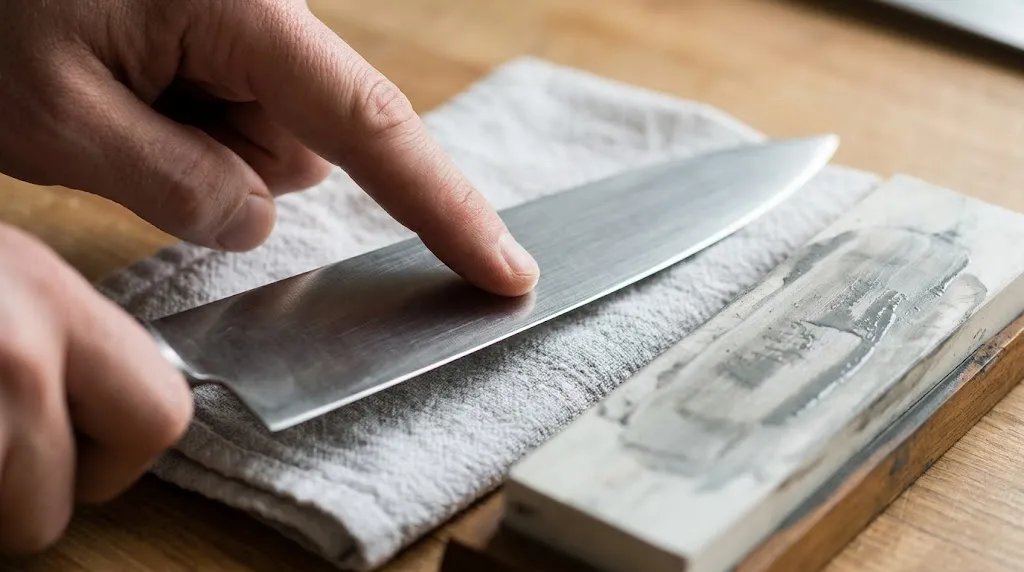
Move a fingertip slowly across the edge, from the face of the blade toward and just past the edge, on the side opposite the one you just sharpened. Never slide a finger along the edge. Look for a slight catch or hooked feeling, using very light pressure.
Check in sections: heel, middle, and tip. The tip and heel are most often missed because the angle changes or the stroke lifts early. A burr along only part of the edge means only part of the edge has been fully sharpened. If you cannot feel anything, hold the blade under bright light and look for a faint bright line at the edge.
Warning
Do not test for a burr by running a thumb along the edge, or by pressing down on the edge to see if it bites.
How to Raise a Full-Length Burr
Work one side at a time until the burr is present along the entire edge, then repeat on the other side.
- Hold a steady angle. Many Western chef knives use around 20 degrees per side; many Japanese-style knives are closer to 15 degrees. Consistency from heel to tip matters more than the exact number.
- Work in sections. Cover heel, middle, and tip with smooth strokes and moderate pressure on a medium stone, such as around 1,000 grit.
- Check before flipping. If the burr is missing in a section, keep working that section. Do not flip just to match the stroke count.
- Flip and repeat. Sharpen the second side until the burr transfers back along the full length.
- Refine lightly. Move to a finer stone. The burr should become smaller at each stage, not larger.
The broader process is covered in our guide to how to sharpen a chef knife, and angle choice is explained in our chef knife edge angle guide. The burr check ties them together: the angle sets the geometry, and the burr confirms it reached the edge.
How to Remove a Burr Properly
Removing a burr is mostly about reducing pressure and alternating sides. On a fine stone, use very light, alternating strokes: one pass on one side, one on the other, then repeat. Think of the weight of the knife plus a little hand guidance, not a firm push. After a few pairs of strokes, check again. The catch should feel smaller. Continue until the edge feels clean and even on both sides, without a hooked flap.
Stropping can finish the job. Draw the blade spine-first across leather or denim, so the edge trails rather than digging in. A few light passes per side are usually enough. A ceramic honing rod can help with a light finishing pass, but heavy pressure on a hard rod can fold the edge or, on very hard steel, risk chipping. If you are unsure whether a rod fits your routine, see whether you need a honing rod. The Montana Knife Company whetstone guide gives a useful independent description of feeling for the burr before flipping the blade.
Burr, Wire Edge, Foil Edge, and Rolled Edge
| Term | Meaning | Typical sign |
|---|---|---|
| Burr | Thin flap formed during grinding, before deburring. | Clear catch on one side. |
| Wire edge | Very thin remnant left after incomplete deburring. | Sharp at first, then suddenly dull. |
| Foil edge | Extremely thin apex extension that cannot support itself. | Deceptively keen, then folds immediately. |
| Rolled edge | Edge bent over in use, often on a hard surface. | Dull or dragging on one side. |
In practice, if a knife feels sharp and then fails almost immediately, suspect a leftover wire or foil edge rather than a failed sharpening. That points back to the final deburring stage. A rolled edge is different: it is usually a maintenance issue after use, and light honing may realign a slight roll while a heavy roll needs proper sharpening again.
Troubleshooting: Burr Problems and Fixes
No burr at all
The stone has not yet reached the apex in that section. Check the angle first: colour the bevel with a marker, make a few light strokes, and see where it wears away. Adjust until it wears evenly. Next, check the stone. A dished stone makes a flat bevel hard to hold, and a clogged stone cuts slowly. Our whetstone guide covers preparation and progression. A chipped or heavily rounded edge may also need a coarser grit before a medium stone can reach the apex.
Burr will not come off
Heavy pressure is the usual culprit: each firm stroke can push a new flap over the edge. Lighten up and alternate sides. If the burr only folds from side to side, common with softer steel, raise a clean, small burr again on a medium or fine stone, then deburr immediately with very light alternating passes. If only the top is removed, a weak root remains and fails in the first cuts. A few very light edge-leading passes on a fine stone, at the correct angle, can cut that remnant cleanly, but too much pressure or a wrong angle will dull the edge. Drawing the edge through cork can remove a loose burr, but treat it as a last check, not the main technique.
Mistakes that waste a good sharpening
- Flipping too early, before a full-length burr forms, leaves one bevel short of the apex.
- Finishing with grinding pressure recreates the burr you are trying to remove.
- Over-stropping can round the apex; a few light passes are usually enough.
- Treating every knife the same: serrated knives need a different approach, and single-bevel knives need only very light work on the flat side to remove the burr.
How to Test the Edge After Deburring
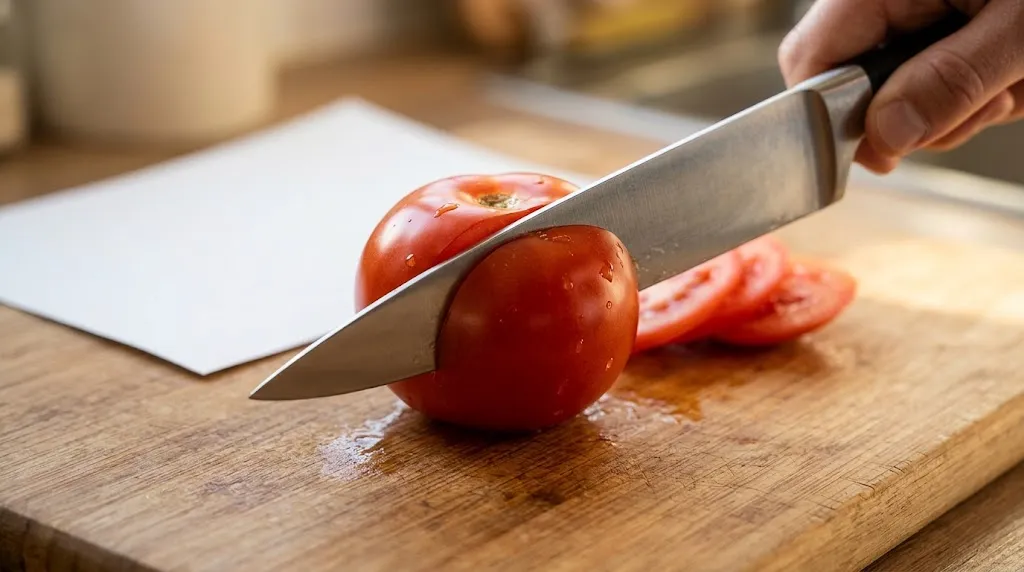
After deburring, the edge should feel clean on both sides, with no hooked flap. Slice a sheet of paper with a smooth, light motion: a clean edge cuts without tearing or catching. Then try a ripe tomato under the knife’s own weight. The blade should bite into the skin rather than skating across it. If it bites in one section but skates in another, recheck that section.
Finally, use the knife for a short prep session. A properly deburred edge should still cut cleanly after several ingredients. If sharpness collapses after the first few cuts, the deburring stage needs another careful pass. Our guide on how to test if a knife is sharp gives more checks that do not rely on fingertip feel alone.
Tip
Judge the finish by sustained cutting, not by the first slice. A clean edge keeps working; a burred edge impresses once and then folds.
Related Product
Whetstone Sharpening Stone Set
A medium-to-fine whetstone set makes it easier to raise a burr, refine it, and remove it with light finishing passes.
As an Amazon Associate, we earn from qualifying purchases.
Frequently Asked Questions
Is a burr good or bad when sharpening a chef knife?
A burr is good as a signal and bad as a finished edge. It shows you have ground one side to the apex, but it must be removed before use. Left in place, it often feels sharp briefly, then dulls quickly as the wire folds or breaks.
Should I feel a burr on both sides of the knife?
Yes, in sequence. Raise it on the opposite side from the bevel you are grinding, then flip and raise it on the other side. Final deburring should leave the edge feeling clean on both sides.
Why can I feel a burr in the middle but not near the tip?
The tip is easy to miss because the angle changes as the blade curves and strokes often lift early. Slow down near the tip, keep the angle steady, and work that section until the burr runs through it.
Can a honing rod remove a sharpening burr?
It can help with light finishing and alignment, but it is not the best tool for a large burr from whetstone sharpening. Use light, alternating passes on a fine stone first, then a strop if needed.
Does a pull-through sharpener create a burr?
Yes. Any abrasive sharpening method can leave a burr, which is one reason a knife can feel sharp after a pull-through sharpener and then dull fast. Light deburring on a fine stone or strop can improve the result.
How do I know the burr is fully gone?
The edge should feel smooth and even from both sides, with no hooked catch. It should also pass a sustained test: clean paper slicing, a tomato cut under light pressure, and continued clean cutting through several ingredients.
Conclusion
A burr is not a flaw to fear, and it is not a finish to keep. It is the clearest signal that sharpening has reached the apex, followed by a final step that turns that signal into a durable edge. Raise it along the full length, flip it, refine it with lighter pressure, and remove it with alternating fine passes and, if needed, a strop. Then judge the result by how the knife keeps cutting, not by how sharp it feels for a single slice.