Chef Knife Sharpening Pressure: How Much Force to Use
Quick Answer
Apply moderate, firm downward pressure—roughly three to five pounds of force—on the forward stroke when sharpening a chef knife, and use little to no pressure on the return stroke. Heavy force bends the thin apex, creates uneven bevels, and damages stones, while correct pressure allows the abrasive grit to efficiently remove steel without flexing the blade.
Why Sharpening Pressure Matters for Chef Knives
Mastering the correct amount of downward force is one of the most critical factors in knife maintenance. When you sharpen a chef knife on a whetstone, the abrasive grit relies on consistent friction to shave away microscopic layers of steel until a fresh, sharp apex is formed.
If you press too hard, you fight the natural mechanics of the stone and distort the thin geometry near the cutting edge. If you press too lightly, the abrasive particles fail to bite into the metal, leaving you spending hours trying to correct a dull blade. Finding the right balance ensures efficient metal removal while protecting the structural integrity of your kitchen knife.
Understanding how pressure interacts with different stone grits and blade steels helps prevent common sharpening errors. The goal is always controlled, repeatable contact that keeps the bevel uniform from the heel of the knife all the way to the tip.
The Mechanics of Sharpening Force
 Save
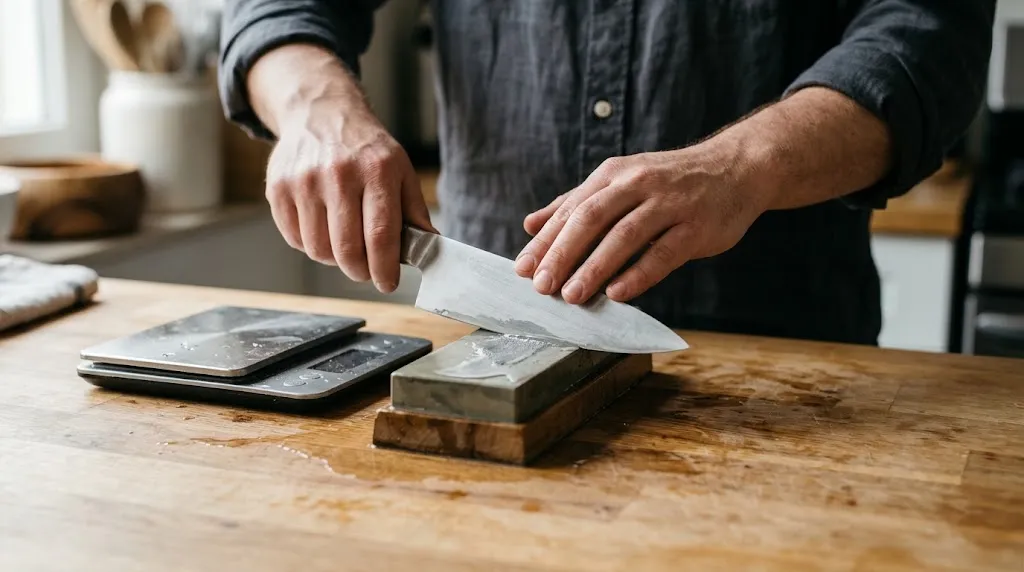
Sharpening force is not distributed equally across the entire stroke. Effective sharpening breaks down into two distinct phases: the active cutting stroke and the recovery stroke.
On the push stroke—moving the edge forward across the stone—you apply steady, downward pressure. This forces the abrasive particles to engage with the steel matrix. On the pull-back or recovery stroke, you should either lift the blade entirely off the stone or reduce downward force to near zero.
Dragging the edge backward under heavy pressure can catch microscopic burrs, dull the freshly formed apex, and cause premature wear on waterstones. Maintaining this rhythm keeps your sharpening strokes uniform and predictable.
How Much Force is Three to Five Pounds?
To visualize the correct pressure, imagine pressing down on a digital kitchen scale until the display reads roughly three to five pounds. It is firm enough to keep the spine and edge locked at your chosen angle, but light enough that your hand and wrist remain relaxed.
Tip
Rest your fingertips gently across the flat of the blade rather than pressing down with a single finger. Spreading your fingers distributes the force evenly along the section of the edge you are currently sharpening.
How Pressure Should Change Across Different Grit Stages
Your sharpening pressure should never remain static from the beginning to the end of the session. As you transition from coarse repair stones to fine polishing stones, the required force shifts significantly.
| Stone Grit Stage | Recommended Pressure | Primary Purpose |
|---|---|---|
| Coarse (200–400 grit) | Moderate, firm pressure | Repairing chips, resetting bevel angles |
| Medium (1000–3000 grit) | Medium to light pressure | Sharpening, establishing working edge |
| Fine (5000+ grit) | Very light, feather touch | Polishing, refining apex, removing burr |
When repairing a damaged or dull chef knife on a coarse stone, moderate pressure helps remove metal quickly to re-establish the bevel. Once you move to medium and fine stones, heavy pressure becomes counterproductive because it scratches the polished finish and makes burr control difficult.
Common Mistakes Involving Sharpening Pressure
Many home cooks struggle with sharpening not because of their angle control, but because of errors in force management. Recognizing these pitfalls helps you produce a cleaner, more durable edge.
The most frequent error is bearing down with heavy body weight when a knife fails to cut quickly. Pressing harder causes the thin apex of a chef knife to flex away from the stone, resulting in a rounded, convex shoulder instead of a crisp flat bevel. Furthermore, excessive downward force gouges soft waterstones, creating uneven dips that ruin the flat surface required for precision sharpening.
Another common mistake is applying uneven pressure from the heel to the tip. Cooks often push down hard near the handle while letting up as they reach the tip. This leaves the tip dull while over-sharpening the heel.
Warning
Never push the edge of the knife directly into the stone or apply excessive downward force while moving backward. This can gouge the abrasive stone, chip your knife blade, or cause your hand to slip dangerously toward the cutting edge.
How to Maintain Consistent Force Along the Blade Profile
A chef knife curves upward toward the tip, which means your hand position and downward pressure must adapt as you move across the stone.
When sharpening the straight section near the heel, distribute your fingers evenly along the blade width and maintain steady downward force. As you glide the knife forward and reach the curved belly and tip, you must slightly lift the handle to maintain your chosen sharpening angle.
At the same time, shift the primary downward pressure from your fingers on the blade flat toward your thumb or fingers supporting the tip area. This ensures the curved belly receives the exact same amount of abrasive friction as the rest of the blade.
Managing Pressure During Burr Formation and Removal
 Save
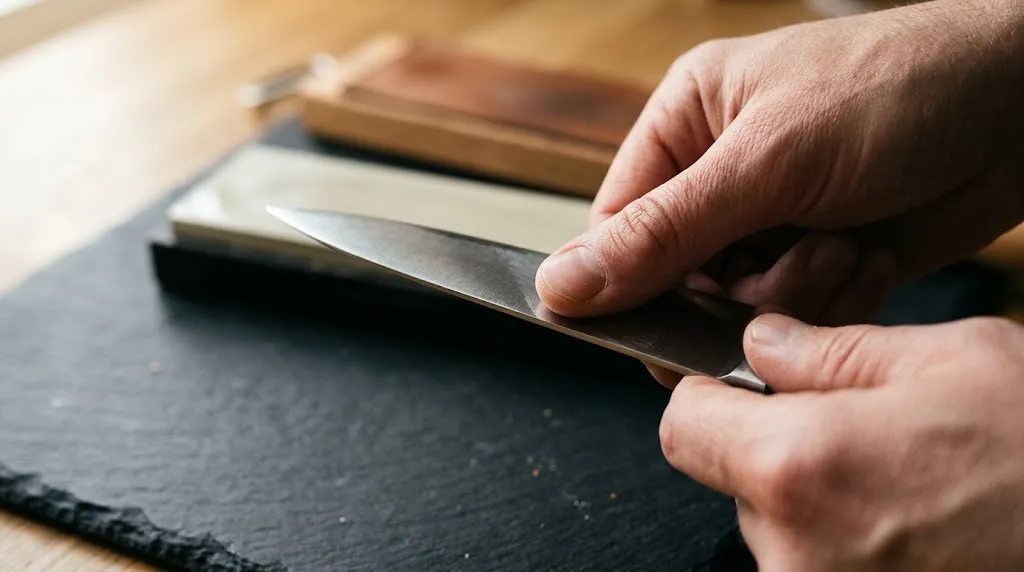
The formation of a burr—a microscopic ridge of displaced metal pushed to the opposite side of the edge—indicates that your sharpening stroke has reached the very apex.
During the initial stages of sharpening on your medium stone, maintain moderate, steady pressure until you can feel a distinct burr running along the entire length of the blade when you carefully swipe your thumb perpendicular to the edge.
Once the burr is formed, reduce your pressure by half. When you flip the knife to sharpen the other side and form the opposing burr, keep that lighter touch. Finally, when clearing the burr on your fine stone or strop, use the lightest possible touch—just enough to keep the steel in contact with the abrasive surface. Heavy pressure at this final stage will fold the delicate burr back and forth rather than shearing it off cleanly.
Related Product
Sharpening Stone Whetstone Set
A dual-grit whetstone set provides the ideal surface progression to practice controlled sharpening pressure from coarse shaping to fine polishing.
As an Amazon Associate, we earn from qualifying purchases.
Frequently Asked Questions
How much pressure should you apply when sharpening a chef knife?
Apply moderate, firm downward pressure on the forward stroke (pushing the edge away from you), and lift or use very light pressure on the return stroke. The ideal pressure is roughly equivalent to pressing down on a kitchen scale to read about three to five pounds, ensuring the bevel stays flat against the stone without gouging the abrasive surface.
Does pressing harder make a knife sharpen faster?
No, pressing too hard does not speed up the process and often ruins the edge. Excessive force causes the apex of the blade to flex, creates uneven scratches, dislodges abrasive particles from waterstones prematurely, and can form a thick, messy burr that is difficult to refine.
Should pressure change between coarse and fine sharpening stones?
Yes, pressure should decrease as you progress to finer grit stones. Use moderate, steady pressure on coarse stones to reshape the bevel and remove metal quickly, then progressively lighten your touch as you move to medium and fine stones to polish the edge and cleanly shear off the burr.
How do you maintain a consistent sharpening angle while controlling pressure?
Lock your wrist and elbow to maintain a fixed angle—typically 15 to 20 degrees for a chef knife—and let the large muscles in your shoulder drive the motion. Keep the downward force focused directly over the point of contact between the blade and the stone rather than pushing down haphazardly.
What happens if you use uneven pressure along the length of the blade?
Uneven pressure results in an inconsistent bevel width and a wavy cutting edge. If you press harder near the tip than the heel, you risk rounding off the tip or creating a localized dip in the blade profile that prevents the knife from making full contact with cutting boards.
How do you adjust pressure when forming and removing the burr?
Apply firm, consistent pressure on initial coarse and medium grits until a distinct burr forms along the opposite side of the edge. Once the burr is established, reduce pressure significantly on the finishing strokes and alternate sides to minimize the burr before final stropping.
Conclusion
Controlling your pressure is the secret to transforming erratic knife sharpening into a smooth, repeatable skill. By using moderate force on coarse grits, lightening your touch on fine stones, and easing up completely during burr removal, you protect both your whetstones and your knife’s edge geometry. Focus on steady contact and let the abrasive grit do the heavy lifting rather than relying on brute force.