How to Wax a Cutting Board: A Simple, Food-Safe Method That Lasts
Quick Answer
To wax a cutting board, clean and dry it fully, oil it first with food-grade mineral oil, then rub on a thin coat of beeswax board butter and buff it after 4 to 6 hours. This two-step routine seals the grain, repels water, and helps prevent a cutting board from warping.
Quick steps
- Clean and dry: Wash with hot, soapy water and let the board dry upright for 12 to 24 hours.
- Oil first: Apply food-grade mineral oil generously and wipe off the extra after 20 minutes.
- Wax thin: Rub a pea-sized amount of board butter per section into the grain with a cloth.
- Wait and buff: Let the wax set for 4 to 6 hours, then buff with a clean, dry cloth.
- Repeat monthly: Rewax every 3 to 4 weeks for daily-use boards, or when water stops beading.
What to avoid
- Skip olive oil, vegetable oil, and coconut oil, since they can turn rancid in the wood.
- Skip thick coats of wax, since they stay sticky and attract crumbs.
I waxed my first maple board the wrong way, with a thick smear of pure beeswax and no oil underneath. It looked shiny for a day, then turned patchy and tacky.
Years later, I use a slower method that holds up for weeks. This guide walks you through that exact routine, plus the mistakes I see most home cooks make.
What Is Board Butter, and Why Does Wax Help?
Board butter is a food-safe blend of mineral oil and beeswax, mixed into a soft paste that soaks in and seals wood in one step.
Oil alone sinks deep into the grain and keeps wood from drying out. Wax sits closer to the surface and forms a light, water-repellent barrier.
Together, they do what neither does well alone. Oil feeds the wood, and wax locks that moisture in.
- Water resistance: Wax helps water bead up instead of soaking into knife cuts.
- Stain control: A sealed surface picks up less color from beets, turmeric, and berries.
- Crack prevention: Stable moisture levels reduce splitting, especially on end-grain boards.
- Smoother feel: A buffed coat leaves a satin finish that feels dry, not greasy.
I tested this side by side on two maple boards in my kitchen last winter. The oiled-only board showed water spots after one week, while the waxed board still beaded water after three weeks.
That test changed how I treat every wood board I own. Wax is the finish step, not a replacement for oil.
What Do You Need to Wax a Cutting Board?
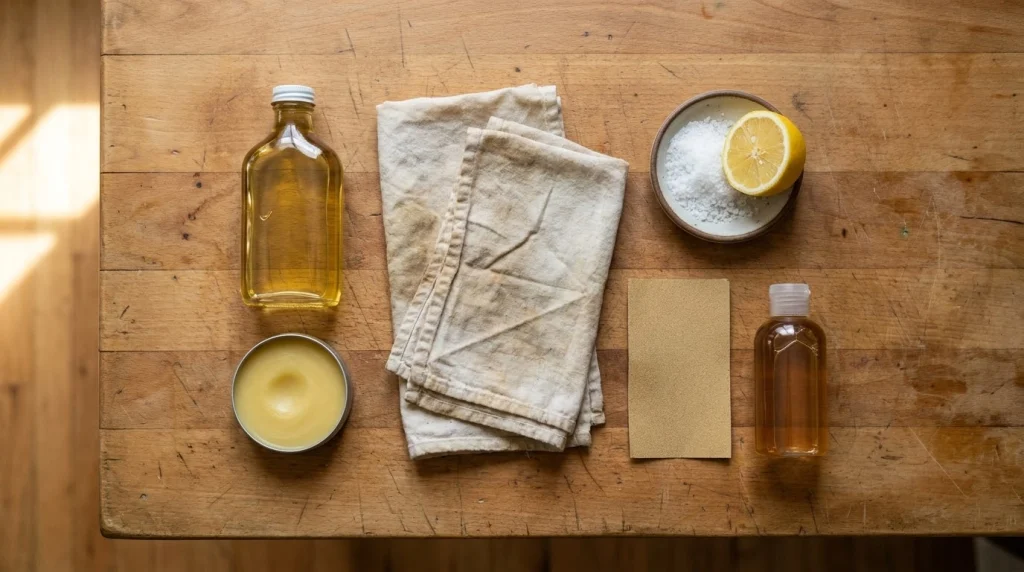
You need only a few supplies, and most cost under $25 total. Gather them before you start so the board stays clean and dry.
- Food-grade mineral oil: Choose a plain, unscented bottle labeled food-grade or for butcher blocks.
- Board butter or beeswax paste: Pick a blend of beeswax and mineral oil made for cutting boards.
- Two clean cotton cloths: Use lint-free rags or old cotton T-shirts cut into squares.
- Mild dish soap: Use a small amount for the first wash, then rinse well.
- Fine sandpaper, 220-grit: Keep this on hand only for rough spots or raised grain.
- Lemon and coarse salt: Use these only if the board smells stale before waxing.
Check the label before you buy any wax or oil. It should say food-safe, food-grade, or safe for surfaces that touch food.
If the label lists tung oil, linseed oil, or added fragrance, skip it. Those finishes can cure oddly or leave a taste behind.
How to Wax a Cutting Board Step by Step
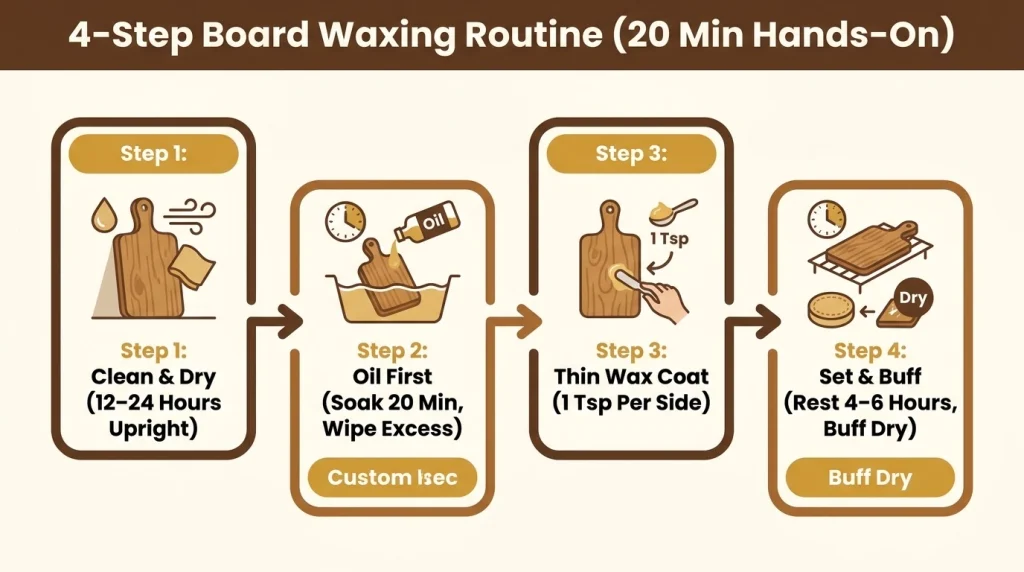
The full job takes about 20 minutes of hands-on work, plus drying and setting time. Plan to start in the morning so you can use the board by dinner.
Step 1: Clean and Dry the Board Completely
Start with a clean, bone-dry board, since wax traps whatever sits under it. Wash the board with hot water and a drop of dish soap, then rinse it well.
Stand it upright in a dish rack and let it dry for 12 to 24 hours. The surface should feel dry and look pale, with no dark, damp patches.
- For stains: Sprinkle coarse salt over the board, rub it with a cut lemon half, then rinse and dry again.
- For rough grain: Sand lightly with 220-grit paper, always with the grain, then wipe off the dust.
- For deep cuts: Clean grooves with a stiff brush so old food does not seal under the wax.
If your board still shows dark marks after washing, treat those first with the steps in my guide to remove stains from a cutting board. Wax will not hide a stain, and it can lock the color in.
Odors need the same care before you seal the wood. I follow the lemon-and-salt method in my guide to remove odors from a cutting board when garlic or onion lingers.
Step 2: Oil the Board First
Oil always comes before wax, because wax cannot soak deep into dry wood. Pour a generous puddle of food-grade mineral oil onto the top face and spread it with a cloth.
Coat the top, sides, edges, and bottom, not just the cutting face. End grain drinks oil fast, so add a second pass to those thirsty areas.
Let the oil soak for 20 minutes, then check for dry spots. Add more oil to any pale patch that drank the first coat.
Wipe off all extra oil with a clean cloth after 20 to 30 minutes. The board should look rich and damp, not wet or pooled.
Step 3: Apply a Thin Coat of Wax
Scoop a pea-sized dab of board butter onto a clean cloth. Rub it into one small section at a time, using small circles and light pressure.
Work with the grain on edge-grain boards, and in circles on end-grain boards. Keep the coat thin enough that you can still see the wood through it.
- Use less than you think: A 12-inch board needs about one teaspoon of paste per side.
- Warm the wax first: Rub the cloth between your palms for 10 seconds if the paste feels stiff.
- Cover every edge: Hit the handles, juice groove, and sides, since water enters there first.
Flip the board and repeat the same thin coat on the back. A one-sided finish can pull moisture unevenly and lead to cupping.
I like Howard Butcher Block Conditioner for this step, since it spreads thin and buffs clean without a waxy smell. One 12-ounce tub has lasted me through more than a year of monthly care.
Step 4: Let It Set, Then Buff
Let the waxed board rest for 4 to 6 hours, or overnight for a new or very dry board. Stand it upright so air reaches both faces.
Buff the whole board with a fresh, dry cloth, using firm, quick strokes. Keep buffing until the surface feels smooth and dry to the touch.
If any spot still feels tacky, buff it again with a clean section of cloth. Sticky patches mean too much wax sat in one place.
Wait at least 6 hours before cutting raw meat or juicy fruit on the fresh finish. That pause lets the wax harden into a stable layer.
Should You Oil Before You Wax?
Yes, oil first every time you wax a wood cutting board. Oil feeds the wood from inside, and wax seals that oil in from outside.
Wax alone sits on top and wears off fast, especially under a knife. Oil alone soaks in well but leaves the surface open to water.
Think of it like skin care for wood. Oil is the moisturizer, and wax is the light seal that holds it in place.
- New board: Oil it 2 to 3 times over two days, then wax once.
- Monthly care: Oil once, wait 20 minutes, wipe, then wax.
- Quick refresh: If the board still looks rich, a wax-only touch-up works for one cycle.
As of 2026, most board makers I follow still teach this same oil-then-wax order. It holds up across maple, walnut, cherry, and beech.
Board Butter vs Mineral Oil vs Beeswax Alone: Which Works Best?
Board butter wins for most home cooks, since it blends the deep soak of oil with the seal of wax. Pure oil needs more frequent care, and pure wax spreads poorly on its own.
| Finish | Water resistance | How often to reapply | Best for |
|---|---|---|---|
| Board butter | High | Every 3 to 4 weeks | Daily-use wood boards |
| Mineral oil only | Medium | Every 2 to 3 weeks | Quick upkeep between waxes |
| Pure beeswax | High, but uneven | Every 4 to 6 weeks | Display boards, not daily cutters |
| Coconut oil wax blend | Medium to high | Every 3 to 4 weeks | People avoiding mineral oil |
Pure beeswax feels hard at room temperature and drags across the grain. Board butter stays soft, spreads thin, and buffs to a clean satin sheen.
Some woodworkers ask about Danish oil as a finish instead. I cover that choice in my guide to Danish oil on a cutting board, since most Danish oils are not meant for food-contact surfaces.
How Often Should You Wax a Cutting Board?
Wax a daily-use board every 3 to 4 weeks, and a light-use board every 6 to 8 weeks. Heat, dish soap, and acidic foods strip the finish faster.
Use the water test between full treatments. Sprinkle a few drops on the surface and watch how they behave.
- Beads hold shape: The wax still works, so wait another week.
- Beads flatten fast: The seal is thin, so plan a wax within a few days.
- Water soaks in dark: The board is dry, so oil and wax it that day.
End-grain boards need wax more often than edge-grain boards. Their open fibers drink oil fast and show dry patches sooner.
Boards near the stove or sink also dry out faster. I keep a small tub of board butter in the drawer next to my sink as a reminder.
What Oils and Waxes Should You Avoid?
Only food-safe, non-drying oils belong on a cutting board. Cooking oils go rancid in wood pores and leave a stale, sour smell.
This rule trips up a lot of new owners. A bottle that works fine in a pan can ruin a board over time.
- Vegetable and canola oil: These oxidize in the grain and turn sticky within weeks.
- Olive oil: It smells pleasant at first, then turns rancid and attracts dust.
- Coconut oil, unrefined: It can go rancid too, unless the product uses refined, fractionated oil made for boards.
- Tung and linseed oil: These cure into a hard film that can crack and flake into food.
- Furniture wax: Many blends hold solvents or silicone that never belong near food.
I explain the full reason in my guide on vegetable oil on a cutting board. The short version is simple: if it can spoil in your pantry, it can spoil in your board.
When in doubt, check the federal food safety guidance on cutting board care and cleaning. Clean, dry, food-safe surfaces matter more than any single product claim.
Can You Make Your Own Cutting Board Wax?
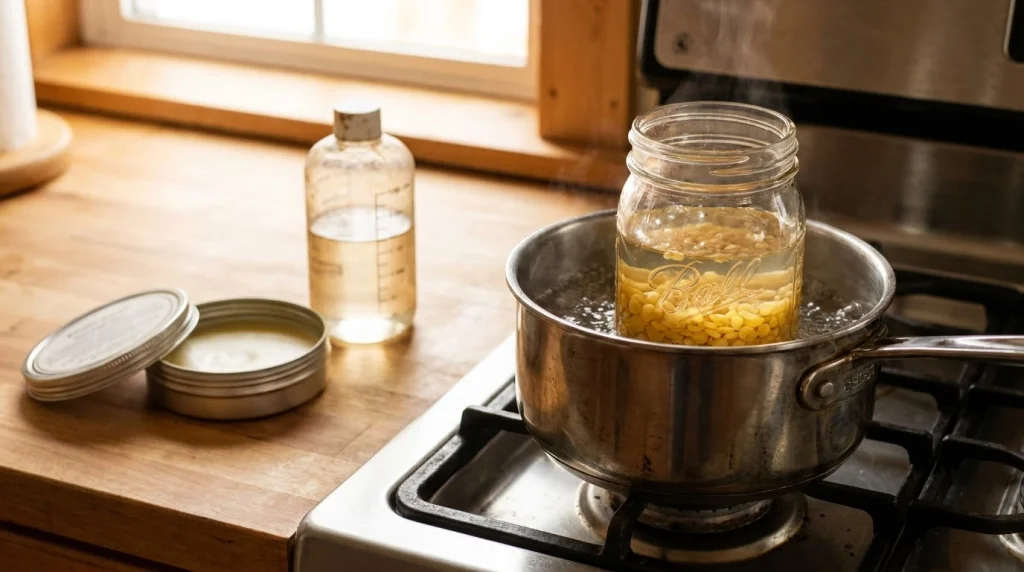
Yes, you can make board butter at home with two ingredients and a double boiler. Use a 4-to-1 ratio by weight: 4 parts food-grade mineral oil to 1 part beeswax.
Melt 100 grams of beeswax pellets in a heat-safe jar set in simmering water. Stir in 400 grams of mineral oil once the wax turns clear and golden.
- Use a scale: Weight gives a steady texture, while cups vary with pellet size.
- Keep heat low: Beeswax melts near 145°F, so never heat it over an open flame.
- Pour into a wide tin: A shallow jar cools into a soft paste in about 90 minutes.
Homemade butter costs less per ounce than most store tubs. It also lets you tune the mix, with a 3-to-1 ratio for thirsty end grain.
Store the cooled paste with a lid, away from heat. It keeps for 12 months or more at room temperature.
Common Mistakes That Leave Boards Sticky or Patchy
Most wax problems come from prep, not the product. A rushed job shows up as tacky spots, white haze, or a dull, uneven sheen.
- Waxing a damp board: Trapped moisture turns cloudy under wax and can lead to dark stains.
- Skipping the oil step: Wax alone wears off in days on a dry board.
- Using too much paste: Thick coats stay gummy and catch crumbs, even after buffing.
- Buffing too soon: Wax needs 4 to 6 hours to set before it will shine.
- Waxing only one side: Uneven moisture can cup or warp a board over time.
I made the thick-coat mistake on a walnut serving board years ago. It took two rounds of hot, soapy washing and a full re-oil to fix it.
Thin coats always win, even if they feel too light at first. You can add a second thin coat, but you cannot easily remove a thick one.
For food-contact safety, stick to products labeled for cutting boards and check the Food and Drug Administration food safety pages if a claim sounds too good. Clear labeling beats clever marketing every time.
What I Recommend for Waxing a Cutting Board
If you’re ready to pick one, here’s what I’d use in my own kitchen. Each pick below is food-safe, easy to spread thin, and proven on maple and walnut boards.
🏆 Best Overall
Howard Butcher Block Conditioner, 12 oz
★★★★★
Food-grade mineral oil and beeswax blend in a soft, spreadable paste. I reach for this one most months because it buffs clean and never leaves a waxy taste.
🪵 Best for End Grain
Walrus Oil Cutting Board Oil and Wood Wax Set
★★★★☆
Paired oil and wax made for thirsty end-grain butcher blocks, with coconut oil and beeswax. I use this set on my thick end-grain block when it drinks a full oil coat in minutes.
💰 Best Budget
Clark’s Cutting Board Finish Wax, 6 oz
★★★★☆
Compact tin of carnauba and beeswax paste that spreads thin and buffs to a soft shine. I keep this tin for small boards and wooden spoons when I want a quick refresh.
Look for third-party food-contact testing when you compare brands. The NSF food safety standards site is a useful place to check what food-safe certification means.
Frequently Asked Questions About Waxing a Cutting Board
Can you wax a bamboo cutting board?
Yes, you can wax bamboo, but use a light hand since bamboo is dense and absorbs less finish than maple or walnut. Oil it first with food-grade mineral oil, then apply a thin coat of board butter and buff it well after 4 hours.
Do you need to wax a new cutting board?
Yes, most new wood boards need oil and wax before first use, even if they feel smooth in the store. Give a new board 2 to 3 oil coats over two days, then one thin wax coat, and let it set overnight before cutting.
Can you use candle wax on a cutting board?
No, skip candle wax, since most candles use paraffin with dyes, scents, or additives that are not food-safe. Use only pure beeswax or a board butter made for food-contact wood, and check the label for food-grade mineral oil.
How long should wax dry on a cutting board?
Let board butter set for 4 to 6 hours at room temperature, or overnight for a new or very dry board. Buff it with a dry cloth once it feels firm, then wait at least 6 hours before cutting wet or acidic foods.
Can you wax a plastic cutting board?
No, wax will not help plastic, since it cannot soak into the surface and will just smear off. Wash plastic boards with hot, soapy water, sanitize them as needed, and replace them once deep grooves hold stains or odors.
The Takeaway
Waxing a cutting board is simple once you follow the order: clean, dry, oil, wax, then buff. Thin coats and a little patience beat thick coats every time.
Set a monthly reminder, keep a tub of board butter near the sink, and your board will stay smooth and water-resistant for years. Your knives and your wood will thank you for it.