Can You Use an Engraved Cutting Board for Food? (Safe Guide)
Quick Answer
Yes, you can use an engraved cutting board for food if the engraving is shallow, the wood is food-safe, and the finish is food-grade. Most laser-engraved boards are made for daily kitchen use. Skip raw meat on deep grooves, and clean the lines well after each use.
When an engraved board is safe for food
- Shallow engraving: Light laser marks under 1 mm deep stay easy to clean and do not trap food.
- Food-safe wood: Maple, walnut, cherry, and bamboo are closed-grain choices that hold up well to knives.
- Food-grade finish: Mineral oil or beeswax blends seal the surface without adding harmful chemicals.
- Right foods: Bread, cheese, fruit, vegetables, and cooked meats are ideal for the engraved side.
- Good care: Hand washing, full drying, and monthly oiling keep grooves from holding moisture.
When to use the plain side instead
- Use the flat back for raw meat, raw fish, and juicy prep that could pool in the lines.
- Keep deep carved boards for serving only, and cut on a separate board.
I got my first engraved board as a housewarming gift, and I stared at it for a week before I dared to cut on it. It felt too nice to use, and I worried the grooves would trap food.
I’ve since tested laser-engraved maple, walnut, and bamboo boards in my own kitchen, and I’ve learned where the line sits. This guide covers safety, cleaning, care, and the foods that work best, so you can use yours with confidence.
What Is an Engraved Cutting Board?
An engraved cutting board is a wooden or bamboo board with a design, name, or pattern cut into its surface by laser or hand carving. The marks sit below the surface, unlike paint or vinyl on top of it.
Laser engraving burns a thin layer of wood to create dark, crisp lines. Hand carving cuts deeper with chisels or routers, which leaves wider grooves that need more care.
- Laser engraving: Shallow, precise, and smooth to the touch in most cases.
- Router carving: Deeper channels, often used for large letters or juice grooves.
- Hand carving: Varied depth, with a rustic look and more texture.
Depth matters more than the method itself. A light laser mark behaves like a normal board surface, while a deep carved channel acts like a small trench.
Can You Use an Engraved Cutting Board for Food?
Yes, you can use an engraved cutting board for food in most cases. The key is shallow engraving, food-safe wood, and a food-grade finish.
I use my engraved maple board for bread, cheese, and vegetables almost every day. I flip it over for raw chicken, and that simple habit solves most of the risk.
Food safety starts with the wood itself. Hardwoods with tight grain, like maple and walnut, resist deep knife scars and dry fast after washing.
- Safe choices: Maple, walnut, cherry, teak, beech, and bamboo.
- Risky choices: Pine, cedar, and other soft or resinous woods that dent fast and can taste bitter.
- Check first: If you are unsure about the species, read my guide on whether you can use any wood for a cutting board before you prep food on it.
The finish matters just as much as the wood. Food-grade mineral oil, beeswax, and carnauba blends are standard for boards that touch food.
Avoid boards sealed with furniture varnish, polyurethane, or unknown craft finishes. Those coatings can chip into food, and they are not made for knife contact.
Is It Safe to Cut Directly on the Engraving?
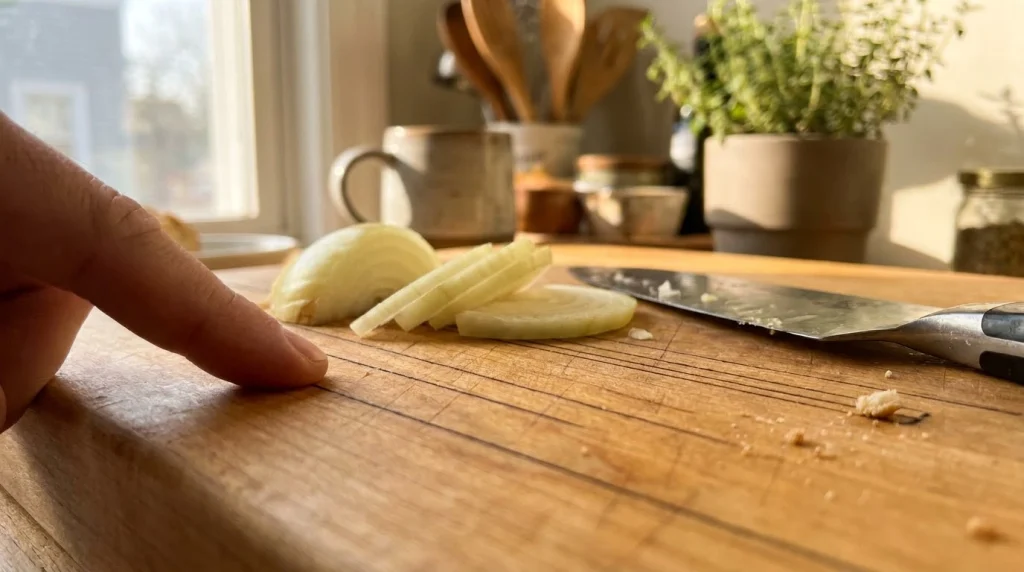
Yes, light cutting on shallow engraving is safe for most foods. Deep grooves are the part to watch, since food and moisture can settle there.
Think of it like a knife scar on a plain board. A thin line cleans fast, while a deep cut holds crumbs and needs a brush.
Shallow laser engraving vs deep carving
Shallow laser marks, around 0.5 to 1 mm deep, rarely change how a board performs. Your knife glides over them, and a quick scrub clears them.
Deep carving, over 2 mm, creates pockets that trap onion juice, meat drippings, and crumbs. Those pockets need a stiff brush and extra drying time.
- Shallow marks: Fine for slicing bread, fruit, cheese, and cooked meat.
- Medium marks: Fine for dry foods, but flip the board for wet prep.
- Deep marks: Best for display or serving, not for heavy chopping.
My rule is simple and it has held up well. If I can feel the groove catch my fingernail, I serve on that side and cut on the other.
When Should You Not Use an Engraved Board for Food?
Some engraved boards are made for looks, not for prep. A quick check before first use can save you a lot of trouble.
Skip food prep if the board smells strongly of chemicals, stain, or paint. That smell often points to a finish that was never meant for a kitchen.
- Paint-filled engraving: Colored paint or resin in the lines can flake under a knife.
- Cracked or split wood: Cracks hold bacteria and moisture, even after washing.
- Unknown finish: If the seller cannot name the finish, treat the board as decor only.
- Rough, splintered grooves: Splinters can break off into food and hurt your hands.
- Raw meat on deep lines: Juices pool in grooves and are hard to rinse out fully.
Food safety guidance from the USDA Food Safety and Inspection Service stresses clean surfaces and separate boards for raw meat. That advice applies twice over when grooves are involved.
If your board fails any check above, use it as a serving tray or wall piece. You still get the beauty, without the risk.
Engraved Cutting Board vs Regular Cutting Board
An engraved board and a plain board share the same wood and care needs. The engraving changes cleaning time, knife feel, and best use, not the core material.
Here is how they compare side by side, based on daily use in 2026.
| Feature | Engraved Board | Regular Board |
|---|---|---|
| Best use | Serving, light slicing, gifts, charcuterie | Heavy daily chopping and raw meat prep |
| Cleaning time | 3-5 minutes with a brush for grooves | 1-2 minutes with soap and a sponge |
| Knife feel | Slight texture on engraved side | Smooth and even across the surface |
| Raw meat safety | Use the plain back side only | Safe if cleaned and sanitized after use |
| Oiling needs | Every 3-4 weeks, with extra oil in grooves | Every 4-6 weeks for most hardwoods |
| Lifespan | 5-10 years with care; engraving fades slowly | 5-10 years with care; can be sanded and refinished |
The table points to one clear takeaway. Use the engraved side for serving and light work, and keep heavy prep on a plain surface.
I keep one engraved walnut board for guests and one plain maple board for weeknight cooking. That split keeps the gift looking new, and it keeps prep fast.
How Do You Clean an Engraved Cutting Board?
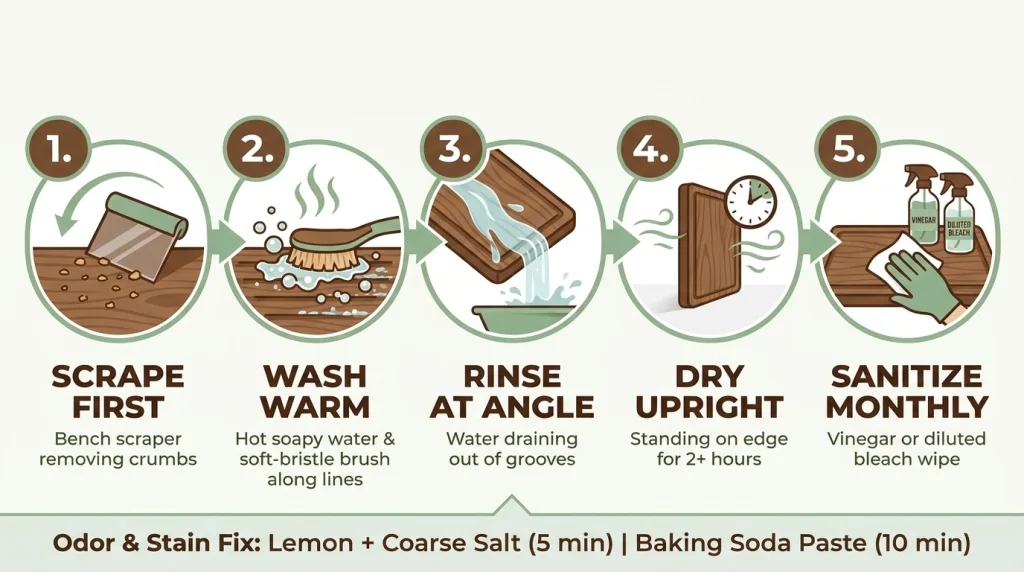
Clean an engraved board by hand with hot water, dish soap, and a soft brush. Never soak it, and never put it in the dishwasher.
Grooves need a brush, not just a sponge. A soft-bristle brush reaches into laser lines without scratching the wood.
- Scrape first: Push crumbs out of the grooves with a bench scraper or dull knife edge.
- Wash warm: Use hot water and mild dish soap, and scrub along the lines with a brush.
- Rinse well: Hold the board at an angle so water runs out of the engraving, not into it.
- Dry upright: Stand the board on its edge and let air reach both sides for at least 2 hours.
- Sanitize monthly: Wipe with white vinegar or a diluted bleach rinse, then rinse and dry fully.
For full technique, my guide on how to use a cutting board safely covers cross-contamination and sanitizing in more depth. It pairs well with the steps above.
General kitchen hygiene advice from FoodSafety.gov also recommends washing boards after each use and replacing boards with deep grooves that are hard to clean. Engraved boards follow the same rule.
What about stains and smells in the grooves?
Lemon and coarse salt work well for light stains and odors in engraving. Sprinkle salt, rub with half a lemon, wait 5 minutes, then rinse.
Baking soda paste helps with garlic and onion smells that linger in deeper lines. Spread a thin paste, wait 10 minutes, scrub gently, and rinse clean.
Skip harsh oven cleaners, steel wool, and long soaks. Those steps raise the grain, dull the engraving, and can crack the board.
How Do You Oil and Care for an Engraved Board?
Oil an engraved board with food-grade mineral oil once a month, or when the wood looks pale and dry. Oil seals the grooves and stops water from soaking in.
I oil my engraved boards a bit more often than my plain ones. The grooves expose more end grain, and end grain drinks oil fast.
- Use mineral oil: Pick a food-grade mineral oil made for cutting boards, not cooking oil.
- Apply with the grain: Rub a thin coat along the engraving with a soft cloth.
- Let it soak: Leave the board overnight, then wipe off the excess in the morning.
- Add wax for shine: A beeswax and mineral oil blend adds a soft sheen and extra water resistance.
Cooking oils like olive or vegetable oil can turn rancid on wood. Stick with mineral oil or a board butter made for food contact.
For step-by-step timing and amounts, see my guide on how to oil a wooden cutting board. The same method works for engraved boards, with a little extra oil pressed into the lines.
A good food-grade mineral oil costs little and lasts for months. One bottle covers several boards and many coats.
What Foods Work Best on an Engraved Board?
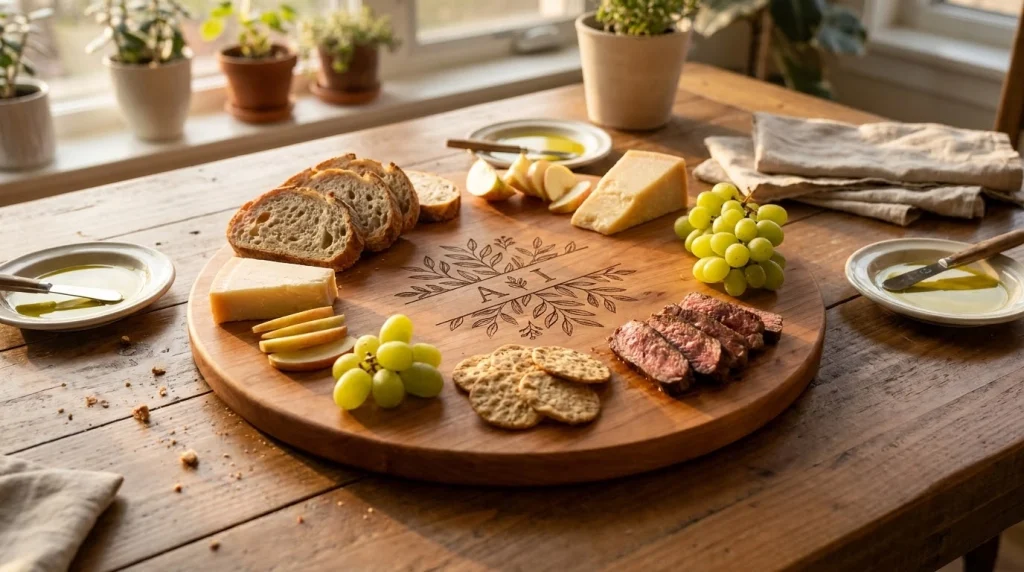
Dry and firm foods work best on the engraved side. They sit on top of the lines instead of pooling inside them.
Cheese, bread, cured meats, fruit, and roasted vegetables all look great on an engraved board. The design shows through around the food, which is the whole point.
- Best picks: Sourdough, hard cheese, grapes, apples, crackers, and cooked steak slices.
- Good with care: Tomatoes and citrus, if you wash the board right after serving.
- Use the back side: Raw chicken, raw fish, ground meat, and beetroot that can stain.
Engraved boards shine as serving boards for gatherings. They turn a simple cheese plate into a centerpiece without any extra effort.
If you love hosting, my guide on using a cutting board for charcuterie shows layouts, food pairings, and spacing that keep the engraving visible. It works well for holidays and weekend spreads.
What Should You Look for Before You Buy One?
Buy an engraved board like you would buy any good board, then check the engraving. Wood, thickness, and finish come first, and the design comes second.
Look for a board at least 0.75 inches thick for stability. Thin boards warp fast, and warping opens the grooves even more.
- Wood type: Hard maple, American walnut, or cherry for daily use.
- Engraving depth: Ask for laser engraving under 1 mm if you plan to cut on it.
- Finish label: Look for “food-safe” or “food-grade mineral oil finish” in the listing.
- Two-sided design: A plain back gives you a prep side and a show side in one board.
- Size: A 12 x 18 inch board handles most serving and slicing tasks with room to spare.
Reputable sellers list the wood species and finish in plain terms. Vague listings that say “wood board” with no species or finish are a red flag.
Certification can help, too. The NSF mark and FDA food-contact guidance, covered on the FDA food safety pages, set a useful bar for materials that touch food. A seller who names those standards is usually worth trusting.
If you’re ready to pick one, here’s what I’d actually recommend:
🏆 Best Overall
John Boos Maple Wood Edge Grain Cutting Board
★★★★★
Hard maple, 18 x 12 x 1.5 inches, edge grain for knife care. I use this style for daily prep and it takes laser engraving well on one side.
💰 Best Budget
Royal Craft Wood Bamboo Cutting Board
★★★★☆
Bamboo, 15 x 10 inches, with juice groove and light weight. I keep one for cheese nights, and the price makes it an easy gift pick.
🎁 Best for Gifting
Virginia Boys Kitchens Walnut Cutting Board
★★★★★
American black walnut, 17 x 11 inches, with rich grain and a food-safe oil finish. I gave this to my brother last year, and the engraving still looks sharp.
Frequently Asked Questions
Can you cut meat on an engraved cutting board?
Yes, you can cut cooked meat on a shallow engraved board, and it works well for serving slices. For raw meat, flip the board and use the plain side, then wash it with hot soapy water right away.
Are laser-engraved cutting boards food safe?
Most laser-engraved boards are food safe when they use food-safe wood and a food-grade oil finish. Check that the seller names the wood and finish, and avoid boards with paint, resin, or varnish in the engraving.
Can you put food directly on engraved wood?
Yes, dry and firm foods like bread, cheese, fruit, and crackers can sit right on the engraving. Wet or juicy foods need a quick wash after serving, since liquid can settle in the lines and leave stains.
How do you clean food out of engraving?
Scrape crumbs out first, then scrub along the lines with hot soapy water and a soft brush. Rinse at an angle, dry the board upright, and oil it monthly to keep the grooves sealed and easy to clean.
Does engraving ruin a cutting board?
No, shallow engraving does not ruin a board, and it can last for years with normal care. Deep carving can shorten the prep life of one side, but the board still works well for serving and light slicing.
The Bottom Line
Yes, an engraved cutting board is made to be used, not just admired. Keep the engraving shallow, the wood food-safe, and the finish food-grade, and it will serve you well.
Use the pretty side for serving and light slicing, and flip to the plain side for messy prep. With a brush, a little oil, and a quick dry after each wash, your board will stay safe and sharp-looking for years.