Chef Knife Scratches on Blade: Causes, Cleaning, and How to Fix Them
Quick Answer
Scratches on a chef knife blade usually come from abrasive cleaning pads, contact with other utensils, hard cutting surfaces, or sharpening. Wash the knife with mild dish soap and a soft sponge, then dry it thoroughly. Light surface marks may be cosmetic, but deep grooves, pitting, rust, and edge damage need different treatment. Follow the manufacturer’s knife care guidance before attempting any polishing.
What to Do About Blade Scratches
- Clean first: Use warm water, mild dish soap, and a non-scratch sponge to remove food residue.
- Inspect the mark: Check whether it is a removable stain, a shallow scratch, rust, or a deep groove.
- Avoid abrasives: Skip steel wool, rough scouring pads, and aggressive polishing compounds.
- Protect the finish: Wash by hand, dry immediately, and store the knife away from other metal tools.
- Repair carefully: Consult a knife professional for deep scratches, extensive corrosion, or damage near the cutting edge.
A Quick Safety Check
- Stop using the knife if you find a loose handle, a significant crack, a badly chipped edge, or a damaged coating that may flake into food.
- Never rub a sharp blade toward your fingers while inspecting or cleaning it.
Chef knife scratches on the blade can make a trusted kitchen knife look worn long before its cutting performance declines. The good news is that many marks are cosmetic, and better cleaning and storage habits can prevent additional damage.
In this guide, I’ll explain how to identify common blade marks, what you can safely do at home, and when professional repair makes more sense. I’ll also cover the tools worth considering and the mistakes that can make a scratched knife worse.
What Causes Scratches on a Chef Knife Blade?
 Save
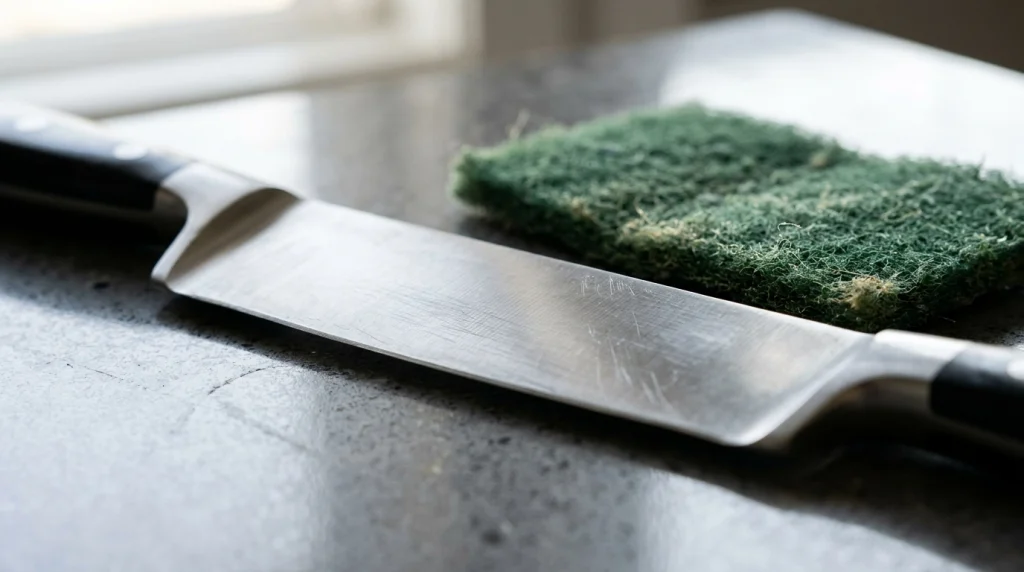
Scratches form when a harder or abrasive material rubs against the blade, or when repeated contact gradually changes its surface. The pattern, location, and appearance of the marks often reveal what caused them.
1. Abrasive sponges and scouring pads
Rough kitchen scrubbers can leave fine lines across a polished blade. Steel wool and gritty cleaning powders are especially poor choices when you want to preserve a smooth finish.
Use a soft sponge or nonabrasive cloth instead. If a knife has a colored coating, decorative finish, or patterned surface, check the manufacturer’s instructions before applying any cleaning product.
2. Contact with other utensils
A knife tossed into a drawer can strike forks, spoons, other knives, and metal kitchen tools. Repeated contact may produce random scratches, small dents, or damage along the cutting edge.
This problem is preventable. A knife block, blade guard, suitable in-drawer organizer, or secure magnetic storage system can keep the blade separated from other utensils.
3. Cutting on hard surfaces
Glass, granite, ceramic, marble, and metal surfaces can damage a knife’s cutting edge. Dragging the blade sideways across a board can also cause unnecessary wear.
Choose a suitable wooden or plastic cutting board. After chopping, use a bench scraper or another appropriate tool to move ingredients instead of scraping the knife’s edge across the board.
4. Sharpening and polishing mistakes
Sharpening removes a small amount of metal to create a fresh cutting edge. Incorrect angles, coarse abrasives, excessive pressure, or poor technique can leave visible marks or change the blade’s geometry.
Honing is different. It helps realign a knife’s cutting edge, while sharpening removes material to restore that edge. Neither process is a general-purpose solution for scratches across the flat side of the blade.
5. Rust, water spots, and food residue
Not every mark is a scratch. Mineral deposits, dried food, discoloration, and early corrosion can look like surface damage until you clean the blade properly.
Acidic foods such as tomatoes, citrus, and mustard can also contribute to staining when residue remains on the steel. Clean the knife promptly and dry it before storage.
How Can You Tell Whether a Blade Mark Is a Scratch or a Stain?
A scratch is a physical change in the blade’s surface, while a stain is usually discoloration or residue. Cleaning the blade gently is the safest first test, but it won’t remove a genuine groove in the metal.
| What You Notice | Possible Cause | Recommended Response |
|---|---|---|
| Fine, silvery lines | Abrasive cleaning or utensil contact | Clean gently and avoid further abrasion. |
| Brown or orange spots | Rust or corrosion | Clean according to the manufacturer’s care instructions and inspect for pitting. |
| White or cloudy patches | Mineral deposits, residue, or finish changes | Try mild soap and water before considering other treatment. |
| Deep grooves or pits | Physical abrasion or corrosion | Seek professional assessment if the damage is significant. |
| Notches along the cutting edge | Impact, hard cutting surfaces, or misuse | Assess edge damage separately from cosmetic scratches. |
How to check: Rinse the blade, wash it with mild dish soap, and dry it with a clean cloth. Inspect the marks under good lighting without running your fingers along the blade.
If discoloration disappears, residue may have caused the problem. If a line remains and catches the light from different angles, it may be a genuine surface scratch, although visual inspection alone cannot determine its depth precisely.
How Do You Remove Scratches From a Chef Knife?
The right approach depends on the blade material, finish, and severity of the damage. Start with cleaning, not sanding or polishing, because removing metal unnecessarily can permanently alter the knife.
Step 1: Wash the blade gently
Place the knife securely in your hand with the sharp edge facing away from your fingers. Wash it with warm water, mild dish soap, and a soft sponge, keeping the blade controlled throughout the process.
Never leave a knife loose in a sink full of soapy water. Someone reaching into the sink could accidentally contact the concealed blade.
Step 2: Dry and inspect the surface
Dry the blade immediately with a soft, clean towel. Look for discoloration, shallow lines, rust spots, and deeper damage before deciding whether additional treatment is necessary.
For a knife with an ordinary satin or polished finish, mild cleaning may be all it needs. A Damascus-patterned blade, black-coated knife, ceramic blade, or specially treated surface may require a different care method.
Step 3: Decide whether polishing is appropriate
Light scratches sometimes can be reduced by professional refinishing, but there is no universal scratch remover suitable for every chef knife. Polishing compounds and abrasive pads remove or alter surface material, so an unsuitable product may create more visible damage.
- For light cosmetic marks: Leave them alone if they do not affect safe use or cleaning.
- For a uniform satin finish: Ask a knife specialist whether refinishing is appropriate for that particular blade.
- For patterned or coated blades: Avoid DIY abrasion unless the manufacturer explicitly approves it.
- For deep grooves or corrosion pits: Get a professional assessment instead of trying to grind the marks away.
Step 4: Keep the cutting edge separate from cosmetic repairs
Scratches on the flat side of the blade do not automatically mean the knife needs sharpening. If the knife cuts well and its edge is intact, cosmetic marks alone are not a reason to remove more steel.
If the edge is dull, use a sharpening method suited to the knife’s steel and geometry. Follow the manufacturer’s recommendations or consult a qualified sharpener if you’re uncertain.
Expert tip: Don’t chase every scratch.
A working chef knife will often develop fine cosmetic marks over time. Removing every line can require repeated abrasion and may wear away the original finish unnecessarily.
Can You Use Baking Soda, Metal Polish, or Sandpaper?
Some household products can affect certain stainless-steel surfaces, but that doesn’t make them safe for every chef knife. The blade’s finish and the manufacturer’s instructions should determine what you use.
| Method | Best Use | Main Concern |
|---|---|---|
| Mild dish soap | Routine cleaning and food residue | Will not remove actual metal scratches. |
| Baking soda paste | Only where the maker approves the method for a specific stain | Can abrade or dull a delicate finish. |
| Metal polish | Certain compatible, uncoated metal surfaces | Residue, finish changes, or food-contact suitability concerns. |
| Sandpaper or abrasive pads | Specialist refinishing when appropriate | Can create new scratches and remove too much material. |
| Professional refinishing | Significant cosmetic damage on suitable blades | May change the finish and costs more than routine cleaning. |
Don’t assume that a product marketed for stainless-steel sinks or cookware is suitable for a knife blade that contacts food. Check its intended use, follow the label, and make sure any permitted treatment can be rinsed away completely.
For a valuable Japanese knife, Damascus blade, or coated chef knife, I would ask the manufacturer or a specialist before using an abrasive product. A cautious approach is cheaper than repairing an accidentally damaged finish.
Which Tools Help Prevent Chef Knife Scratches?
 Save
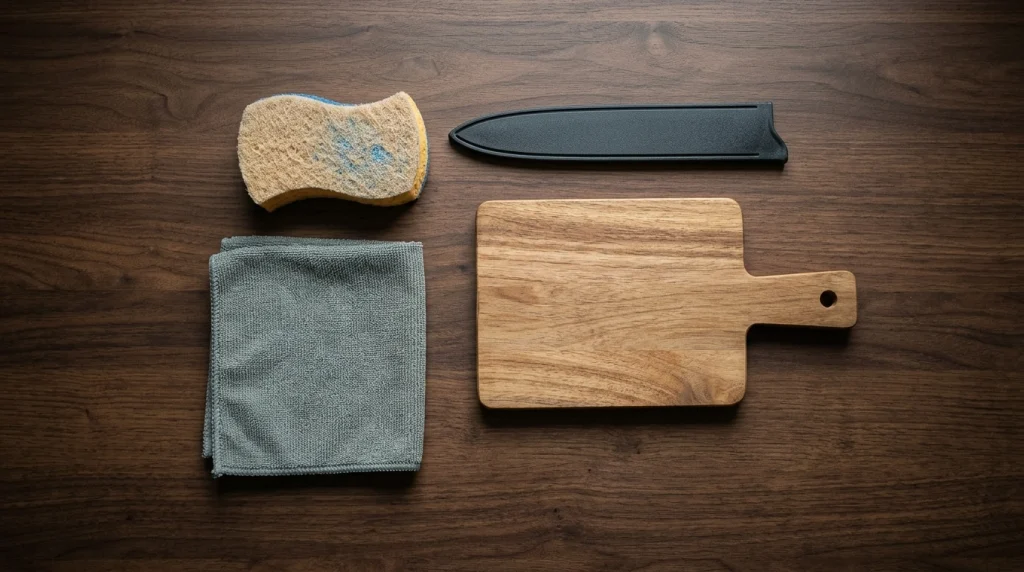
Preventing new marks is usually easier than restoring a scratched finish. A few basic kitchen tools can reduce contact damage without requiring expensive maintenance equipment.
- Soft cleaning sponge: Removes everyday food residue without the aggressive abrasion associated with scouring pads.
- Microfiber or soft cotton cloth: Helps dry the blade and wipe away fingerprints without rough scrubbing.
- Wooden or suitable plastic cutting board: Provides a more knife-friendly cutting surface than glass, stone, or ceramic.
- Blade guard or knife block: Separates the blade from other utensils during storage.
- Appropriate sharpening stone: Restores the cutting edge when needed, provided you use a suitable technique and grit.
These tools address different problems. A cleaning cloth prevents unnecessary abrasion, a blade guard limits storage damage, and a sharpening stone maintains the cutting edge rather than polishing the blade’s flat surface.
How Should You Clean and Store a Chef Knife?
Good maintenance helps prevent scratches, staining, and corrosion. The most important habits are simple: wash promptly, dry thoroughly, use the knife on an appropriate board, and store it so the blade cannot strike hard objects.
Follow this after-use routine
- Remove food promptly. Wash the blade soon after cutting, particularly after working with acidic ingredients.
- Use mild soap. Clean with a soft sponge or cloth instead of steel wool or a gritty cleanser.
- Rinse carefully. Remove soap and food residue without leaving the knife submerged.
- Dry immediately. Wipe the blade with a clean towel, moving carefully and keeping your fingers away from the edge.
- Store securely. Use a knife block, protective sheath, blade guard, or suitable in-drawer holder.
Handwashing is a sensible default for chef knives. Even when a manufacturer labels a particular knife dishwasher-safe, contact with other objects, harsh detergent, and heat may still affect the blade or handle over time.
For additional maintenance advice, consult the care information from Victorinox or ZWILLING. Their guidance can help you distinguish ordinary edge maintenance from more extensive repair.
When Should You Replace or Professionally Repair a Scratched Knife?
Most shallow cosmetic scratches don’t make a sound chef knife unusable. However, damage that affects the blade’s structure, safe handling, or ability to clean properly deserves more attention.
- Consider professional repair: Deep scratches, extensive pitting, significant chips, or a damaged cutting edge may need specialist attention.
- Stop using a cracked blade: A crack can spread or cause the blade to fail under pressure.
- Check damaged coatings: If a coating is peeling or flaking, stop using the knife until the manufacturer advises whether it is safe to continue.
- Check the handle: A loose handle or damaged attachment can make the knife unsafe even if the blade scratches are cosmetic.
- Ask about warranty coverage: New knives with unusual marks or suspected manufacturing defects should be documented before you attempt any repair.
Take clear photographs of the blade under natural or bright neutral lighting. Include close-ups of the damaged area and a wider image of the whole knife, then contact the maker or a reputable knife repair service.
Recommended Products for Knife Care
If you’re setting up a basic knife-care routine, choose products that solve a specific maintenance problem. The recommendations below are established product types and models to research, not claims that any item will erase every scratch.
Best for Edge Maintenance
KING Japanese Whetstone
A whetstone can restore a dull cutting edge when used with the correct technique. I would choose a suitable grit and follow the knife manufacturer’s sharpening instructions rather than using a stone to chase cosmetic marks across the blade.
Best for Everyday Protection
Blade Guard for Chef Knives
A correctly sized blade guard helps prevent a knife from striking other utensils in a drawer. I would check the blade length and height before ordering, because a loose or poorly fitting guard offers less protection.
Best for Gentle Cleaning
Non-Scratch Kitchen Sponge
A soft, non-scratch sponge is useful for routine washing and removing food residue. I would avoid rough scouring layers and abrasive powders when maintaining a polished, satin, or coated blade.
Before buying any sharpening or cleaning product, confirm that it suits your knife’s steel and finish. A protective storage accessory and a gentle sponge are often more useful for scratch prevention than a specialized polishing kit.
Frequently Asked Questions
Are scratches on a chef knife blade normal?
Yes, fine scratches can develop through normal kitchen use, cleaning, sharpening, and storage. Shallow cosmetic marks usually don’t affect cutting performance. Deep grooves, rust pits, cracks, or chips along the cutting edge deserve closer inspection because they may require professional repair.
Can I remove scratches from a stainless-steel chef knife?
Some scratches on compatible stainless-steel blades can be reduced through careful refinishing, but the result depends on the steel and original finish. Mild soap removes residue, not genuine grooves. Avoid abrasive polishing unless the manufacturer or a qualified knife specialist confirms that the method is suitable.
Does baking soda remove knife scratches?
Baking soda may help with certain surface residues when a manufacturer approves its use, but it won’t reliably remove scratches cut into the metal. Because it can act as a mild abrasive, rubbing it over a polished or coated blade may change the finish. Try gentle cleaning first.
Why does my new chef knife have scratches?
Possible causes include contact during packaging or transport, handling marks, sharpening marks, or a surface finish that naturally shows fine lines. Photograph the blade before attempting to clean or polish it, then contact the seller or manufacturer if the damage appears unusual or the knife arrived in unacceptable condition.
Do blade scratches make a chef knife unsafe?
Shallow cosmetic scratches generally don’t make a structurally sound knife unsafe by themselves. However, cracks, serious chips, deep corrosion, a loose handle, or a peeling coating can raise safety concerns. Stop using a knife with significant damage until you have assessed it or obtained professional advice.
Final Takeaway: Protect the Finish Instead of Chasing Every Mark
Chef knife scratches on the blade are often a normal sign of use, not proof that the knife is ruined. Start with gentle cleaning, identify the type of damage, and avoid aggressive polishing that could remove metal or alter the original finish.
For long-term care, wash and dry the knife promptly, cut on a suitable board, and store it where the blade cannot strike other utensils. If you find deep scratches, corrosion, cracks, or significant edge damage, consult the manufacturer or a qualified knife professional before attempting a repair.
For most home cooks, consistent care is the best investment. A few cosmetic lines are usually a better trade-off than unnecessary refinishing that shortens the life of a good knife.
Affiliate disclosure: This article contains affiliate links. CookingFlavour may earn a commission from qualifying purchases at no additional cost to you.