How to Remove a Burr From a Chef Knife (Without Ruining It)
Quick Answer
To remove a burr from a chef knife, finish on a fine stone with light, alternating, edge-trailing strokes, reducing pressure until only the weight of the blade remains. Then check both sides, strop lightly if a faint wire edge remains, and stop once the edge feels smooth. Heavy pressure or endless stropping will fold the edge over again instead of cleaning it.
A burr can make a freshly sharpened knife feel very sharp for a few cuts, then suddenly dull. That short-lived sharpness is the clue: a thin flap of metal is still hanging on to the edge, and it folds or breaks off as soon as it meets food. Removing it cleanly is what turns a ground edge into a durable kitchen edge.
What a Burr Actually Is
A burr is a thin, weak strip of steel pushed past the very edge during sharpening. When the two bevels finally meet, the last bit of metal has nowhere to go, so it curls to the opposite side. It is often too small to see clearly, but it can usually be felt.
A finished edge is a clean meeting point between two bevels. A burred edge has that meeting point plus a fragile flap attached to it. The flap can slice paper or tomato skin at first because it is extremely thin, but it cannot stay straight under normal cutting pressure. It bends, tears, or snaps away, leaving a rougher, duller edge behind.
A burr is not a sign that sharpening went wrong. Raising one along the full length of the edge is useful evidence that the stone has reached the apex. The problem is only leaving it there. The shape of the bevel matters because the burr forms exactly where those bevel surfaces meet, not farther up the blade.
How to Tell If a Burr Is Still There
 Save
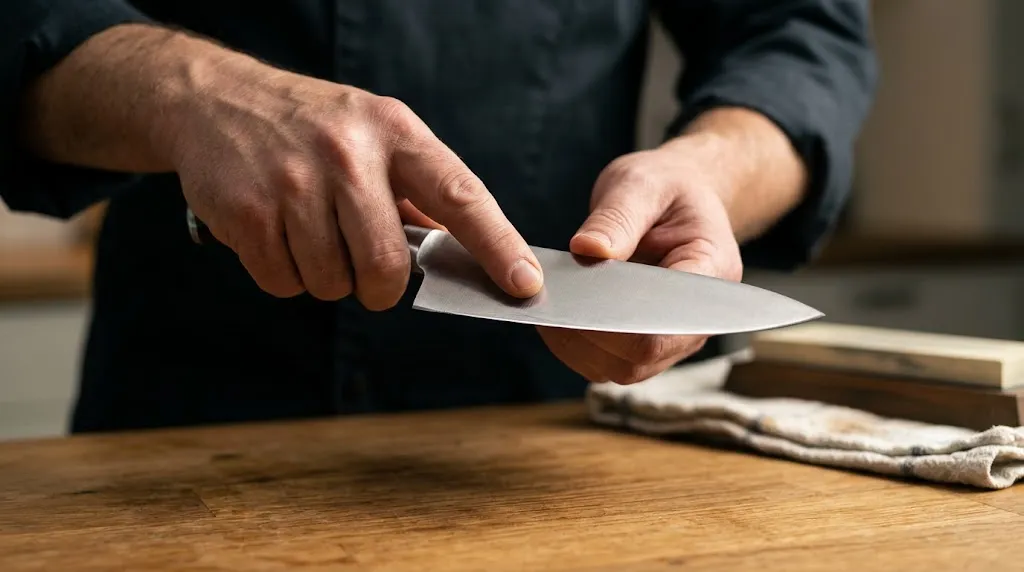
Check with your fingertips, not by running a finger along the edge. Hold the blade safely and drag a fingertip very lightly across the edge, from the spine toward the cutting edge, on one side and then the other. Always move across the edge, never along it.
A burr usually feels like a slight catch, roughness, or tiny hook on one side only. If one side feels smooth and the other catches, the burr is leaning toward the catching side. Check the heel, middle, and tip separately, because a burr can remain in one section even after the rest of the edge feels clean.
Under a bright light, a remaining wire edge may also show as a thin, bright line or uneven reflection. A gentle paper cut can confirm the problem: a clean edge slices smoothly, while a burred edge may catch, tear, or feel sharp in one direction and rough in the other.
Warning
Never test for a burr by sliding a thumb or finger along the length of the edge. Move from the spine toward the edge, with light pressure, and keep your fingers clear of the cutting line.
Before You Start Removing the Burr
Do not try to remove a large, coarse burr on a finishing strop alone. If the burr is thick, uneven, or only present in patches, the edge probably needs a little more work on the stone first. A strop is best for refining an edge that is already close, not for rescuing an unfinished sharpening job.
Work on a stable surface with the stone secured so it cannot slide, and keep a water stone wet. Use the same sharpening angle you used to create the edge. Raising the angle sharply at this stage can round the apex and undo the clean geometry you just made. If the earlier steps feel uncertain, revisit how to sharpen a chef knife first: burr removal works best as the last part of one continuous process.
Method 1: Remove the Burr on a Fine Stone
For most double-bevel chef knives, the fine stone is the most reliable deburring tool. It is abrasive enough to weaken and detach the burr, but gentle enough, with light pressure, to leave a clean apex.
- Move to your finest stone. A 3000 to 6000 grit range is a practical finishing range for most kitchen knives, although light, controlled pressure matters more than the exact grit.
- Set the blade at the same angle used for sharpening. For many Western chef knives this is around 15 to 20 degrees per side, but follow the angle already established on your knife. The chef knife edge angle guide explains why matching the existing angle matters more than chasing one universal number.
- Make one very light stroke on one side, then one on the other. Use edge-trailing strokes, meaning the spine leads and the edge follows, so the burr is not driven into the stone.
- Reduce pressure with each alternating pair. After a few pairs, the blade should be moving almost under its own weight.
- Stop and check both sides with the fingertip test. If a burr is still present, repeat with even lighter strokes rather than pressing harder.
The goal is to fatigue the burr, not grind it away aggressively. Repeated light flips bend it back and forth until it detaches cleanly. Heavy pressure does the opposite: it can create a new burr, push the old one to the other side, or round the edge. This is also why WÜSTHOF’s whetstone guidance moves from the coarse side to the fine side and notes that the fine side removes leftover steel. The finishing stage is not just polishing for appearance; it cleans up what the coarser stage left behind.
Method 2: Finish With a Leather Strop
Stropping is a useful final step after the fine stone, especially for a faint wire edge that is too small to feel clearly. Place the blade on the strop at the sharpening angle, then draw it spine-first across the surface, from heel to tip. Lift, flip the knife, and repeat on the other side.
Always move edge-trailing: if the edge leads into the strop, it will dig in and dull. Use only light pressure, about the weight of the knife, and keep the strokes slow and even. Five to ten light passes per side is enough for most kitchen knives.
More is not automatically better. Over-stropping can round the apex, especially on a soft strop, and produce an edge that feels smooth but slides over tomato skin instead of biting into it. If the knife starts to lose bite after stropping, return to the fine stone for a few alternating strokes and stop earlier next time.
Method 3: Use a Honing Rod or Ceramic Rod Carefully
A smooth steel or ceramic rod can help with a very light burr, but it is easy to misuse at this stage. A honing rod mainly realigns a bent edge; it is not designed to grind away a thick burr. Used with heavy pressure or the wrong angle, it can fold the burr over or create a new one.
If you use a rod, hold it steady, match the sharpening angle, and make only a few light, alternating passes from heel to tip. Stop and check. If the burr does not improve quickly, go back to the fine stone instead of adding more rod passes. Do not use a coarse, grooved steel as a deburring tool for a fine kitchen edge: its aggressive surface can leave the edge rough.
How to Test the Edge After Deburring
 Save
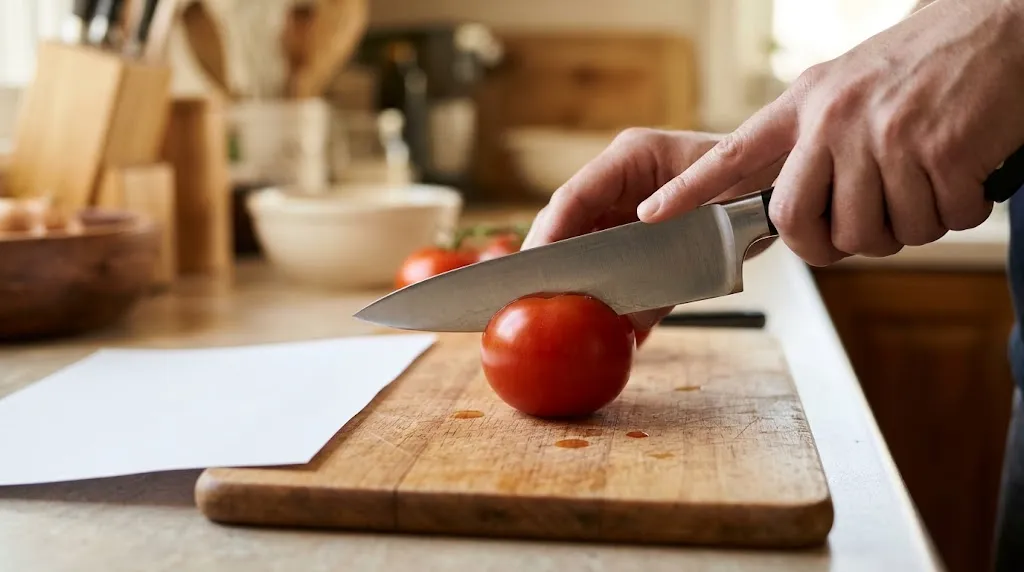
Test only after both sides feel smooth to the fingertip test. Hold a sheet of paper by its top edge and slice downward with a smooth motion. A clean edge cuts without tearing, snagging, or veering. Test the heel, middle, and tip, because each section can behave differently.
Next, try a tomato with almost no downward pressure. A properly deburred edge should bite into the skin and start the cut easily. If the blade slides across the skin, the edge may be rounded from over-stropping, or a fine burr may still be folded over. If it catches in one spot, check that section again and repeat a few light alternating stone strokes.
Common Mistakes That Keep the Burr in Place
Pressing harder on the finishing stone. Heavy pressure creates more burr and makes angle control harder. The finishing stage should feel almost effortless.
Flipping the burr instead of removing it. Many strokes on one side simply move the burr to the other side. Alternating single strokes, with decreasing pressure, weaken it until it breaks away.
Using edge-leading strokes on a strop. Pushing the edge into leather, felt, or cardboard will dig in and dull the apex. Stropping is always spine-first.
Key Insight
A burr is not removed by force. It is removed by alternating the side it leans toward, while steadily reducing pressure, until the weakened metal detaches and leaves a clean apex behind.
Related Product
Leather Strop for Knife Sharpening
A leather strop is useful for the final step after the fine stone, when only a faint wire edge remains to be polished away.
As an Amazon Associate, we earn from qualifying purchases.
Frequently Asked Questions
Should a burr be removed after every sharpening?
Yes. A burr is a normal by-product of reaching the apex, but it should not be left on a finished edge. Remove it with light alternating strokes on a fine stone, then check both sides before using the knife.
Can a honing rod remove a burr?
A honing rod can help with a very light burr or a slightly bent edge, but it is not the best tool for a thick burr. Use only a few light passes at the correct angle, and return to a fine stone if the burr remains.
Why does my knife feel sharp, then dull after a few cuts?
This is a common sign of a remaining burr or wire edge. The thin flap cuts well at first, then folds or breaks off during use, leaving a duller edge. Deburr again with lighter, alternating strokes and test the edge through several cuts.
Is stropping the same as deburring?
No. Stropping can finish the deburring process, but it is mainly a refinement step. The fine stone should remove most of the burr first, especially if it is large enough to feel clearly.
Can you remove a burr without a strop?
Yes. Light, alternating, edge-trailing strokes on a fine stone are sufficient for most chef knives. A strop is optional and is most useful for polishing away a very faint wire edge.
What if the burr only remains near the tip?
Check the tip separately and give it a few careful, light alternating passes, lifting the handle slightly so the curved tip keeps contact with the stone. Avoid grinding the whole edge again just to fix one small section.
Conclusion
Removing a burr is less about force and more about finishing with control. Use a fine stone, alternate sides, reduce pressure until the blade moves under its own weight, and check the heel, middle, and tip before you stop. Add a few light strop passes only if a faint wire edge remains, and avoid turning stropping into a long grinding session. When both sides feel smooth and the knife cuts cleanly through paper and tomato skin, the edge is ready for real cooking, and it should stay sharp far longer than a burred edge ever would.