How to Refinish a Cutting Board: A Step-by-Step Guide
Quick Answer
To refinish a cutting board, clean and dry the wood, sand away surface damage, remove sanding dust, and apply food-grade mineral oil. Let the oil absorb, wipe away the excess, and allow the board to dry before use. Refinish only structurally sound boards. The USDA cutting board guidance recommends replacing boards with excessive wear or hard-to-clean grooves.
Quick Refinishing Steps
- Inspect: Check for deep cracks, loose joints, mold, and excessive damage.
- Clean: Wash with mild dish soap and warm water, then dry thoroughly.
- Sand: Start with 120-grit sandpaper for moderate wear, then move to 180 and 220 grit.
- Remove dust: Vacuum or brush away particles and wipe the surface clean.
- Condition: Apply food-grade mineral oil evenly to all wooden surfaces.
- Finish: Allow absorption, remove excess oil, and ensure the surface feels dry before cutting food.
Time needed: Approximately 30–60 minutes of hands-on work for a moderately worn board, plus drying and oil absorption time.
Learning how to refinish a cutting board can save a favorite wooden board from unnecessary replacement. Years of chopping can leave scratches, rough fibers, discoloration, and a dull-looking surface.
The good news is that light surface damage often responds well to careful sanding and conditioning. This guide explains the tools, techniques, food-safe finishes, and warning signs worth knowing before starting.
In This Guide
Can You Refinish an Old Cutting Board Safely?
Yes, you can refinish many wooden cutting boards when the damage is superficial. Light scratches, raised grain, and a dry appearance usually make reasonable restoration projects.
Cutting board refinishing means removing a thin layer of damaged wood and renewing its protective conditioning treatment. It improves the surface but cannot reverse every structural or sanitation problem.
Which Cutting Boards Are Worth Refinishing?
Start by placing the board on a flat countertop and inspecting both faces, the edges, and any glued seams. A board that rocks, splits, or contains questionable discoloration deserves closer attention.
- Light knife scratches: Usually suitable for sanding and reconditioning.
- Raised wood fibers: Often improve with fine sanding.
- Dry or faded wood: May need conditioning rather than aggressive sanding.
- Minor surface stains: Sometimes improve during cleaning and resurfacing.
- Stable, shallow dents: May remain harmless if the surface can still be cleaned effectively.
When Should You Replace Instead of Refinish?
Not every old board deserves another round of sanding. Removing more wood from an already damaged board can create an unstable or uneven cutting surface.
| Board Condition | Suggested Action | Reason |
|---|---|---|
| Light scratches | Refinish | Usually surface-level wear |
| Dry, dull surface | Oil first | Sanding may be unnecessary |
| Loose glue joints | Stop using | Seams can trap food and moisture |
| Deep, dirty cracks | Replace | Difficult to clean reliably |
| Severe warping | Replace or seek professional advice | Unstable during cutting |
| Suspected deep mold | Replace | Surface sanding cannot establish safety |
My rule is simple: preserve a safe, stable board rather than chase every visible knife mark. A few shallow scratches are preferable to excessive material removal.
What Do You Need to Refinish a Cutting Board?
 Save
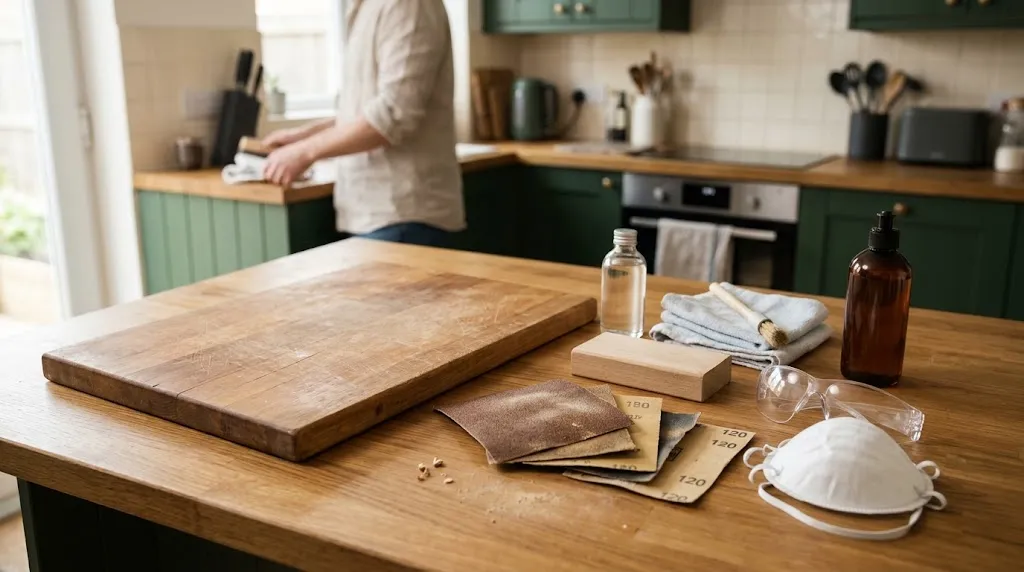
Most cutting board restoration projects need only basic tools and a suitable food-contact finish. The exact sandpaper grit depends on how badly the wood has worn.
Essential Tools and Supplies
- 120-grit sandpaper: For removing moderate scratches and surface damage.
- 180-grit sandpaper: For smoothing marks left by the initial sanding.
- 220-grit sandpaper: For preparing a smooth final surface.
- Sanding block: Helps distribute pressure evenly.
- Soft brush or vacuum: Removes loose sanding dust.
- Clean, lint-free cloths: Useful for wiping and oiling.
- Mild dish soap: Cleans the board before restoration.
- Food-grade mineral oil: Conditions exposed wood.
- Dust protection: Suitable eye protection and a well-fitting dust mask or respirator for sanding.
Which Sandpaper Grit Should You Use?
Begin with the least aggressive grit capable of improving the damaged surface. Coarse sandpaper removes wood quickly, making it easier to create low spots or rounded edges.
- 80–100 grit: Reserved for substantial wear on thick, structurally sound boards.
- 120 grit: A practical starting point for moderate knife marks.
- 180 grit: Smooths scratches from earlier sanding.
- 220 grit: Creates a suitable final surface for most boards.
- 320 grit: Optional for lightly smoothing raised fibers after dampening.
The Purdue Extension woodcraft guidance also describes sanding and mineral-oil treatment for wooden cutting boards.
An electric sander is optional. Hand sanding provides good control, especially when the board has a juice groove, rounded corner, or decorative edge.
How Do You Refinish a Wooden Cutting Board Step by Step?
 Save
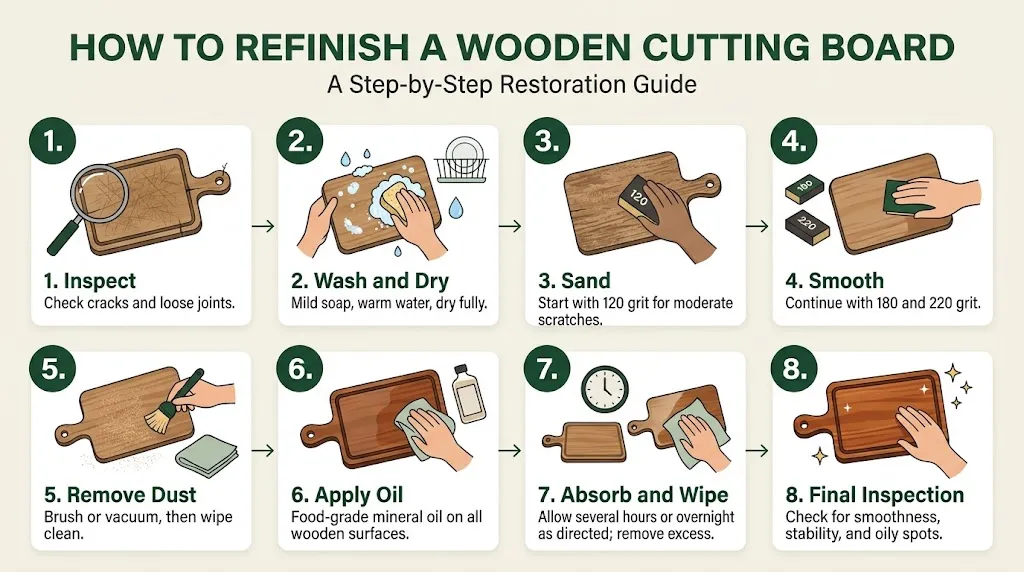
Refinishing a wooden cutting board involves cleaning, carefully removing surface wear, and replacing the conditioning oil. Follow these steps on a solid, repairable board with a known food-safe wood surface.
Step 1: Inspect the Entire Board
Examine both sides before reaching for sandpaper. Look closely at the glue joints, corners, and deep knife marks where moisture may collect.
Press gently near any visible separation without forcing the wood apart. If the board has loose joints or extensive cracks, do not continue with a cosmetic refinish.
Step 2: Wash and Dry the Cutting Board
Wash the board with warm water, mild dish soap, and a soft brush or sponge. Clean the edges and juice grooves without soaking the wood.
Rinse thoroughly, wipe away surface moisture, and stand the board upright in a ventilated area. Let it dry completely before sanding, which may take overnight or longer.
The University of Maine Cooperative Extension recommends thorough cleaning, drying, and regular conditioning for wooden cutting boards.
Step 3: Sand Away Surface Scratches
Secure the dry board on a stable work surface. Use a sanding block with 120-grit sandpaper if the board has moderate scratches.
Work with the direction of the visible wood grain on face-grain and edge-grain boards. Use even pressure and avoid concentrating on one damaged spot.
- Sand the entire cutting face evenly.
- Check the surface frequently under good lighting.
- Remove loose dust to inspect remaining scratches.
- Stop when the surface becomes reasonably uniform.
- Repeat on the opposite face if it also needs resurfacing.
End-grain boards display the cut ends of wood fibers rather than long grain lines. Sand these carefully and evenly, avoiding unnecessary pressure.
Deep cuts may require professional resurfacing instead of aggressive hand sanding. Avoid removing excessive thickness simply to erase cosmetic marks.
Step 4: Smooth the Surface With Finer Sandpaper
Move to 180-grit sandpaper after the main scratches have improved. Sand evenly to remove the marks left by the coarser abrasive.
Finish with 220 grit, including accessible edges that feel rough. Keep the board’s original shape and avoid rounding the cutting surface unnecessarily.
For a smoother result, lightly dampen the wood with a clean cloth and let it dry fully. This raises loose fibers, which you can gently remove with fine sandpaper.
Step 5: Remove All Sanding Dust
Dust removal matters because loose wood particles can contaminate the applied oil and leave a gritty surface. Use a clean brush or vacuum to clear the board.
Wipe with a slightly damp, lint-free cloth if necessary. Allow the wood to dry completely before applying oil.
Pay attention to handle openings and juice grooves. Dust often remains trapped in these areas even when the main cutting face looks clean.
Step 6: Apply Food-Grade Mineral Oil
Place the clean, dry board on a protected work surface. Apply a modest amount of food-grade mineral oil using a fresh, lint-free cloth.
Spread the oil evenly rather than pouring a large puddle onto the wood. Work it across the cutting face, edges, corners, and opposite side.
- Use mineral oil labeled for cutting boards or suitable for food-contact applications.
- Coat all exposed wooden surfaces evenly.
- Pay extra attention to dry areas that absorb oil quickly.
- Follow the manufacturer’s application directions.
- Avoid leaving excess oil pooled on the surface.
Mineral oil conditions the wood and helps reduce rapid moisture absorption. It is not a disinfectant and does not make a damaged board hygienically safe.
Step 7: Allow the Oil to Absorb
Leave the board in a clean location while the oil absorbs. Depending on the product and wood condition, several hours or overnight may be appropriate.
Wipe away remaining oil with a clean cloth. Repeat the treatment if the manufacturer recommends another application and the wood still appears dry.
A properly wiped mineral-oil finish should not leave puddles or a greasy coating. If oil transfers heavily to your fingers, remove more excess and allow additional time.
Step 8: Inspect Before Using Again
Run a clean hand gently across the board to check for rough fibers, loose splinters, or oily spots. Inspect the bottom for stability on the countertop.
Before preparing food, follow the finish manufacturer’s cleaning instructions. Hand wash when appropriate, rinse thoroughly, and let the board dry.
A refinished board should feel smooth, remain stable, and be easy to clean. If deep grooves or cracks remain, reconsider whether the board should be used for food preparation.
Section Takeaway: Use controlled sanding, remove dust thoroughly, and condition the board with a suitable food-grade oil. Never treat refinishing as a substitute for replacing unsafe wood.
What Is the Best Finish for a Cutting Board?
For everyday wooden cutting boards, food-grade mineral oil is a practical, easy-to-maintain choice. It conditions the wood without forming a hard surface film that knives repeatedly cut through.
As of 2026, mineral oil and cutting-board conditioners remain common options for routine wooden board care. Choose a product specifically labeled for its intended food-contact use.
Food-Grade Mineral Oil vs. Cutting Board Wax
Mineral oil penetrates the wood, while beeswax-based conditioners can provide additional surface water resistance. Many board creams combine both ingredients.
| Finish | Main Benefit | Consideration |
|---|---|---|
| Food-grade mineral oil | Easy conditioning | Needs periodic reapplication |
| Beeswax board cream | Additional surface protection | Must be suitable for food contact |
| Olive or vegetable oil | Readily available | Can become rancid or sticky |
| Ordinary varnish or polyurethane film | Hard protective coating | Not recommended for an active cutting surface |
Do not assume every product labeled butcher block oil contains the same ingredients. Some products form curing finishes and require specific preparation and curing periods.
The Home Depot food-safe finishes guide explains the difference between penetrating oils and film-forming finishes.
Can You Use Olive Oil or Coconut Oil?
Ordinary cooking oils are not ideal substitutes for cutting board mineral oil. Vegetable and olive oils can oxidize, develop odors, and become sticky over time.
Coconut oil products vary in composition, so suitability depends on their formulation and labeling. A dedicated food-contact cutting board conditioner removes much of that uncertainty.
How Do You Maintain a Refinished Cutting Board?
 Save
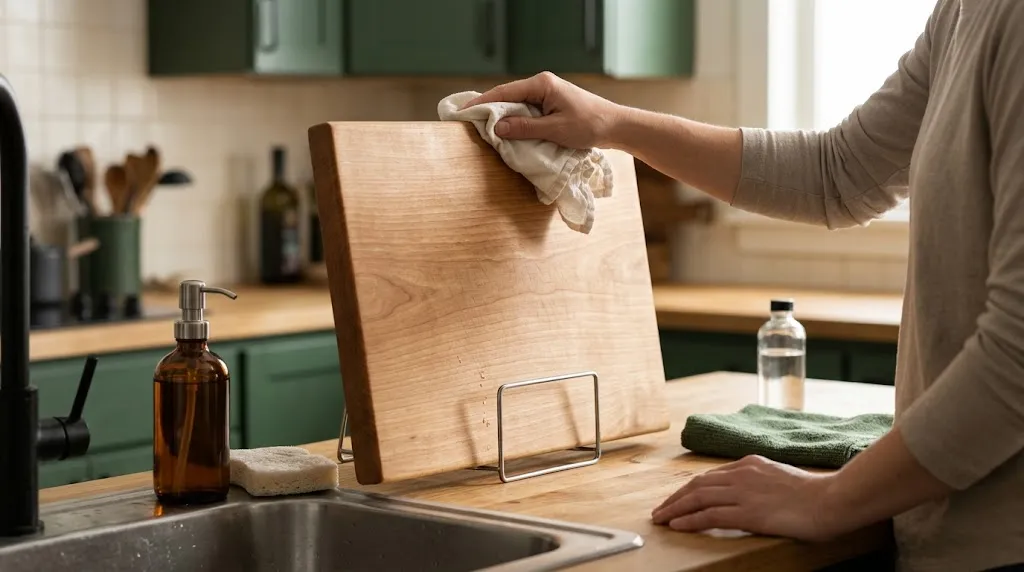
Once the wood is smooth again, routine care matters more than frequent sanding. Proper washing, drying, storage, and conditioning help extend the board’s useful life.
Clean the Board After Every Use
Wash the board with dish soap and warm water after food preparation. Scrub away residue, rinse thoroughly, and dry promptly.
Avoid prolonged soaking and follow the board manufacturer’s dishwasher instructions. Laminated wooden boards are especially vulnerable to moisture-related joint damage.
Prevent Cross-Contamination
Use separate boards for raw meat and ready-to-eat foods whenever possible. This reduces the risk of transferring harmful microorganisms between ingredients.
For additional guidance, review the USDA recommendations for preventing cross-contamination.
When sanitizing is necessary, use a food-contact-appropriate sanitizer and follow its instructions. Never combine bleach with vinegar, ammonia, or other cleaning chemicals.
Oil the Board When It Looks Dry
Many wooden boards benefit from conditioning about once a month, although usage and washing frequency affect the interval. Reapply sooner when the wood looks dry or feels rough.
Apply a light, even coating and wipe away the excess. Remember that oil maintains the wood; it cannot repair deep structural damage.
Store the Board Correctly
- Allow the board to dry completely before storage.
- Stand it upright when possible to improve airflow.
- Keep it away from prolonged direct heat.
- Never store it while damp inside a closed cabinet.
- Inspect the surface periodically for new cracks or deep grooves.
Section Takeaway: Clean promptly, dry thoroughly, and condition when needed. Good daily habits reduce the need for aggressive resurfacing.
Frequently Asked Questions
1. Can You Refinish a Cutting Board Without Sanding?
Yes. If the board is smooth but dry, washing, drying, and applying food-grade mineral oil may be enough. Sanding is mainly helpful for raised fibers and surface scratches. Avoid removing wood when conditioning alone solves the problem.
2. What Grit Sandpaper Is Best for Refinishing a Cutting Board?
For moderate surface damage, 120 grit is a practical starting point, followed by 180 and 220 grit. Lightly worn boards may need only fine sanding. Use coarser abrasives cautiously because they remove more wood and can distort the surface.
3. How Long Should Mineral Oil Sit on a Cutting Board?
Follow the specific product’s label. Many conditioning routines allow several hours or overnight for absorption, followed by wiping away excess oil. The surface should not remain greasy before use, and additional applications depend on the wood’s condition.
4. Can You Refinish a Bamboo Cutting Board?
Some bamboo boards can tolerate gentle surface sanding and reconditioning, but their construction varies. Bamboo boards often contain glued strips and may have factory finishes. Check the manufacturer’s care instructions before sanding, especially if seams are damaged.
5. How Often Should You Sand a Wooden Cutting Board?
Sand only when the surface develops roughness or scratches that can safely be removed. There is no universal sanding schedule. Regular cleaning and oiling usually require less material removal than repeatedly sanding a board that is already smooth.
6. Can You Use Regular Wood Stain on a Cutting Board?
Do not use ordinary furniture stain on an active cutting surface unless the manufacturer explicitly establishes its suitability for that application. A cutting board needs a finish appropriate for repeated knife contact, cleaning, and direct contact with food.
7. Is a Refinished Wooden Cutting Board Safe for Raw Meat?
A structurally sound, properly cleaned board may be used for raw meat when suitable food safety practices are followed. Refinishing does not sanitize wood. Use separate boards where possible, clean after use, and replace boards with persistent hard-to-clean grooves or cracks.
Final Thoughts: Give Your Cutting Board a Second Life
Learning how to refinish a cutting board is a useful kitchen maintenance skill. A little careful sanding and the right conditioning oil can restore many worn wooden surfaces.
Start gently, work evenly, and avoid removing more wood than necessary. Always put sanitation and structural safety ahead of appearance.
If your board is still solid, try a careful refinish and maintain it regularly. If it has deep cracks or excessive grooves, choose a replacement that will serve your kitchen safely.