How to Make an End Grain Cutting Board: Step-by-Step Guide
Quick Answer
To make an end grain cutting board, cut dry hardwood into strips, glue them into a panel, and crosscut that panel into equal sections. Rotate the sections so the end grain faces upward, glue them together, flatten, sand, and apply food-grade mineral oil. Use a moisture-resistant adhesive suitable for cutting boards, such as one identified in the Titebond wood glue guidance.
Quick Construction Steps
- Choose hardwood: Select dry maple, walnut, or cherry.
- Prepare strips: Mill straight, smooth pieces with matching thicknesses.
- First glue-up: Join the long edges into a solid panel.
- Crosscut sections: Cut the cured panel into uniform slices.
- Rotate and glue: Turn the end grain upward and complete the second glue-up.
- Flatten and finish: Level the board safely, sand it, and apply food-contact-safe oil.
Important Safety Tip
- Avoid thickness planers: Do not run the completed end-grain panel through a conventional thickness planer. Use a router sled or suitable sander instead.
Learning how to make an end grain cutting board is a rewarding woodworking project. The finished board combines an attractive pattern with a practical kitchen cutting surface.
I recommend starting with a simple rectangular design before attempting complex checkerboard patterns. This guide covers wood selection, measurements, cutting, gluing, finishing, and long-term care.
What Is an End Grain Cutting Board?
An end grain cutting board is a wooden cutting surface made by joining short hardwood blocks with their end grain facing upward. The exposed ends of the wood fibers create the board’s distinctive pattern.
Unlike edge-grain boards, the cutting surface displays the ends rather than the sides of the wood fibers. This construction can help reduce visible knife marks during ordinary chopping.
Why Choose End Grain Construction?
End-grain boards are popular because they combine decorative woodworking with everyday kitchen usefulness. Their main advantages include:
- Knife-friendly surface: The wood fibers can separate slightly under a knife edge.
- Attractive patterns: Different wood species create contrasting colors and designs.
- Useful thickness: Many end-grain boards provide a substantial, stable chopping surface.
- Refinishing potential: Light surface wear can often be removed through careful sanding.
- Custom dimensions: Builders can adjust the board to their available kitchen space.
However, end-grain construction requires more precise cutting and additional glue joints. Proper maintenance remains essential.
What Is the Best Wood for an End Grain Cutting Board?
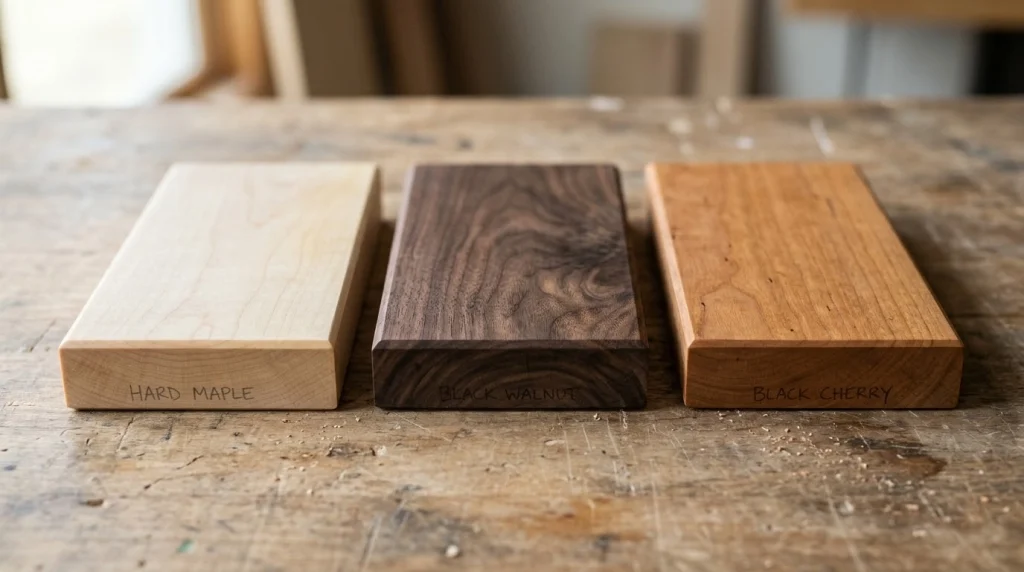
Hard maple, American black walnut, and cherry are excellent starting choices. Each offers a different balance of appearance, hardness, and working characteristics.
I generally recommend maple for a first project because of its durability and light color. Walnut makes an attractive contrasting accent.
Best Hardwood Options Compared
| Wood | Janka Hardness | Appearance | Best Use |
|---|---|---|---|
| Hard Maple | 1,450 lbf | Creamy white | Main board material |
| Black Walnut | 1,010 lbf | Dark brown | Contrasting patterns |
| Black Cherry | 950 lbf | Warm reddish brown | Decorative accents |
These Janka values are typical reference figures for the named wood species. Individual boards vary with growing conditions and moisture content.
For a darker appearance, consider the benefits explained in my guide to using walnut wood for cutting boards.
Which Woods Should You Avoid?
Avoid soft, damaged, chemically treated, or unidentified wood. Some decorative woods contain substances that make them unsuitable for repeated food-contact applications.
- Pressure-treated or chemically preserved lumber
- Painted, stained, or contaminated reclaimed wood
- Wood with significant cracks or loose knots
- Unknown wood species without clear food-contact suitability
- Soft material that develops deep knife grooves easily
Buy clean, properly dried hardwood from a reliable woodworking supplier. Confirm its identity before cutting.
What Tools and Materials Do You Need?
You need accurately prepared hardwood, a suitable glue, reliable clamps, and safe cutting equipment. The final flattening stage also requires special attention.
Essential Materials
- Kiln-dried maple, walnut, or cherry lumber
- Titebond III Ultimate Wood Glue or another appropriately rated adhesive
- Food-grade mineral oil
- Optional food-contact-safe beeswax conditioner
- Sandpaper in 80, 120, 150, 180, and 220 grits
- Clean, lint-free finishing cloths
Essential Tools
- Table saw with appropriate safety equipment
- Crosscut sled or suitable controlled crosscutting setup
- Jointer and thickness planer for initial long-grain preparation, or accurately milled lumber
- Three or more suitably sized bar or parallel clamps
- Router sled or drum sander for final end-grain flattening
- Random orbital sander
- Combination square and measuring tape
- Glue spreader and protective cauls
- Eye protection, hearing protection, and appropriate dust extraction
You do not need every machine if you purchase accurately milled lumber and have access to a suitable flattening service. Never substitute an unsafe cutting method for missing equipment.
What Size Should Your First End Grain Cutting Board Be?
A finished board around 12 × 16 inches is a manageable starting point. It offers useful chopping space without requiring an oversized workbench.
For different kitchen layouts, review my cutting board size guide.
Example Project Dimensions
| Measurement | Example |
|---|---|
| Target finished length | 16 inches |
| Target finished width | 12 inches |
| Target finished thickness | About 1.5 inches |
| Initial panel thickness | About 1.75 inches |
| Initial panel length | About 21–22 inches |
| Initial panel width | About 12 inches |
These are planning dimensions, not a universal cut list. Your exact measurements depend on saw kerf, lumber thickness, flattening losses, and final trimming.
For example, ten crosscut sections from a 1.75-inch-thick panel create approximately 17.5 inches of assembled length before trimming. Cutting those sections about 1.75 inches wide also leaves room to flatten the finished thickness.
How to Make an End Grain Cutting Board Step by Step
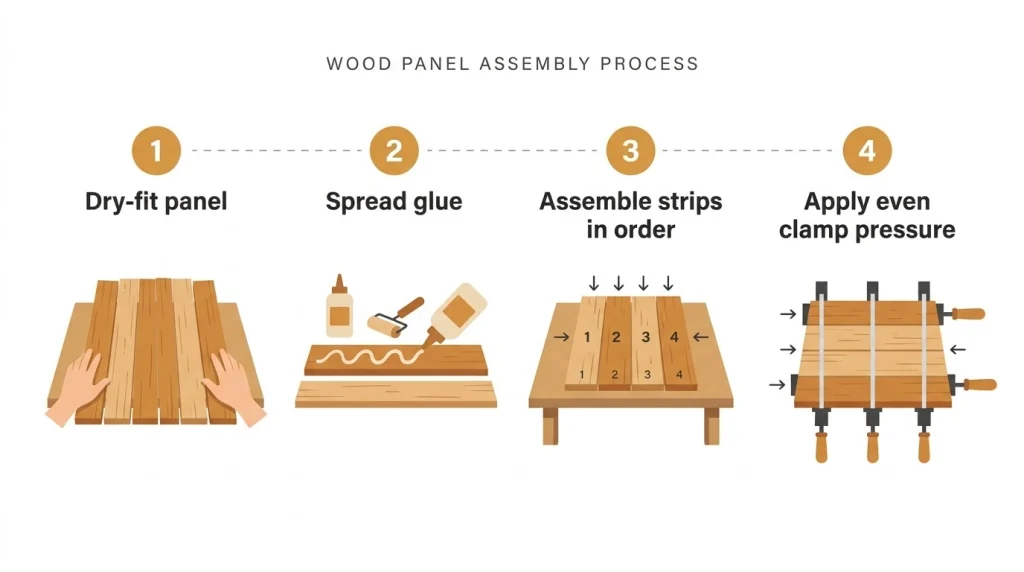
The basic process involves two separate glue-ups. The first creates a long-grain panel, while the second exposes the end grain.
Step 1: Select and Inspect Your Hardwood
Begin with dry hardwood that has reached a suitable moisture balance for your workshop. Stable material helps reduce movement after assembly.
Check every board for twisting, cracks, splits, and damaged areas. Remove unsuitable sections before planning the final layout.
- Choose straight, sound boards with consistent thickness.
- Inspect both faces and every edge.
- Remove loose knots and defects.
- Allow the lumber to adjust to your workshop conditions.
My preferred beginner layout uses mostly maple with a few walnut strips. Keeping the pattern simple makes alignment easier.
Step 2: Mill the Lumber Into Straight Strips
Prepare the lumber so its surfaces are flat, square, and uniform. Accurate milling creates clean joints that require less corrective sanding.
For an example board, prepare strips approximately 21–22 inches long and 1.75 inches thick. Their combined widths should form the planned 12-inch panel.
- Flatten one face and straighten one edge using suitable equipment.
- Bring the stock to uniform thickness while it remains long-grain lumber.
- Rip strips to your chosen widths using proper guards and push sticks.
- Check adjoining edges for gaps.
- Remove dust before gluing.
Never force an unstable board through a cutting machine. Follow the equipment manufacturer’s instructions for safe stock preparation.
Step 3: Arrange Your Cutting Board Pattern
Place the prepared strips side by side on a flat workbench. Experiment with their order before applying glue.
A simple alternating pattern works well when combining maple and walnut. Keep the design manageable on your first attempt.
- Arrange darker strips between lighter ones.
- Check the total panel width.
- Make sure neighboring edges fit properly.
- Mark the chosen order with removable reference marks.
Pay attention to color transitions rather than trying to make every strip identical. A restrained design often looks better than a complicated pattern with misaligned joints.
Step 4: Glue the First Long-Grain Panel
Apply a continuous, even layer of suitable wood glue to the mating edges. Bring the strips together and distribute pressure with the clamps.
Titebond III is a practical option because its manufacturer identifies it as appropriate for cutting board construction. It also offers strong moisture resistance.
- Dry-fit the entire panel before applying glue.
- Spread glue over the mating surfaces.
- Assemble the strips in their marked order.
- Apply moderate, even clamp pressure.
- Use protective cauls to help maintain alignment.
- Remove accessible excess glue without disturbing the joints.
Avoid overtightening the clamps. Excessive force cannot compensate for poorly prepared edges.
For additional guidance, see my detailed tutorial on how to glue up a cutting board.
Step 5: Let the First Panel Cure
Allow the adhesive to cure according to its manufacturer’s instructions. For Titebond III, avoid stressing newly glued joints for at least 24 hours.
After curing, remove the clamps and inspect every seam. The panel should feel solid, with no visible separation.
- Inspect the top and bottom surfaces.
- Remove hardened glue carefully.
- Check the panel for twisting or cupping.
- Flatten the long-grain panel using suitable equipment if necessary.
- Confirm that the panel has square, consistent edges.
This is the appropriate stage for conventional thickness-planer work, provided the stock and grain orientation meet the machine’s requirements. Do not use that same method after converting the panel into end grain.
Step 6: Crosscut the Panel Into Equal Sections
Cut the cured long-grain panel into uniform crosscut sections. Their measured widths will become the thickness of your finished end-grain board.
For example, sections approximately 1.75 inches wide can provide enough material for a finished board near 1.5 inches thick. Account for later flattening.
- Square the starting end using an appropriate crosscut setup.
- Measure the planned section width.
- Secure the panel against a suitable crosscut sled or fixture.
- Make controlled, repeatable cuts.
- Keep the sections in their original order.
Use a properly designed stop system that does not trap offcuts between the blade and a fixed fence. Never freehand small sections near a table saw blade.
Step 7: Rotate the Sections to Expose the End Grain
Turn each section so the freshly exposed end grain faces upward. The individual sections now form rows of short wood blocks.
Arrange the sections side by side to create the final surface. You can also reverse selected sections to change the pattern.
- Aligned pattern: Keep similar blocks lined up for a clean grid.
- Offset pattern: Shift selected rows for a staggered appearance.
- Contrasting pattern: Alternate maple and walnut where their dimensions permit.
Check the entire layout for gaps and uneven contact surfaces. The second glue-up depends on accurate alignment.
Step 8: Complete the Second Glue-Up
Apply adhesive to the long-grain mating faces between the rotated sections. These are the surfaces that will join the rows together.
Work efficiently because large assemblies require careful positioning before the glue begins setting. Prepare all clamps in advance.
- Confirm the layout with a complete dry fit.
- Spread glue evenly over each mating face.
- Bring the sections together in their planned order.
- Apply even pressure across the assembly.
- Check the surface for excessive misalignment.
- Allow the adhesive to cure fully before machining.
Support the assembly on a flat work surface during curing. A stable glue-up reduces later flattening work.
Step 9: Flatten and Sand the End Grain Surface
Once the glue has cured, flatten both sides of the completed panel. A router sled or suitable drum sander is preferable to a conventional thickness planer.
Important: Do not run a completed end-grain cutting board through a standard thickness planer. The cutting action can cause severe tear-out, structural damage, and dangerous kickback or ejection.
The WoodWorkers Guild of America explains safer end-grain flattening alternatives, including router-based surfacing methods.
Recommended Sanding Sequence
- 80 grit: Begin only when significant tool marks remain.
- 120 grit: Remove coarse scratches.
- 150 grit: Refine the surface.
- 180 grit: Continue smoothing the exposed fibers.
- 220 grit: Prepare the board for its final finish.
Do not rely on sanding alone to correct major height differences. Flatten the board first and use sanding to refine the surface.
Remove sanding dust between grit changes. Inspect the surface under good lighting before moving forward.
Step 10: Round the Edges and Apply a Food-Safe Finish
Ease the sharp corners with careful sanding or a suitable round-over router bit. Rounded edges make the board more comfortable to carry and clean.
After removing all dust, apply food-grade mineral oil to the dry wood. Coat the cutting faces, sides, and corners.
- Place the clean board on a protected surface.
- Apply a moderate amount of food-grade mineral oil.
- Spread it evenly using a clean cloth.
- Allow the wood to absorb the oil according to the product directions.
- Remove all excess oil.
- Repeat if the wood still appears dry.
- Optionally apply a suitable beeswax-based conditioner.
Ordinary cooking oils are not my preferred finishing choice because some can become rancid. A dedicated food-contact-safe mineral oil is more reliable.
For further maintenance instructions, read how to oil a wooden cutting board.
How Long Does It Take to Make an End Grain Cutting Board?
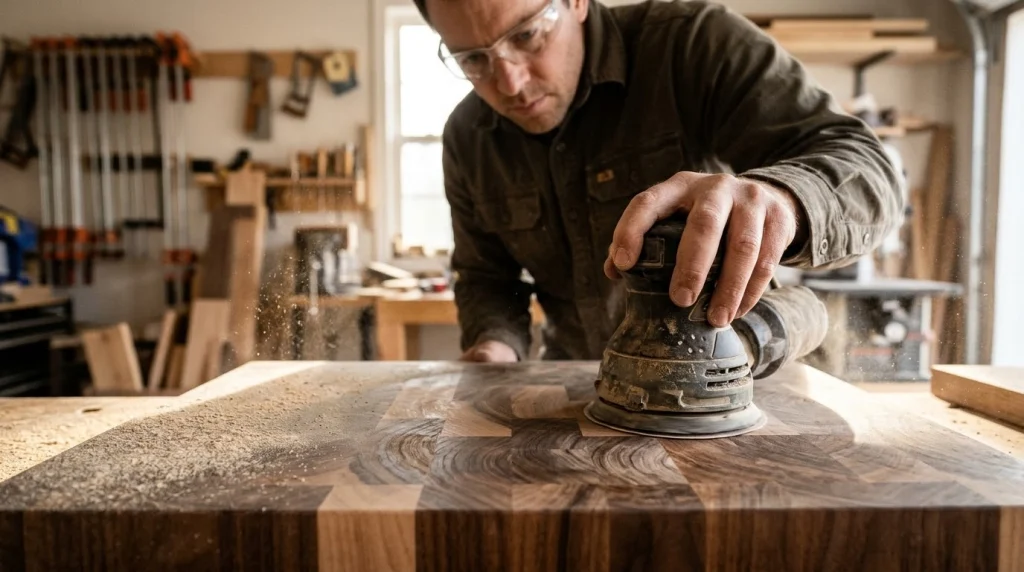
Plan for several workshop sessions rather than one uninterrupted afternoon. Two separate glue-ups require curing time.
| Stage | Illustrative Time |
|---|---|
| Wood preparation and layout | 1–3 hours |
| First glue-up | 30–60 minutes of assembly work |
| First curing period | At least 24 hours before stressing joints |
| Crosscutting and second glue-up | 1–3 hours |
| Second curing period | At least 24 hours before stressing joints |
| Flattening, sanding, and oiling | 2–4 hours plus finish absorption |
These are approximate planning times, not measured project results. Your equipment, skill level, and design complexity will affect the schedule.
What Are the Most Common End Grain Cutting Board Mistakes?
Most problems begin with poor preparation, rushed gluing, or incorrect flattening methods. Careful inspection between stages prevents many avoidable defects.
1. Using Wet or Unstable Wood
Wood that changes moisture content substantially can move after assembly. This movement may lead to cupping, gaps, or cracked glue joints.
Start with properly dried hardwood and avoid exposing the project to sudden moisture changes.
2. Leaving Gaps Between Pieces
Wood glue is not a replacement for accurately fitted joints. Visible gaps may weaken the assembly or create hard-to-clean spaces.
Dry-fit each stage before applying adhesive. Correct poorly fitting surfaces instead of adding extra glue.
3. Applying Uneven Clamp Pressure
Uneven clamping can cause sections to shift during assembly. It may also create unnecessary flattening work.
Use enough suitable clamps and protective cauls to hold the pieces securely. Tighten the clamps gradually.
4. Using the Wrong Flattening Equipment
A conventional thickness planer is unsuitable for the completed end-grain panel because of the risk of catastrophic tear-out. Choose a safer flattening method.
A router sled or suitable surface sander gives you more control over the final surface.
5. Applying Finish Before the Board Is Ready
Excess oil can leave an unpleasant, greasy surface. Applying finish over sanding dust also reduces the quality of the result.
Clean the board thoroughly and follow the finish manufacturer’s directions. Wipe away unabsorbed oil before kitchen use.
How Do You Clean and Maintain an End Grain Cutting Board?
Clean your board promptly after preparing food, then dry it thoroughly. Proper cleaning matters more than relying on the natural properties of the wood.
The USDA’s cutting board guidance discusses suitable cutting surfaces and hygiene practices.
Daily Cleaning Routine
- Remove food scraps promptly.
- Wash with warm water and dish soap.
- Scrub the cutting surface thoroughly.
- Rinse with clean water.
- Dry with a clean towel.
- Stand upright with airflow around both faces.
Avoid soaking the board or placing a glued end-grain board in the dishwasher. Prolonged moisture and heat can damage its construction.
Use separate cutting boards for raw animal products and ready-to-eat foods whenever practical. The University of Maine Cooperative Extension’s cutting board guide provides additional food-safety advice.
When Should You Reapply Oil?
Apply food-grade mineral oil whenever the surface looks dry or absorbs water quickly. There is no universal schedule for every wooden board.
For a worn surface, follow the techniques in my guide to refinishing a cutting board.
Inspect joints and corners regularly. Replace a board with deep, unrepairable cracks or surfaces that cannot be cleaned properly.
Recommended Products for Making an End Grain Cutting Board
If you’re preparing your first build, I would prioritize a suitable adhesive, reliable clamps, and a dedicated finishing product. These three options serve different stages of the project.
The star scores below represent editorial suitability for this DIY project, not verified customer review ratings or hands-on test results.
🏆 Best Wood Glue
Titebond III Ultimate Wood Glue
★★★★★ Editorial suitability: 5/5
This waterproof wood glue meets the manufacturer’s stated Type I water-resistance specification and has documented indirect food-contact suitability. I recommend it for cutting board glue-ups because the manufacturer specifically identifies cutting boards as an intended application.
🔧 Best Clamping Upgrade
Bessey K Body REVO JR Parallel Clamp
★★★★☆ Editorial suitability: 4/5
The REVO JR series features parallel jaws and a manufacturer-rated clamping force of up to 900 pounds. I favor parallel-jaw clamps for panel assembly because their broad contact surfaces make alignment easier to manage.
🌿 Best Finishing Conditioner
Howard Butcher Block Conditioner
★★★★☆ Editorial suitability: 4/5
Howard’s conditioner combines food-grade mineral oil with beeswax and carnauba wax. I recommend considering it after the initial oil treatment to help condition the surface and reduce moisture absorption.
Frequently Asked Questions
Can a Beginner Make an End Grain Cutting Board?
Yes, a beginner can make an end grain cutting board after learning basic milling, glue-up, and machine-safety techniques. However, it is more demanding than an edge-grain board. Start with a rectangular design, accurately prepared lumber, and access to a suitable end-grain flattening method. Consider building an edge-grain board first.
How Thick Should an End Grain Cutting Board Be?
A thickness of approximately 1.5–2 inches is a practical target for many homemade end-grain boards. Thicker boards can feel substantial and provide material for future resurfacing, but they also become heavier. Choose the finished thickness based on your lumber, available tools, planned dimensions, and handling preferences.
Can You Make an End Grain Cutting Board Without a Planer?
Yes. You can start with accurately milled lumber and use a router sled or suitable surface sander to flatten the completed board. A conventional thickness planer is not recommended for the finished end-grain surface. If you lack appropriate surfacing equipment, consider using a woodworking shop that offers this service.
What Glue Is Best for an End Grain Cutting Board?
Titebond III Ultimate Wood Glue is a widely used option because its manufacturer recommends it for cutting board construction. It offers strong water resistance and documented suitability for indirect food contact. Apply it to properly prepared mating surfaces and allow adequate curing time before machining or using the finished board.
How Often Should You Oil an End Grain Cutting Board?
Oil the board when its surface looks dry or no longer resists moisture as well as expected. Frequency depends on washing, kitchen humidity, and daily use. Apply food-grade mineral oil to a clean, dry surface, allow absorption, and remove excess oil. Regular conditioning does not replace proper cleaning.
Final Thoughts: Build Your Own End Grain Cutting Board
Making an end grain cutting board requires patience, precise measurements, and two careful glue-ups. The finished result can offer a functional cutting surface with a beautiful hardwood pattern.
I recommend choosing maple for the main body, adding walnut for contrast, and keeping the first design straightforward. Take extra care when flattening the completed end-grain panel.
Most importantly, use suitable materials and maintain the board properly. Good cleaning, thorough drying, and occasional oiling help protect your work.
Ready to get started? Choose your hardwood, sketch a simple pattern, and prepare your tools before the first cut.