Chef Knife Sharpening Mistakes: 12 Fixes That Work
Quick Answer
Most chef knives stay dull because the angle changes during the stroke, the edge never reaches its apex, or a thin burr is left on the blade. Keep one steady angle, sharpen until a small burr forms along the whole edge, then remove it with light finishing strokes. A honing rod alone will not fix a truly dull knife.
Why Most Sharpening Sessions Fail
Sharpening removes a little steel until the two sides meet in a clean apex. If that point is rounded, uneven, or covered by a folded flap of metal, the knife may look shiny and still cut poorly. Use the symptom first, then check the likely cause.
| Symptom | Likely mistake | First fix |
|---|---|---|
| Sharp briefly, then dull | Burr left on the edge | Light alternating strokes, then strop |
| Never feels sharp | Angle changes, or apex never reached | Hold one angle; check for a full burr |
| Steers in dense food | One side worked much more | Work both sides evenly |
| Tip fails while heel cuts | Tip lifted or skipped | Follow the belly curve to the tip |
| Edge chips soon after | Angle too thin, or too much pressure | Use a sturdier angle, lighter pressure |
1. Treating Honing as Sharpening
Honing mainly realigns an edge that has bent slightly. Sharpening removes steel and creates a new edge. If a knife skates across tomato skin or needs force to start a cut, honing is unlikely to be enough.
The reverse mistake also wastes steel: sharpening a knife that only needed honing. If it still cuts cleanly but feels less crisp, hone it. If it is genuinely dull, use a stone. See do you need a honing rod.
2. Changing the Angle Mid-Stroke
 Save
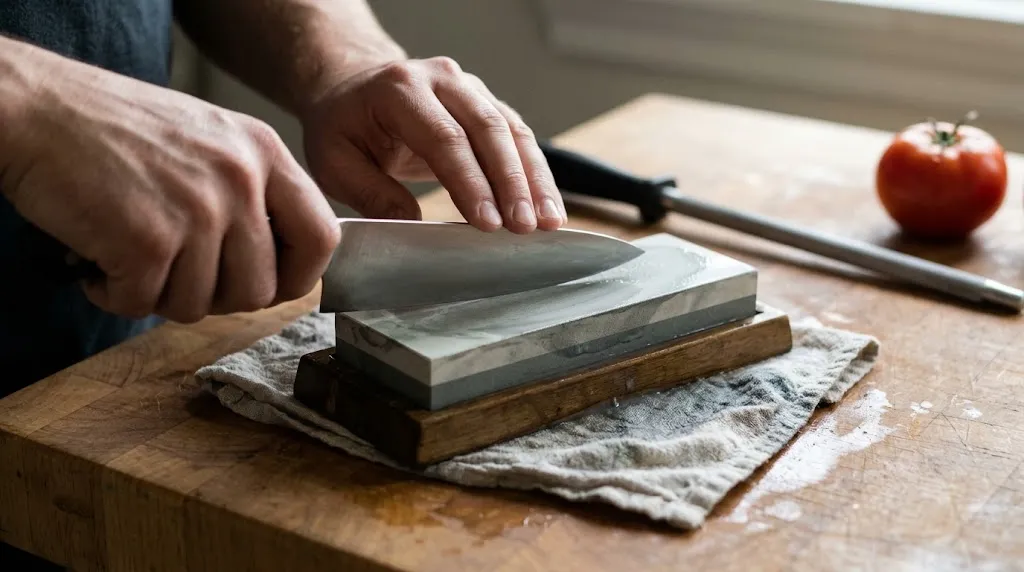
Even a small wobble rounds the bevel instead of forming a clean apex. The usual cause is movement from the wrist, especially near the tip, where the hand naturally lifts. Lock the wrist, move from the shoulder, and slow down.
Do not assume one universal angle either. Many Western-style knives are described as 20 degrees per side and many Japanese-style knives as 15 degrees, but makers differ. WÜSTHOF’s sharpening guide lists 14 degrees per side for standard blades and 10 degrees for Asian-style blades. Match the existing bevel and maker’s guidance.
Tip
Colour the bevel with a marker, make one light pass, and see where the ink is removed. Ink removed only at the shoulder means the angle is too steep. Ink removed without reaching the apex usually means it is too shallow.
See the chef knife edge angle guide for per-side and inclusive angles.
3. Pressing Too Hard
Heavy pressure makes angle control harder, wears the stone unevenly, and can round the edge. On a fine stone, it can also leave deeper scratches than intended.
Let the abrasive work: moderate pressure on coarse grit, lighter pressure on fine grit. Hard honing can also bend or round the edge.
4. Stopping Before the Burr Forms
A burr is a thin ridge pushed to the opposite side as steel is removed. It shows sharpening has reached the apex there. If none forms, the stone may be polishing the blade side without reaching the edge.
This often happens with too shallow an angle, too few passes, or a fine stone on a genuinely dull knife. Check heel, middle, and tip separately.
5. Leaving the Burr on the Finished Edge
This is the classic false-sharp result. A burr feels extremely sharp, then folds over during the first few cuts.
After a burr forms on both sides, use light, alternating strokes on a finer grit. An edge-trailing strop can remove the last trace.
Key Insight
Sharp to the touch is not the same as sharp in use. A burr is sharp because it is thin and weak. A finished edge is sharp because it is clean, continuous, and supported by the steel behind it.
6. Using the Wrong Grit, or Skipping Grits
Match grit to the edge. A very dull or chipped knife needs a coarse stone first; a slightly dull knife does not need aggressive grinding. Starting too coarse wastes steel; starting too fine wastes time.
Skipping from coarse straight to very fine also backfires: the fine stone must remove deep coarse scratches it is not designed to clear efficiently. Move through grits in order. For routine work, a medium stone around 1000 grit is a practical workhorse.
7. Sharpening One Side More Than the Other
Uneven work creates an uneven bevel, so the knife can steer in dense food. Counting strokes helps, but check the burr and bevel on each side, not just the pass count.
For a normal double-bevel knife, treat both sides equally. Single-bevel knives are the exception, sharpened mainly on one side; treating one like a double-bevel knife can damage its geometry.
8. Neglecting the Tip and Heel
A chef’s knife has a curved belly near the tip, and the heel can be hard to reach with a full bolster. A straight stroke can miss the curve, leaving a dull tip while the middle feels sharp.
Follow the curve near the tip, rather than lifting the handle suddenly. Start far enough back to include the heel, then check tip and heel separately.
9. Using the Wrong Tool for the Knife
Pull-through and many electric sharpeners are fast, but they remove steel aggressively and often impose a fixed angle. That may suit an inexpensive soft-steel knife, but it is a poor routine choice for a hard, thin Japanese edge.
Serrated knives are a separate case: a flat stone will not sharpen them correctly, and a pull-through device can damage them. Most need a tapered rod matched to the serration, or professional service. Also, do not put oil on a water stone; mixing lubricants can clog the abrasive.
10. Sharpening on a Dished, Dry, or Dirty Stone
A dished stone has a hollow from repeated use in one spot, making a steady angle almost impossible because the blade rocks into the dip. Use the full surface and flatten it periodically.
A dry or clogged stone cuts unevenly and can scratch the blade. Soak a water stone as directed, re-wet it during the session, rinse it afterward, and let it dry fully.
11. Sharpening Too Often, or Waiting Too Long
Sharpening weekly, when honing would have been enough, removes steel unnecessarily. Waiting until the knife is completely blunt makes repair harder.
Hone when the edge feels less crisp; sharpen when cutting needs noticeable force or the knife skates on tomato skin. See how often to sharpen kitchen knives. If a hard-steel knife chips repeatedly, check the chef knife steel chipping guide first.
12. Undoing a Good Edge After Sharpening
Some edges are lost after sharpening. Glass, stone, ceramic, and metal surfaces dull an edge quickly, as do loose drawers and dishwasher cycles.
Use wood or plastic boards, store the knife in a block, on a magnetic strip, or in a guard, and wash and dry it by hand. These habits protect a sharp edge and reduce how often sharpening is needed.
Warning
Do not test sharpness by running a thumb along the edge or pressing it into skin. Use paper, a ripe tomato, or a controlled cutting test instead, and keep fingers clear of the blade path while sharpening.
How to Tell Which Mistake You Made
 Save
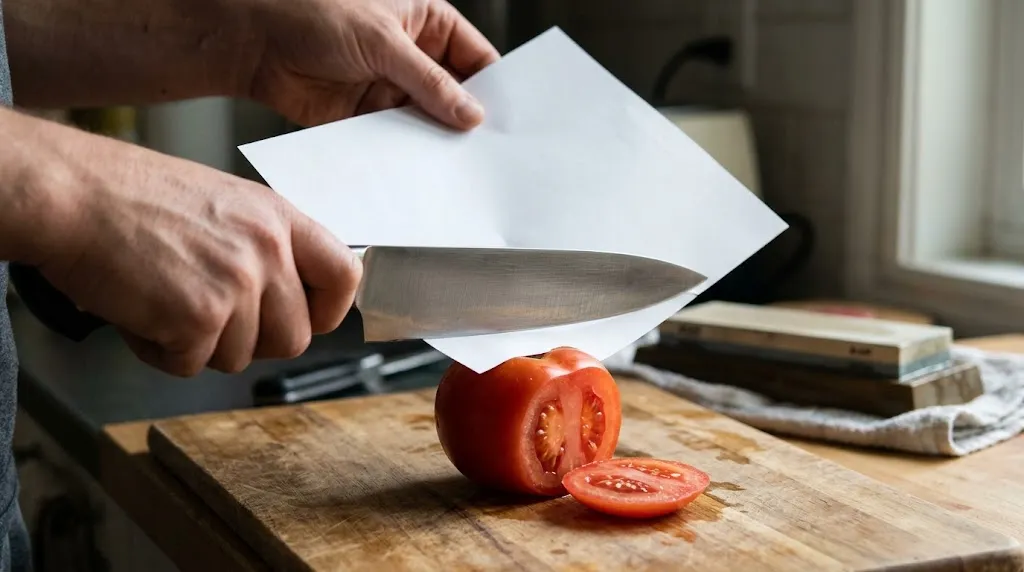
Hold a sheet of paper by one corner and slice downward. A clean, quiet cut suggests a continuous edge; tearing or skating suggests a dull section, burr, or uneven bevel.
Next, try a ripe tomato using only the knife’s weight and a gentle draw. If it bites immediately, the apex is working; if it skates, the edge was not fully formed or has folded. Check tip and heel separately. See how to test if a knife is sharp.
A Simpler Reset When the Edge Has Gone Wrong
Do not add random passes. Start with a flat, prepared stone and a suitable grit. Hold one angle, work one side until a burr forms along the full edge, repeat evenly on the other side, then finish with light alternating strokes.
Test after finishing, not after every coarse pass. If it still fails, check angle, burr, tip coverage, and stone flatness before blaming the steel. See how to sharpen a chef knife. For a badly chipped or valuable knife, professional sharpening is sensible.
Related Product
Whetstone Sharpening Stone Kit
A combination whetstone gives a practical way to practise a steady angle, repair a dull edge, and finish it cleanly without relying on a fixed-angle pull-through sharpener.
As an Amazon Associate, we earn from qualifying purchases.
Frequently Asked Questions
Can honing fix a dull chef knife?
No, not if the knife is truly dull. Honing mainly realigns a slightly bent edge. A knife that skates on tomato skin, needs force to start a cut, or has a rounded or chipped edge needs sharpening, which removes steel and creates a new apex.
Why does my knife feel sharp and then go dull very quickly?
A leftover burr is the most common cause. The thin flap feels sharp at first, then folds over during use and leaves a rough, dull edge. Finish with light, alternating strokes on a fine stone or strop, and test after deburring rather than before.
What angle should I sharpen a chef knife at?
Match the knife’s existing bevel and the manufacturer’s guidance when available. Many Western-style knives are around 20 degrees per side and many Japanese-style knives around 15 degrees per side, but this varies: WÜSTHOF, for example, lists 14 degrees per side for standard blades. Consistency at the correct angle matters more than chasing a single universal number.
How often should I sharpen instead of honing?
Hone when the edge feels slightly less crisp but still cuts. Sharpen when the knife needs noticeable force, skates on tomato skin, or fails a paper test. For many home cooks, that means honing regularly and sharpening every few months, but use and cutting surfaces change the timing.
Can I permanently ruin a chef knife by sharpening it wrong?
Most ordinary mistakes can be corrected by re-establishing the correct angle and removing the burr, although repeated aggressive grinding shortens the blade. Severe overheating, deep chips, a badly reshaped tip, or damage to a single-bevel knife are harder to fix and may need professional help.
Should I use a pull-through sharpener on an expensive Japanese knife?
It is usually a poor choice. Pull-through sharpeners can remove steel aggressively and impose a fixed angle that does not suit a hard, thin edge, increasing the risk of chipping and shortening the knife’s life. A whetstone, used at the correct angle with light finishing pressure, gives much better control.
Conclusion
A dull result after sharpening is usually a signal, not a verdict on the knife. Check the angle, then whether the apex was reached, then whether the burr was removed. Fix those three steps, match the tool to the knife, and protect the edge with a suitable board and storage.