Chef Knife Burr Won’t Remove? How to Fix a Stubborn Burr
Quick Answer
If a chef knife burr won’t remove, stop using heavy pressure and check whether the burr is folding from side to side instead of coming off. Use a suitable sharpening stone, maintain a consistent bevel angle, and make controlled passes to cut away the remaining wire edge. Finish with light alternating strokes and careful stropping if necessary, then test the edge on paper.
How to fix a stubborn burr
- Check the entire edge: Inspect the heel, middle, and tip for a remaining wire edge.
- Reduce pressure: Heavy strokes can bend the burr back and forth rather than remove it.
- Keep your angle steady: Match the existing bevel instead of rounding the cutting edge.
- Alternate sides: Make controlled passes on each bevel to reduce the burr.
- Refine the edge: Use a suitable finer abrasive and a few gentle stropping passes when appropriate.
- Verify sharpness: Check whether the knife slices paper cleanly without snagging.
One important safety tip
- Never slide your finger along the cutting edge to check for a burr. Inspect it under good light or use a cautious, spine-to-edge check with your finger kept away from the sharp edge.
A chef knife burr that refuses to disappear can turn a promising sharpening session into a frustrating cycle of grinding and testing. The knife may even seem sharp at first, only to lose its cutting ability after a few slices.
I’ll explain how to identify the cause, remove a stubborn wire edge, and avoid wasting steel on unnecessary sharpening. You’ll also learn when a different stone, a leather strop, or a professional sharpening service makes more sense.
What Is a Burr on a Chef Knife?
A burr is a thin flap or wire of steel that folds over the cutting edge during sharpening. It forms when an abrasive removes steel from one bevel and pushes some material beyond the edge toward the opposite side.
A burr is useful because it helps confirm that sharpening has reached the cutting edge. However, a burr left attached is not the same as a clean, stable cutting edge.
Why does a burr form in the first place?
Imagine sharpening the right side of your chef knife on a whetstone. As the abrasive works toward the apex, a tiny ridge of steel may develop on the left side.
That ridge is the burr. After reaching the apex, you switch sides, refine the bevels, and remove the remaining weak metal.
- Healthy sharpening progress: A small burr develops along the section being sharpened.
- Incomplete sharpening: Some sections never reach the apex, so the edge remains dull in those spots.
- Incomplete deburring: The bevels meet, but a thin flap of steel remains attached.
These problems require different fixes. First, determine whether you’re dealing with a stubborn burr or an edge that was never fully sharpened.
Why Won’t My Chef Knife Burr Come Off?
 Save
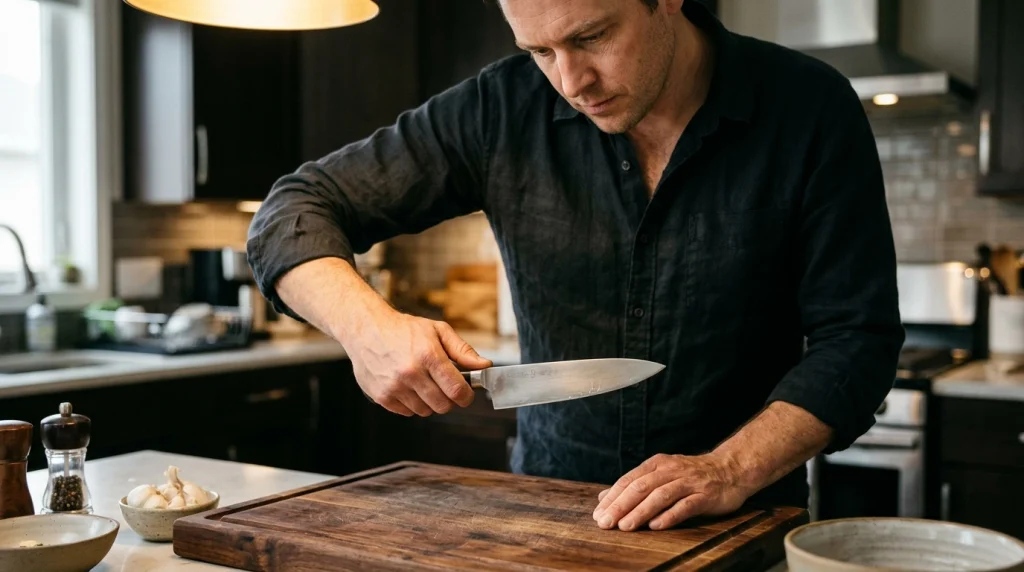
A stubborn burr usually results from excessive pressure, inconsistent sharpening angles, an unsuitable finishing technique, or a burr that has become folded over instead of being cut away. Identifying the cause helps you avoid repeatedly sharpening the same section without improving the edge.
1. You’re using too much pressure
Heavy pressure can push the thin burr from one side to the other. The edge may feel different after every pass, but the wire remains attached.
Reduce your pressure during finishing. Let the abrasive do the work, and use controlled strokes rather than forcing the blade into the stone.
2. Your sharpening angle keeps changing
If your wrist rises or drops during each stroke, the stone may contact different parts of the bevel. This makes it harder to remove the remaining metal cleanly.
Maintain a steady angle that matches the knife’s existing bevel. A permanent marker can help you check your technique by showing where the stone contacts the bevel.
3. You’re using the wrong grit for the problem
A coarse stone removes metal quickly, but it can leave a substantial burr. A very fine stone may struggle to correct a poorly formed edge if the underlying bevel still needs substantial work.
Use a suitable medium-grit stone to establish the edge, then move to a finer abrasive for refinement. You don’t need to jump to an extremely high grit just because the burr is stubborn.
4. You’re alternating sides before reaching the apex
Switching sides too early can leave sections of the edge incompletely sharpened. The result may be a mixture of dull spots, small burrs, and areas that cut well.
When establishing a new edge, work one side until you can confirm a small burr along the full length. Repeat on the opposite side before beginning the deburring stage.
5. The burr is folded over rather than removed
A thin wire edge can bend repeatedly as you sharpen. This is especially frustrating when you alternate strokes but keep using enough pressure to push the burr back and forth.
If the burr continues to flip sides, stop repeating the same finishing strokes. Re-establish a clean edge with controlled sharpening, then use a deliberate deburring method.
How Do You Remove a Stubborn Burr From a Chef Knife?
The most reliable approach is to correct the edge, reduce the burr with controlled abrasive contact, and verify that the cutting edge is clean. Don’t rely on stropping alone when a large or persistent wire edge remains.
Step 1: Clean the blade and inspect the edge
Wipe away metal particles and sharpening residue. Under a bright light, inspect the cutting edge from heel to tip, looking for shiny reflections, irregularities, or a visible wire edge.
A small magnifier can help you examine problem areas. Avoid running a fingertip along the edge or squeezing the blade to feel for a burr.
Step 2: Return to a suitable sharpening stone
If the edge is uneven or the burr is substantial, return to a stone capable of cutting the bevel effectively. A medium stone around 800–1,000 grit is a useful starting point for many routine sharpening jobs, although damaged edges may require a coarser abrasive.
Keep the blade angle consistent. Use controlled passes to establish a clean apex instead of trying to grind away the burr with random movements.
Step 3: Confirm the bevel reaches the edge
Work carefully along the heel, belly, and tip. A knife can develop a burr in the middle while missing the heel or tip, leaving the edge inconsistent.
If you’re unsure whether the stone is contacting the right area, color the bevel with a marker and make a few controlled strokes. The removed ink reveals where the abrasive is contacting the steel.
Step 4: Reduce the burr with alternating strokes
Once the edge has been established on both sides, make light, alternating passes at the same sharpening angle. Reduce pressure progressively as the burr becomes smaller.
- Use full, controlled strokes that cover the intended section of the blade.
- Alternate sides instead of repeatedly pushing the burr in one direction.
- Keep the angle stable and avoid pressing hard into the stone.
- Inspect the edge frequently rather than relying on a fixed stroke count.
If the wire edge remains stubborn, a few controlled passes on an appropriate medium or fine stone may be needed to cut it away. Avoid endless feather-light strokes that merely bend the burr without removing its root.
Step 5: Refine the edge and strop if needed
After removing the substantial burr, move to a suitable finer stone if your sharpening sequence calls for it. Finish with a few gentle alternating passes, keeping the bevel angle consistent.
A leather strop can help remove tiny remnants and refine the apex. Use edge-trailing strokes, moving the blade with its spine leading so the cutting edge doesn’t slice into the leather.
Step 6: Test the result safely
Wipe the blade clean and test it on a sheet of ordinary paper. A properly finished edge should cut smoothly without repeatedly snagging or tearing.
Then test the knife on food using a stable cutting board. If it struggles in one section, revisit that section instead of sharpening the entire blade unnecessarily.
Which Sharpening Method Works Best for a Burr That Won’t Remove?
The best method depends on whether the burr is large, folded, or nearly removed. A stone is generally the better choice for correcting an attached wire edge, while a strop is most useful for final refinement.
| Method | Best use | Main limitation |
|---|---|---|
| Medium whetstone | Correcting an uneven edge and cutting away a stubborn burr | Requires angle control and consistent technique |
| Fine whetstone | Refining an established edge and reducing a small burr | May be inefficient for major edge damage |
| Leather strop | Finishing and removing tiny residual wire-edge remnants | Cannot reliably correct a badly formed bevel |
| Guided sharpening system | Maintaining a repeatable sharpening angle | Requires the right setup and suitable abrasives |
| Professional sharpening | Severe damage, unusual geometry, or persistent problems | Involves a service cost and handing over the knife |
For most home cooks, a suitable whetstone and careful technique are enough. A guided system can help if maintaining a consistent angle is your biggest challenge.
Can a Leather Strop Remove a Burr From a Chef Knife?
Yes, a leather strop can help remove a tiny remaining burr, but it isn’t a universal fix for a stubborn wire edge. The result depends on the burr’s size, the condition of the bevel, and how you use the strop.
Use edge-trailing movements and light pressure. Keep the blade aligned with its existing bevel, and avoid dragging the cutting edge forward into the leather.
Too much pressure can round the apex or cut into the strop. If the burr continues to fold over after stropping, return to a suitable sharpening stone rather than adding more pressure.
Plain leather may be enough for final refinement. Some sharpeners use a suitable polishing compound, but the compound should match the intended finishing process rather than serve as a substitute for proper sharpening.
How Can You Tell Whether the Burr Is Gone?
A burr-free knife should have a consistent cutting edge rather than a fragile wire that temporarily creates a sharp sensation. No single test proves everything, so combine careful visual inspection with a practical cutting test.
- Visual inspection: Examine the edge under bright light for irregular reflections or obvious wire-like projections.
- Magnification: Inspect sections that repeatedly snag or lose sharpness.
- Paper test: Check whether the knife cuts smoothly without catching in the same spot.
- Food test: Make a controlled cut through a tomato or another suitable ingredient on a stable board.
Don’t mistake initial bite for lasting sharpness. A folded burr can catch paper or skin-like surfaces briefly while the underlying edge remains weak.
What Mistakes Make a Chef Knife Burr Harder to Remove?
Repeated sharpening doesn’t guarantee a better edge. Several common habits can prolong the problem and remove more steel than necessary.
- Applying heavy pressure: This can fold the burr instead of cutting it away.
- Changing angles mid-stroke: Inconsistent bevel contact makes the edge harder to refine.
- Using only a strop: A large burr usually needs proper abrasive work first.
- Sharpening past the stopping point: Excessive grinding wastes steel and can damage the blade’s geometry.
- Ignoring the heel and tip: Uneven sharpening can leave isolated dull patches.
- Testing with a finger along the edge: This creates an unnecessary risk of a serious cut.
Good sharpening is controlled metal removal. Work only as much as needed to restore a clean, consistent edge.
When Should You Replace the Stone or Get Professional Help?
If your sharpening technique seems consistent but the stone barely cuts, check its condition before blaming the knife. A clogged surface or dished whetstone can make it difficult to maintain contact across the bevel.
Clean the stone according to its manufacturer’s instructions and flatten it if the stone requires flattening. If the blade has deep chips, significant damage, or a badly altered bevel, professional sharpening may be the safer and more efficient option.
Different steels also respond differently to abrasives. A hard, wear-resistant chef knife may need an abrasive suited to its steel, while a softer blade may develop a more persistent, flexible wire edge.
As of 2026, the basic principle remains the same: reach the apex, remove the weak burr, and confirm the edge with a practical test. More equipment isn’t automatically better.
For most home kitchens, you can solve this problem without buying an entirely new sharpening setup. If your current stone cuts effectively, focus on technique first.
Which Tools Help Remove a Stubborn Knife Burr?
 Save
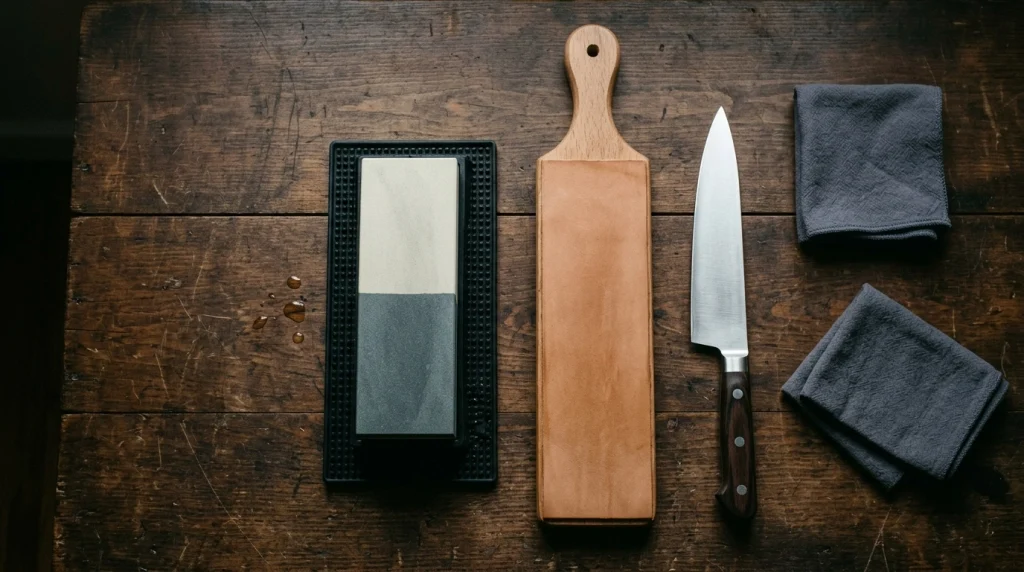
The most useful tools are a reliable sharpening stone and, optionally, a leather strop. Choose equipment based on the problem you’re trying to solve rather than buying several products at once.
These options are worth considering if you need to replace worn equipment or make your sharpening process easier to control.
BEST FOR GENERAL SHARPENING
KING KW65 Combination Whetstone
★★★★☆
This combination stone offers coarse and fine sharpening surfaces for routine kitchen-knife maintenance. I’d prioritize a dependable stone like this over an expensive finishing accessory when the edge still needs proper sharpening.
BEST FOR FINAL REFINEMENT
BeaverCraft Leather Knife Strop
★★★★☆
A leather strop can help refine an already sharpened edge and address tiny residual burrs. I’d treat it as a finishing tool, not a replacement for a stone when a substantial wire edge remains.
Product specifications, included accessories, and availability can vary by listing. Check the current product details before purchasing, and make sure the equipment suits your knife and sharpening method.
Frequently Asked Questions
Why does my chef knife still have a burr after stropping?
A burr may remain after stropping if it is too large, folded over, or attached to an incompletely sharpened edge. Return to a suitable stone, establish a clean apex, and remove the remaining wire with controlled passes before trying the strop again.
Should I use more pressure to remove a stubborn burr?
Not automatically. Heavy pressure can bend the burr from one side to the other and may damage the edge. Use controlled pressure appropriate to the stone, maintain a consistent angle, and reduce pressure during the finishing stage.
Can I remove a knife burr with a honing rod?
A honing rod can realign some rolled edges, depending on the rod and the knife steel, but it is not a reliable substitute for deburring after sharpening. If a wire edge remains attached, return to an appropriate abrasive and remove it carefully.
Why does my knife feel sharp but become dull after a few cuts?
A remaining wire edge may fold over or break away during cutting, causing the knife to lose its initial bite. An incomplete or damaged apex can produce similar symptoms. Inspect the edge, correct the bevel if needed, and verify the finished edge on paper and food.
How many strokes does it take to remove a burr?
There is no reliable universal stroke count. The result depends on the burr’s size, the steel, the abrasive, and your technique. Use the condition of the edge as your guide, inspect it frequently, and stop once you’ve achieved a clean, consistent cutting edge.
Final Takeaway: Fix the Edge Before Sharpening More
When a chef knife burr won’t remove, the answer usually isn’t to keep grinding harder. Check whether the burr is folding, confirm that the bevel reaches the apex, and use controlled alternating passes to remove the remaining weak steel.
Finish with a suitable finer abrasive and light stropping when necessary. With a consistent technique and careful testing, you can restore a dependable cutting edge without removing more steel than the job requires.
Affiliate disclosure: This article contains affiliate links. If you purchase through these links, Cooking Flavour may earn a commission at no additional cost to you.