Can You Use a Chef Knife to Cut Herbs? Knife Skills & Guide
Quick Answer
Yes, an 8-inch or 10-inch chef’s knife is widely regarded by professional culinary institutions as the best all-around tool for cutting fresh herbs. Its curved belly allows for a fluid rocking motion that slices through cell walls cleanly rather than crushing them. The single condition is blade sharpness: a dull chef’s knife will bruise delicate herbs, turning them dark and leaching bitter chlorophyll onto your cutting board.
Home cooks frequently wonder if their standard chef’s knife is too large or cumbersome for fragile leafy plants like cilantro, basil, or chives. In culinary practice, however, a standard chef’s knife is actually the primary workhorse for this task.
The length and curve of the blade provide mechanical leverage that smaller blades cannot replicate. Understanding how to handle the knife, select the right cutting motion, and prep your greens will keep your herbs bright, aromatic, and free from discoloration.
Why a Chef’s Knife Is Ideal for Fresh Herbs
A standard Western chef’s knife features a continuous curve along its cutting edge, commonly referred to as the “belly.” This curved profile is engineered specifically for circular rocking cuts against a cutting board.
When you cut herbs, the goal is clean cellular separation. Fresh herb leaves contain fragile cell walls loaded with aromatic essential oils, moisture, and chlorophyll. If you exert downward pressure without forward or backward motion, you rupture those cell membranes indiscriminately.
According to culinary technique resources from organizations like the Culinary Institute of America, a sharp edge guided by a rhythmic rocking motion slices cleanly through the plant tissue. This clean incision seals in volatile aromatic compounds until the food is consumed, preserving peak flavor and preventing moisture loss.
Furthermore, the broad face of a chef’s knife serves as an efficient bench scraper. Once your herbs are minced or sliced, you can tilt the spine slightly and scoop the pile directly into a bowl or pan without reaching for another kitchen tool.
Key Insight
Herbs turn black or wet on a cutting board because dull blades compress and crush plant cells instead of shearing them. A razor-sharp chef’s knife preserves the crisp cell structure, retaining volatile aromatic oils inside the leaf rather than leaving them behind on the wood.
Tender Herbs vs. Woody Herbs: How the Blade
Interacts
 Save
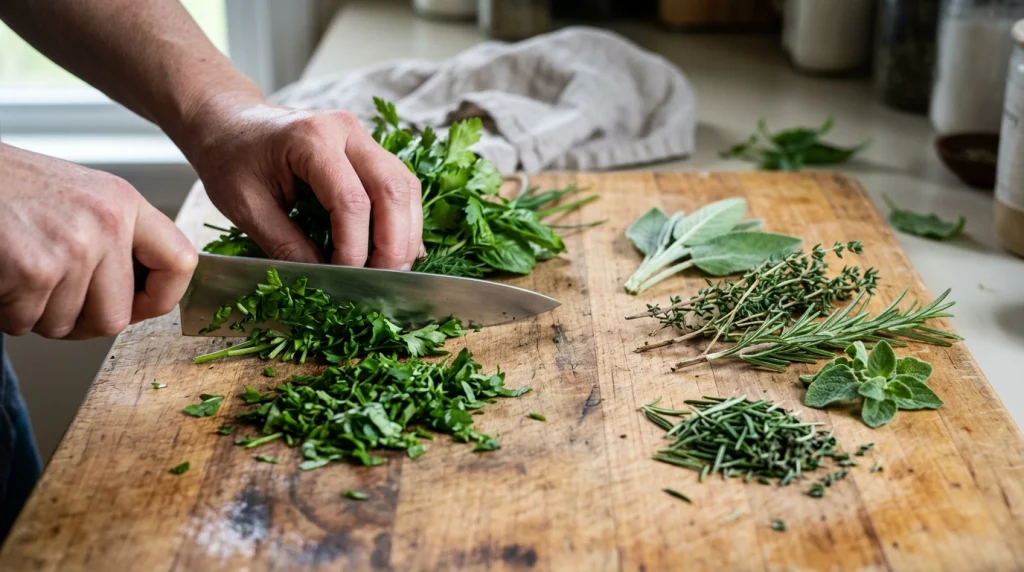
SaveCulinary herbs fall into two distinct structural categories: tender and woody. The knife technique and edge contact you use must adapt to the botanical structure of the herb you are preparing.
Working With Tender Herbs
Tender herbs have soft stems and delicate leaves. This group includes:
- Flat-leaf Italian parsley and curly parsley
- Cilantro (coriander leaves)
- Sweet basil and Thai basil
- Fresh dill and chervil
- Mint
- Chives and scallion greens
Because tender herbs possess minimal structural lignin, they bruise easily under dull steel. Soft herbs require a slicing motion with minimal downward force. For leafy varieties like parsley and cilantro, soft upper stems can often be chopped along with the leaves, as they carry significant flavor and tender texture.
Handling Woody Herbs
Woody herbs grow on semi-rigid, fibrous stems that are unpleasant to chew. Common examples include:
- Rosemary
- Thyme
- Oregano
- Sage
- Winter savory
- Marjoram
Before bringing a chef’s knife to woody herbs, you must strip the leaves from the fibrous stems by pulling backwards against the direction of leaf growth. Once stripped, woody herb leaves are denser and contain less ambient surface moisture than tender varieties. They tolerate a brisk, repeated cross-chop without immediate enzymatic browning.
| Herb Category | Common Examples | Recommended Knife Action | Primary Risk |
|---|---|---|---|
| Tender Leaf | Parsley, Cilantro, Mint | Rock-chop with forward glide | Enzymatic bruising, moisture weeping |
| Broad Leaf | Basil, Sage | Single-pass chiffonade (thin ribbon slicing) | Blackened cut edges from repeated chopping |
| Tubular | Chives, Scallions | Push-cut or draw-cut across the cylinder | Flattened hollow rings, tearing |
| Woody & Needle | Rosemary, Thyme | Two-handed pivot rocking mincing | Uneven coarse fragments, tough mouthfeel |
Comparing herb tissue structures helps determine whether a single slicing pass or an active rocking motion produces the best culinary result.
Step-by-Step: The Correct Cutting Techniques
Using a chef’s knife to process herbs demands deliberate grip mechanics and controlled edge travel. You should never hack straight down onto the cutting board like an axe.
1. The Foundation: Hand Position and Grip
Hold the knife with a classic culinary pinch grip. Grasp the heel of the blade between your thumb and the base of your index finger, wrapping your remaining three fingers securely around the handle. This grip gives you direct balance and prevents the knife from wobbling side-to-side.
Your non-knife hand should form a protective “claw.” Curl your fingertips inward toward your palm like a bear claw, resting your flat fingernails and knuckles against the flat side of the knife blade. This guides the cutting plane while keeping your fingertips safely tucked away from the sharp edge.
2. The Rock-Chop Method (Best for Parsley, Cilantro, and Stripped Herbs)
- Anchor the tip: Place the front third of the knife blade on the cutting board just beyond your pile of herbs.
- Form a bundle: Compress your washed and dried herbs into a dense mound with your guiding hand.
- Initiate the roll: Lower the heel of the knife smoothly through the herb cluster while keeping the tip in contact with the board. Push forward slightly as you descend to initiate a slicing action.
- Advance the blade: Raise the rear of the blade, slide the knife laterally by a fraction of an inch, and repeat the rocking stroke across the entire pile.
- Cross-chop to finish: For a fine mince, gather the cut herbs into a tight pile. Place the palm of your non-dominant hand flat on the spine near the tip of the blade, keeping your fingers straight up and away from the edge. Pivot the blade across the pile in a wide semi-circle until the desired size is achieved.
3. The Chiffonade Technique (Best for Basil and Mint)
Broad leaves like basil turn brown rapidly if subjected to a repeated cross-chop. The French chiffonade technique creates thin, uniform ribbons in a single cutting stroke:
- Stack 5 to 8 clean, thoroughly dried basil leaves on top of one another, aligning their stems and tips.
- Roll the stacked leaves tightly into a compact cylinder, similar in shape to a cigar.
- Position the cylinder perpendicular to your knife blade.
- Using the curved belly of the chef’s knife, slice thinly across the cylinder using gentle forward push-cuts spaced roughly 1/8-inch apart.
- Unfurl the sliced rings with your fingertips into delicate ribbons. Make only one pass; never chop back over basil ribbons once cut.
Tip
Always dry washed herbs completely using a salad spinner or dry paper towels before cutting. Residual surface water creates capillary tension that pulls plant sap out of ruptured cells, accelerating oxidation and sticking leaves to your knife blade.
Chef’s Knife vs. Alternative Kitchen Cutlery
While an 8-inch chef’s knife is the most adaptable blade in the kitchen, cooks often evaluate other tools for processing herbs. Understanding the mechanical differences helps you choose the right tool for specific kitchen tasks.
Chef’s Knife vs. Santoku
A Japanese Santoku knife typically has a flatter cutting edge with a blunted sheep’s foot tip. Instead of a circular rock-chop, a Santoku relies on a vertical “push-cut” motion (moving down and forward simultaneously). A Santoku excels at slicing chives cleanly into uniform rounds without accordioning them together. However, for continuous cross-chopping of parsley or rosemary mounds, a Western chef’s knife with a curved belly is faster and requires less wrist repositioning.
Chef’s Knife vs. Paring Knife
Paring knives are engineered for in-hand tasks like peeling fruit, trimming blemishes, or coring vegetables. A paring knife has insufficient knuckle clearance when used against a flat cutting board. When you try to chop herbs with a paring knife, your fingers hit the wood before the blade edge completes its stroke, forcing you to use awkward wrist angles and crushing the leaves.
Chef’s Knife vs. Mezzaluna
A mezzaluna is a curved, crescent-shaped blade equipped with one or two handles on top, engineered explicitly for rocking back and forth through herbs. While a mezzaluna performs exceptionally well for mincing large batches of dry, woody herbs into pastes, it is a single-purpose tool. Setting up, handling, and cleaning a mezzaluna requires extra effort compared to a versatile chef’s knife that is already resting on your cutting board.
Chef’s Knife vs. Herb Scissors
Specialty multi-blade herb shears promise quick mincing, but they work by pinching plant material between competing scissor blades. In practice, multi-blade scissors often compress delicate leaves and create jagged tears. They are also notoriously difficult to clean and dry thoroughly between uses.
Warning
Never scrape your chopped herbs across the cutting board using the sharp edge of your knife. Dragging the acute bevel across hard wood or plastic rolls the microscopic apex of the steel, dulling the knife rapidly. Always flip the knife over and scrape using the thick, unsharpened spine.
Critical Factors That Prevent Bruising and Discoloration
 Save
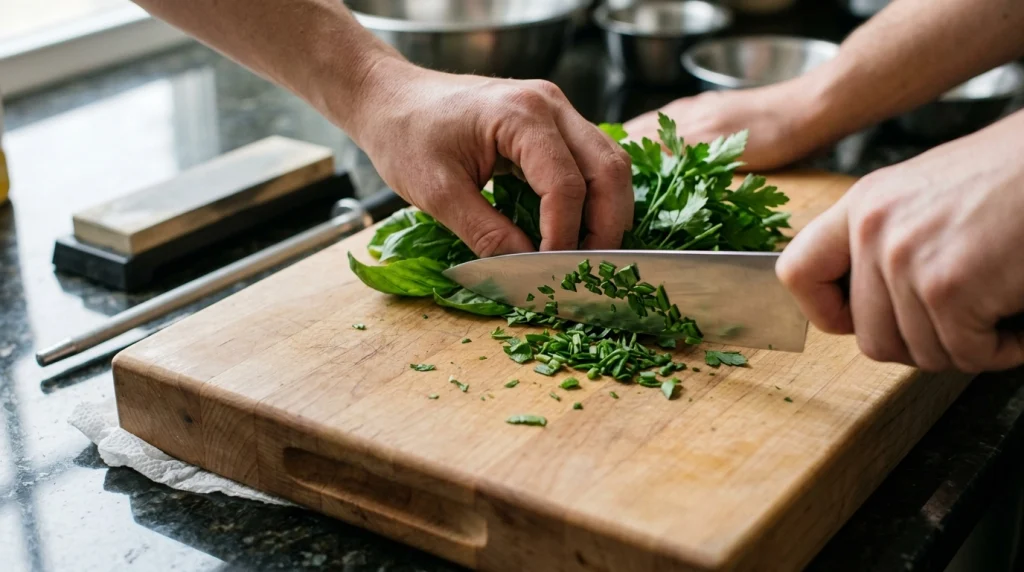
SaveIf your herbs turn dark brown or leave a green paste on your cutting surface, the issue rarely lies with the knife category. Instead, it traces back to blade geometry, cutting surface selection, and steel maintenance.
Blade Sharpness Is Mandatory
A dull knife exerts blunt downward compression on herb leaves. This force bursts vacuoles inside the cells, liberating polyphenol oxidase enzymes. When these enzymes contact ambient oxygen, rapid enzymatic browning occurs. A razor-sharp edge shears through cell walls with minimal friction, preserving pristine green edges.
The Right Cutting Board Surface
Always use a stable wooden cutting board (such as end-grain or edge-grain maple or walnut) or a high-density food-grade polyethylene board. Wood has natural give that yields gently to a razor-sharp apex. Avoid cutting herbs on glass, granite, ceramic, or marble counters. Hard non-yielding surfaces immediately dull or chip fine knife edges, guaranteeing crushed herbs on subsequent cuts.
Eliminate Board Slip
A cutting board that shifts under your knife compromises edge precision and creates serious slip hazards. Place a damp paper towel, a non-slip silicone mat, or damp rubber shelf-liner directly under your cutting board before beginning your prep.
Related Product
Whetstones and Knife Sharpening Systems
A reliable whetstone or sharpening tool keeps your chef’s knife razor-sharp, preventing delicate leafy herbs from bruising, weeping, or turning brown.
As an Amazon Associate, we earn from qualifying purchases.
Frequently Asked Questions
Is an 8-inch chef’s knife too big to cut small herbs?
No, an 8-inch chef’s knife is not too large for herbs. The blade length provides ample balance and leverage, while the curve allows your guiding knuckles to rest comfortably without striking the board. Smaller knives like paring knives lack board clearance and tend to crush herbs rather than slicing them cleanly.
How do you cut herbs with a chef’s knife without bruising them?
Ensure your knife is razor-sharp, completely dry the herb leaves before cutting, and slice with forward or rocking motions rather than chopping straight down. Slicing shears the plant fibers cleanly, whereas blunt downward force ruptures the cell walls and releases bitter green sap onto the board.
Should herb stems be removed before cutting with a chef’s knife?
It depends on the herb structure. Tender stems from herbs like cilantro, parsley, and dill contain pleasant moisture and flavor, so they can be finely minced alongside the leaves. Woody stems from herbs like rosemary, thyme, oregano, and tarragon are fibrous and tough, so the leaves should always be stripped and the stems discarded before chopping.
What is the best cutting motion for cutting chives?
Chives respond best to a clean push-cut or draw-cut across a bundled bunch rather than an aggressive rock-chop. Keep your knife edge sharp and glide it forward through the tubular chives in a single stroke to keep the delicate hollow tubes round and prevent them from flattening together into an accordion.
Can you use a serrated knife to chop fresh herbs?
A serrated utility or bread knife should be avoided for fresh herbs. The scalloped teeth saw and tear fragile botanical tissues, producing ragged cell margins that turn dark brown within minutes. Straight-edge chef’s knives, santokus, and gyutos produce far cleaner, more stable cuts.
Why do chopped herbs turn dark brown or black after cutting?
Herbs turn dark due to enzymatic oxidation. When plant cells are compressed and torn by a dull knife edge, enzymes called polyphenol oxidase mix with cellular phenolics and ambient oxygen, triggering brown melanin pigments. Using a sharp chef’s knife and delaying chopping until right before serving keeps cut herbs bright green.
Conclusion
You can confidently use a chef’s knife to cut virtually any fresh culinary herb. Its curved blade profile and knuckle clearance provide the ideal mechanical platform for both the rocking chop and the delicate chiffonade. The key to preserving bright colors and vibrant flavors is maintaining a sharp edge, thoroughly drying your herbs before slicing, and guiding the blade with a slicing motion rather than blunt downward pressure. With a well-honed blade and sound technique, your chef’s knife will consistently outperform single-purpose gadgets while keeping your greens crisp and aromatic.