How to Sharpen a Chef Knife on a Whetstone
Quick Answer
To sharpen a chef knife on a whetstone, soak a water stone if required, hold the blade at a steady 15 to 20 degrees per side, work a 1000-grit stone until a small burr forms along the whole edge, repeat on the other side, then refine on a 3000 to 6000-grit stone with light, alternating strokes. Test on paper or a tomato, then wash and dry the knife.
A dull chef knife usually needs a new edge, not a replacement. A whetstone is the most controlled way to create one at home. This guide covers only that method, for a straight-edged chef knife.
What Whetstone Sharpening Actually Does
A whetstone sharpens by removing a thin layer of steel from both sides of the edge until the two sides meet in a clean apex. Honing is different. A honing rod mainly straightens an edge that has rolled slightly during use. It can make a knife feel sharper, but it does not replace worn metal.
If the knife still drags or slides off a tomato after careful honing, the edge itself is worn and needs a stone. The Tasting Table explanation of honing versus sharpening draws the same line: honing aligns the existing edge, while sharpening creates a new one.
Choose the Right Angle Before You Start
 Save
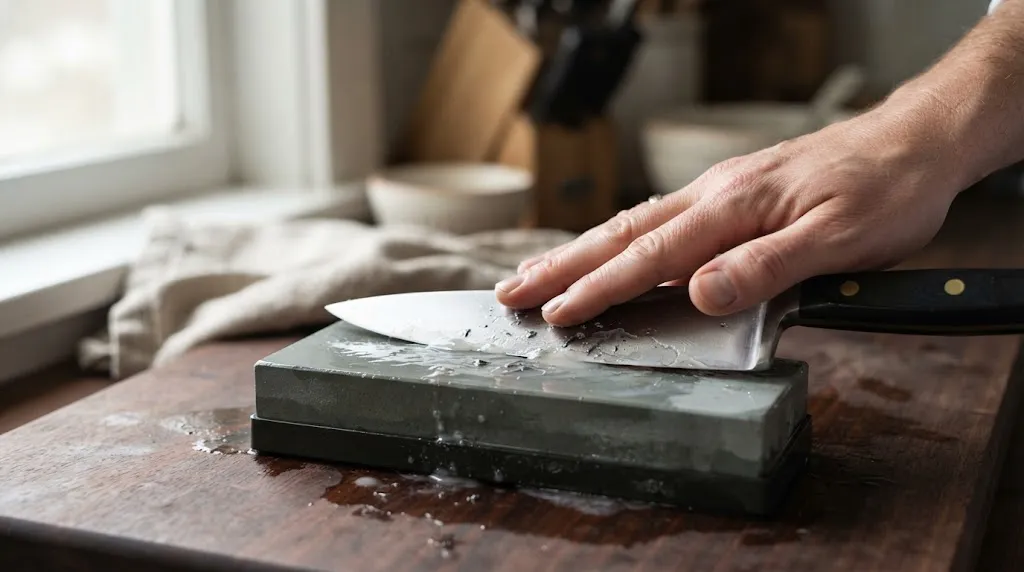
Angle affects the result more than any other choice. Too shallow, and the stone polishes above the edge without reaching it. Too steep, and you remove more steel than needed and leave a blunter edge. Consistency matters more than hitting an exact number.
For most chef knives, use 15 to 20 degrees per side. Start at 15 degrees for a thinner Japanese-style knife and 18 to 20 degrees for a tougher Western-style knife used for heavier work. If unsure, 20 degrees is a safer default: slightly less delicate, but more forgiving. For more detail on per-side and total angles, see the guide to chef knife edge angles.
Colour the bevel with a permanent marker before your first strokes. If it wears off evenly, your angle matches the existing edge. Lock your wrist and move from the shoulder, rather than flexing your hand mid-stroke.
Choose Grit in Order, Not by Guesswork
Grit describes how coarse the abrasive particles are. Lower numbers cut faster and leave a rougher edge. Higher numbers cut slower and leave a smoother edge. For routine sharpening, you do not need a large collection.
| Stone | Best use | When to use it |
|---|---|---|
| 200 to 400 grit | Repair | Chips, a very blunt edge, or reshaping a bevel |
| 1000 grit | Routine sharpening | A dull knife with an intact edge |
| 3000 to 6000 grit | Refining | After 1000 grit, to smooth the edge |
| 8000 grit and above | Fine polishing | Optional, for a very refined slicing edge |
A 1000/6000 combination stone covers most home needs. Do not use a very coarse stone for a touch-up, or expect a fine stone alone to rescue a genuinely blunt knife. Work in order, and rinse the blade between stones.
Set Up the Stone So It Cannot Move
Place the stone on a damp cloth, a non-slip mat, or its holder, coarse side up if using a combination stone. If it slides, your angle changes and your hands move closer to the edge.
Check the stone type before adding water. Many water stones need soaking for about 10 to 15 minutes, until bubbles stop rising. Splash-and-go stones need only a spray of water. Keep water nearby so the surface stays wet, and keep your fingers behind the edge.
Sharpen a Chef Knife on a Whetstone, Step by Step
These steps assume a double-bevel chef knife and a 1000/6000 combination water stone. Adjust the grits if your stone differs, but keep the order and angle the same.
- Soak and stabilise. Soak the stone if required, place it on a non-slip base, and wet the surface. Wash and dry the knife first.
- Set the angle. Place the heel on the stone at your chosen angle, edge facing away from you. Rest the fingers of your other hand lightly on the flat of the blade to guide it.
- Work one side on the coarse grit. Push the blade forward and across the stone, heel to tip, as if slicing a thin layer off the stone. Lift the handle slightly at the curved tip so the whole edge stays in contact.
- Check for a burr. Run a fingertip gently across the edge, from spine toward edge, never along it. A burr feels like a tiny, rough lip on the opposite side. Keep working until it runs the full length.
- Repeat on the second side. Flip the knife and repeat at the same angle and pressure until the burr transfers back to the first side.
- Reduce the burr. Make a few gentle strokes on each side, alternating sides, to centre the edge. Do not press hard here.
- Refine on the fine grit. Switch to the 3000 to 6000-grit side and repeat the motion with lighter pressure, alternating sides near the end.
- Deburr and test. Use very light, edge-trailing strokes to remove the last fine burr. Rinse, dry, and test the knife before putting it away.
Tip
If you lose the angle halfway through, stop and reset it rather than finishing the stroke. One correct stroke helps more than ten at a wandering angle.
How to Tell When the Edge Is Actually Sharp
The burr proves you reached the edge, not that the finished edge is clean and centred. After deburring, hold paper taut and slice downward through it. A sharp knife should cut smoothly, without tearing.
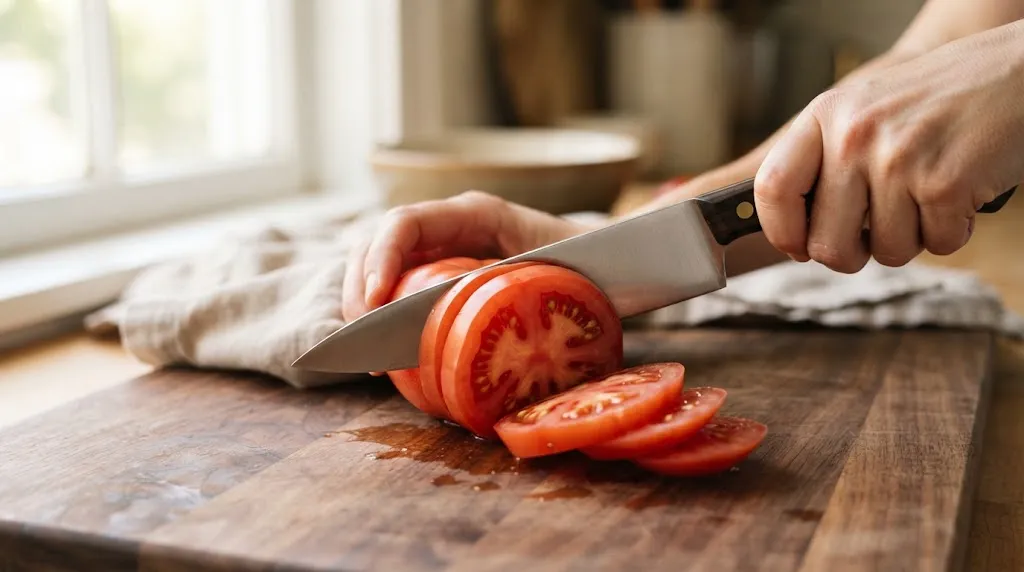
Then try a tomato. The blade should bite into the skin with light forward pressure, rather than sliding across it or squashing the flesh. Check the full length, not just the middle, because first attempts often miss the heel or curved tip. For more checks without guessing, see how to test if a knife is sharp.
Why a Knife Can Still Feel Dull After Sharpening
A dull feeling after sharpening usually has a specific cause, and each cause has a different fix.
- No burr formed. You polished above or below the edge, or stopped too early. Return to the coarse grit, check the angle with the marker test, and work one side until the burr appears along the whole edge.
- A burr was left behind. The knife feels sharp for a few cuts, then dulls as the thin wire edge folds off. Finish with lighter alternating strokes and gentle deburring passes.
- The angle wandered. Rocking the wrist rounds the edge instead of forming a crisp apex. Slow down, lock the wrist, and use shorter strokes.
- The stone was dished. A hollow in the middle changes contact and rounds the bevel. Flatten the stone before trying again.
Mistakes That Waste Steel and Time
- Pressing too hard, especially on the fine stone, which can round the edge.
- Sharpening only the middle of the stone, which dishes it faster and leaves the heel and tip untouched.
- Counting strokes instead of checking the burr, so one side gets more work than the other.
- Skipping the fine grit, which leaves a sharp but rough edge that dulls faster.
- Letting the stone dry out, which increases friction and makes strokes less even.
Warning
Keep fingers behind the edge and off the stone’s path, and never move a hand into the blade’s return stroke to catch it.
When a Flat Whetstone Is the Wrong Tool
Serrated bread knives need a tapered rod that fits each serration, because a flat stone cannot reach into the scallops. Ceramic knives need diamond abrasives. Single-bevel Japanese knives also need a different approach, since they are not sharpened equally on both sides.
Keep the Stone Flat, Clean, and Dry
Water stones wear in the middle with use. That hollow, called dishing, makes a steady angle harder to hold.
Flatten the stone every few sessions, or sooner if you see a dip or feel the blade rock. Draw a pencil grid across the wet surface, then rub it on a flattening plate, or on wet-and-dry paper on flat glass, until the marks disappear. Rinse, then air-dry it completely before storing.
How Often Should You Sharpen?
 Save
There is no single schedule for every kitchen, because use, steel, and cutting surface all change how fast an edge wears. For many home cooks, a full whetstone session every two to three months is a reasonable starting point for a daily-use knife honed between sessions. Lighter use can stretch that interval to four to six months.
Use performance, not the calendar, as the trigger. If honing no longer restores the bite or the knife slides off tomato skin, it is time for the stone. For a fuller schedule, see how often to sharpen kitchen knives.
Between sharpenings, cut on wood or soft composite boards, hand-wash and dry the knife after use, and store it in a block, strip, or guard. See also knife care, cleaning, and sharpening.
Key Insight
Sharpening is not about making the knife as thin as possible. It is about meeting the two sides of the edge cleanly, at a consistent angle, and then removing the burr without rounding that meeting point.
For a broader overview, see how to sharpen a chef knife.
Related Product
Whetstone Sharpening Stone Kit
A 1000/6000 combination whetstone gives you the two grits used in this guide: routine sharpening and fine refining in one stone.
As an Amazon Associate, we earn from qualifying purchases.
Frequently Asked Questions
What grit whetstone should a beginner start with?
Start with a 1000-grit stone for routine sharpening and a 3000 to 6000-grit stone for refining. A 1000/6000 combination stone is usually enough.
Do I need to soak a whetstone every time?
Only if your stone requires it. Many water stones should be soaked for about 10 to 15 minutes until bubbles stop. Splash-and-go stones need only water on the surface. Check the maker’s guidance.
How do I know when to switch sides?
Switch when you can feel a burr along the full length of the opposite side. That burr shows you have reached the edge. Then repeat on the second side until it transfers back.
Can I sharpen a Japanese chef knife the same way?
For a double-bevel Japanese chef knife, the method is the same, but use a lower angle, often around 15 degrees per side, and lighter pressure. Do not use the same routine on a single-bevel knife.
Why does my knife feel sharp, then dull again quickly?
A leftover burr is the most common cause. The thin wire edge feels sharp at first, then folds off during use. Finish with light alternating strokes and gentle deburring passes.
Should I use oil or water on a whetstone?
Use whatever your stone is designed for. Most Japanese-style water stones use water only. Do not switch a water stone to oil unless the maker says it is suitable.
Conclusion
Whetstone sharpening rewards patience more than force. Hold a steady angle, work one side until the burr forms along the whole edge, repeat evenly on the other side, then refine lightly and remove the burr. Test the result, keep the stone flat, and let performance tell you when the next session is due.