How to Sublimate a Wooden Cutting Board: Step-by-Step Guide
Quick Answer
To sublimate a wooden cutting board, choose a board with a sublimation-compatible polymer coating, print a mirrored design using sublimation ink, and transfer it with a heat press. Follow your blank manufacturer’s exact settings because different boards require different temperatures and pressing times. A pre-coated bamboo sublimation board makes the process easier. Treat the printed surface as decorative unless the manufacturer explicitly approves it for direct food contact.
Quick Steps
- Choose the board: Select a wooden or bamboo blank specifically coated for sublimation.
- Prepare your artwork: Create a design that fits the printable surface.
- Print the transfer: Mirror the image and use sublimation ink and paper.
- Prepare the surface: Remove protective film, if present, and ensure the board is clean and dry.
- Secure and press: Attach the transfer with heat-resistant tape and follow the manufacturer’s instructions.
- Finish carefully: Remove the transfer as instructed and allow the board to cool safely.
Important Safety Tip
- Decorative use: Never assume sublimation coatings or inks are safe for direct food preparation or knife contact.
A personalized wooden cutting board can make a thoughtful kitchen gift, attractive wall decoration, or custom keepsake. Sublimation lets you add colorful photographs, family names, recipes, and illustrations to compatible wooden surfaces.
However, wood behaves differently from polyester fabric or coated mugs. In this guide, I’ll explain how to choose the right blank, transfer your design, avoid common mistakes, and understand important food-safety limits.
What Is Wood Sublimation?
Wood sublimation is a heat-transfer printing process that embeds sublimation dyes into a compatible polymer coating on a wooden surface. Heat helps the printed dyes transfer from specialized paper into that coating.
Unlike painting or applying adhesive vinyl, the resulting image becomes part of the receptive coating. The quality of that coating plays a major role in the final result.
How Does Sublimation Work on Wood?
Sublimation requires a compatible surface because ordinary unfinished wood does not provide the same dye-receptive layer as polyester or specially coated products. Simply pressing a sublimation print against raw hardwood usually produces unreliable results.
The process depends on several connected elements:
- Sublimation ink: Special dyes that transfer under heat.
- Transfer paper: Paper designed to release the printed dye during pressing.
- Polymer coating: A receptive layer that holds the transferred image.
- Heat press: Equipment that delivers controlled heat and contact.
- Correct timing: The manufacturer’s recommended pressing duration.
A light-colored coating generally produces brighter artwork than a transparent finish over dark wood. Natural grain can also change how photographs and lighter colors appear.
Can You Sublimate Directly on a Regular Wooden Cutting Board?
Generally, no. A regular unfinished wooden cutting board is not automatically suitable for conventional dye sublimation.
A purpose-made sublimation blank already includes a compatible coating. An ordinary kitchen board usually has bare wood, mineral oil, wax, or another finish designed for a different purpose.
What About Applying Sublimation Spray to Raw Wood?
Some craft coatings claim to make wood receptive to sublimation. Their results depend on the exact product, application method, curing process, and heat resistance.
For beginners, I recommend starting with a professionally coated blank instead of experimenting with unknown finishes. Never assume a craft coating becomes food-safe after curing.
If you want to understand suitable kitchen-board materials, see this guide on choosing appropriate wood for cutting boards.
What Materials Do You Need to Sublimate a Wooden Cutting Board?
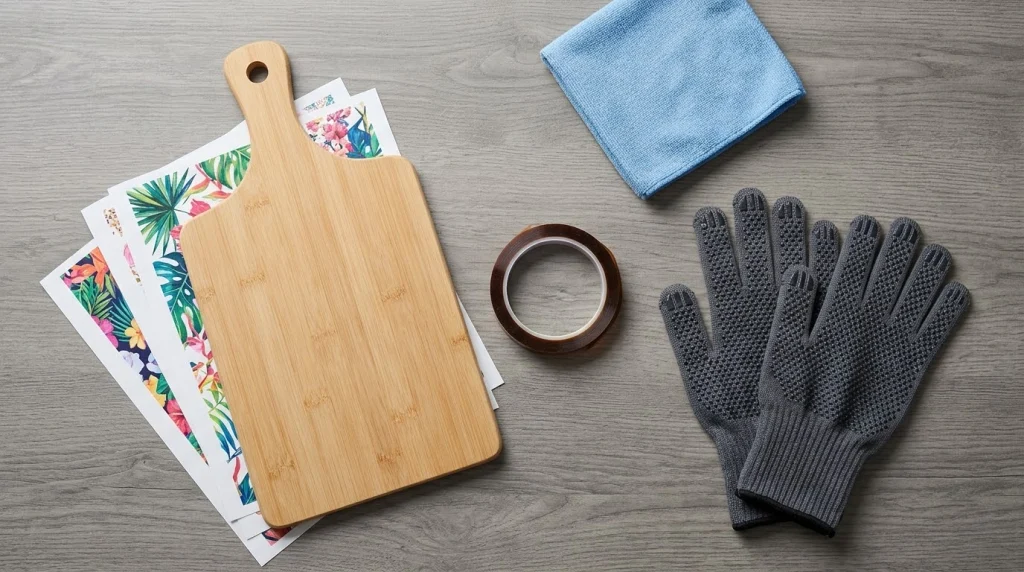
You need a compatible blank, printing supplies, a heat press, and a few protective materials. Buying the correct blank is more important than purchasing every available crafting accessory.
Essential Supplies
- Sublimation-coated cutting board: Wooden, bamboo, or engineered-wood blank approved for this process.
- Sublimation printer: A printer specifically configured for compatible sublimation inks.
- Sublimation ink: Ink appropriate for the printer and transfer workflow.
- Sublimation transfer paper: Paper suited to the selected ink and printer.
- Flat heat press: Ideally one with adjustable temperature, time, and pressure.
- Heat-resistant tape: Helps prevent the image from moving.
- Protective paper: Clean, uncoated blowout paper to protect the press.
- Heat-resistant gloves: For safely handling hot materials.
- Lint-free cloth: For removing dust before pressing.
A swing-away heat press is particularly convenient for thicker blanks because its upper platen moves away from the work area. Confirm that your machine can accommodate the board’s thickness.
Do You Need a Cricut Machine?
No. A Cricut cutting machine is not required for ordinary printed sublimation designs.
You can create artwork in compatible design software and print it directly through your sublimation workflow. Cricut’s sublimation paper instructions also explain printing, mirroring, and transfer preparation.
How to Sublimate a Wooden Cutting Board Step by Step
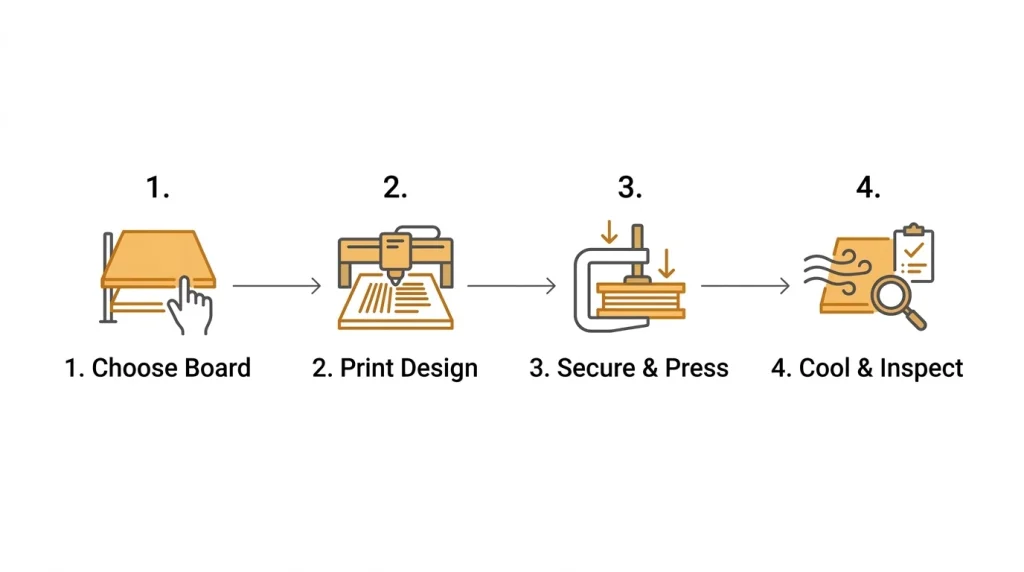
The process becomes easier when you prepare everything before heating the press. Use your board supplier’s instructions as the controlling reference throughout the project.
Step 1: Choose a Sublimation-Ready Board
Select a blank specifically described as compatible with dye sublimation. Check whether the printable surface is coated on one or both sides.
Look for these details before ordering:
- The board’s exact dimensions and thickness.
- The location of the printable coating.
- Whether protective film must be removed.
- The recommended pressing temperature and duration.
- Pressure requirements and any special pressing pad.
- Cleaning instructions and approved food-contact uses.
For a first project, a smaller rectangular blank is often easier to position than a large board with an irregular outline. The printed design should stay inside the manufacturer’s usable artwork area.
Step 2: Create Your Sublimation Design
Prepare artwork in Canva, Adobe Illustrator, Photoshop, or another suitable design application. Set your document dimensions to match the printable area.
For detailed artwork, a resolution around 300 pixels per inch at the final print size is a practical design target. This helps preserve fine text and photographic detail.
Popular personalized designs include:
- Family names and meaningful dates.
- Custom kitchen sayings or illustrations.
- Handwritten family recipes.
- Wedding and anniversary keepsakes.
- Seasonal decorations and holiday gifts.
I prefer artwork with a clear central subject and enough empty space around the edges. This approach helps prevent important details from disappearing near handles or rounded corners.
Step 3: Mirror and Print Your Artwork
For a standard face-down transfer, mirror the artwork horizontally before printing. This is especially important when your design includes names, dates, or readable text.
Use sublimation ink and the correct printable side of the transfer paper. Follow your printer and paper manufacturer’s recommended print settings.
- Open the finished design in your printing software.
- Confirm the artwork dimensions.
- Enable mirror printing when required.
- Select the correct paper and color-management settings.
- Print using compatible sublimation ink.
- Allow the printed transfer to dry as instructed.
The printed paper may look less vibrant than the finished transfer. Judge the final color after pressing rather than immediately assuming the ink is defective.
Step 4: Prepare the Wooden Surface
Inspect the board for damage, uneven coating, moisture, and protective film. Remove any film only when instructed by the manufacturer.
Wipe the printable surface with a clean, dry, lint-free cloth. Avoid applying mineral oil or ordinary cutting-board conditioner to the sublimation coating.
Some manufacturers recommend a short pre-press to reduce moisture. Use that procedure only when specified for your exact blank.
Step 5: Position and Secure the Transfer
Center the printed image on the coated side of the board. The printed side should face the receiving surface when using a conventional face-down transfer.
Secure the paper with small pieces of heat-resistant tape. Keep the transfer flat and avoid wrinkles or gaps.
Then arrange protective paper above and below the project according to the supplier’s pressing diagram. Replace any paper that becomes damp or contaminated with ink.
Step 6: Set the Correct Heat Press Temperature
Heat settings depend on the board’s construction and coating. There is no single universal temperature or duration for every wooden cutting board.
For example, Coastal Business Supplies specifies 385–400°F for 120–180 seconds with medium pressure for one bamboo sublimation cutting board. Other coated MDF and natural-wood products use different settings.
Step 7: Press the Wooden Cutting Board
Preheat the press to the settings listed for your specific product. Make sure the complete design fits within the heated area.
- Protect the lower platen with clean blowout paper.
- Place the taped board and transfer in the specified orientation.
- Add the required upper protective layer.
- Adjust the press for the board’s thickness.
- Apply the specified pressure and heating duration.
- Open the press carefully when the cycle ends.
Avoid repositioning the transfer during pressing. Movement can create doubled outlines or blurred details called ghosting.
Step 8: Remove the Transfer and Cool
Follow the blank manufacturer’s instructions for removing the paper. Some products require immediate removal, while other materials have different cooling procedures.
Use heat-resistant gloves and keep the hot board on a suitable surface. Allow it to cool without exposing it to water or sudden temperature changes.
Step 9: Inspect Your Finished Design
Check the transferred image under good lighting. Look for uneven color, faint edges, blurred text, or damaged coating.
A successful decorative transfer should appear clear and evenly positioned. If something looks wrong, identify the cause before changing your press settings.
What Temperature and Time Should You Use for Wood Sublimation?
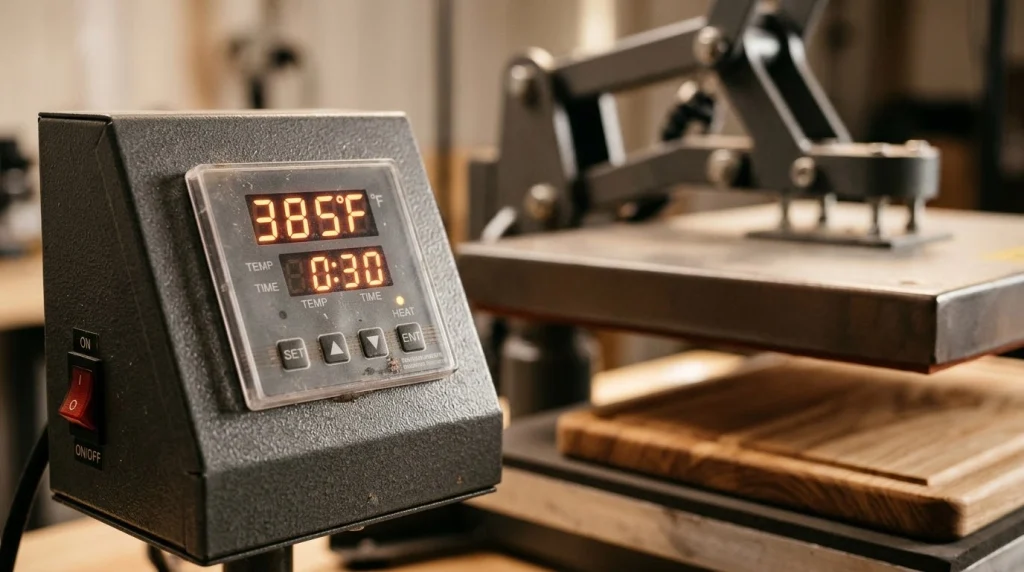
The safest starting point is the exact manufacturer’s instruction sheet. Wood thickness, coating type, and pressing equipment can change the required settings substantially.
The following examples demonstrate why one universal chart is unreliable.
| Sublimation Material | Temperature | Time | Pressure |
|---|---|---|---|
| Coastal bamboo cutting board, 7.5 × 11.5 inches | 385–400°F | 120–180 seconds | Medium |
| Coated MDF board, Sawgrass general guide | 400°F | 60 seconds | Medium |
| Uncoated ordinary hardwood | Not established | Not established | Not suitable by default |
These are examples for different products, not interchangeable recipes. Sawgrass explicitly describes its heat press settings chart as a starting point rather than a guarantee.
As of 2026, I would still prioritize the instructions supplied with the actual blank over a general online heat chart. Testing one spare blank is sensible when preparing multiple personalized gifts.
What Is the Difference Between Sublimation Wood and Regular Cutting Board Wood?
The central difference is their intended surface treatment. A food-preparation board prioritizes cleanability and knife contact, while a sublimation blank prioritizes image transfer.
| Feature | Sublimation-Coated Wood | Regular Cutting Board |
|---|---|---|
| Primary purpose | Personalized printing or decoration | Food preparation |
| Surface | Specialized receptive coating | Wood with a suitable food-contact finish |
| Sublimation readiness | Yes, when manufacturer-approved | Generally no |
| Knife contact | Not assumed safe | Designed for cutting when properly manufactured |
| Cleaning | Follow printed blank instructions | Wash according to board care instructions |
For more detail about everyday food preparation, read whether a serving board can safely function as a cutting board.
Is a Sublimated Wooden Cutting Board Food-Safe?
Not automatically. Sublimation printing suitability does not prove that the completed surface is safe for direct food contact or repeated cutting.
Decorative dyes, coatings, and other finishing materials may have different safety approvals. A manufacturer must specifically establish the intended food-contact use of its finished product.
Can You Chop Vegetables on a Sublimated Board?
Do not chop directly on the decorated surface unless the manufacturer expressly approves the finished surface for knife contact. Repeated cutting can scratch or damage decorative coatings.
Even if a blank is marketed as a cutting board, check the stated limitations before using the printed side. The product’s original food-use claims may not cover every customized finish.
Can You Serve Cheese on a Sublimated Board?
Only when the manufacturer confirms that the completed surface is appropriate for direct contact with food. Otherwise, use the board for decoration rather than serving.
For safe everyday food handling, follow FoodSafety.gov’s guidance on cleaning and preventing cross-contamination.
What About a Board With Only One Decorated Side?
A separate, undecorated side may be usable only if the finished product’s manufacturer explicitly approves that arrangement. A decorative coating on the reverse side alone does not establish food-contact safety.
When approval is unclear, keep the entire customized board for display. Use a separate kitchen-rated cutting board for preparing ingredients.
Why Does Wood Sublimation Sometimes Fail?
Most transfer problems involve material compatibility, heat settings, moisture, or movement. Diagnose the visible symptom before changing several settings at once.
Common Problems and Solutions
| Problem | Possible Cause | Recommended Action |
|---|---|---|
| Faded design | Incorrect coating or insufficient transfer | Verify blank compatibility and pressing instructions |
| Blurry image | Transfer shifted | Secure the paper with heat-resistant tape |
| Uneven colors | Inconsistent pressure or surface contact | Check platen contact and the board’s flatness |
| Browning | Excessive heat or pressing time | Recheck the manufacturer’s specified settings |
| Warped board | Heat stress or moisture imbalance | Stop pressing and inspect the blank |
How Can You Prevent a Wooden Board From Warping?
Choose blanks designed for the required heat and avoid unnecessary pressing cycles. Store finished boards away from prolonged moisture, direct heat, and extreme humidity changes.
Wood can change shape as its moisture balance changes. Read our guide on preventing cutting board warping for more general wooden-board care advice.
How Do You Protect a Sublimated Wooden Cutting Board?
Handle a finished decorative board according to the blank manufacturer’s cleaning and display instructions. Avoid abrasive scrubbing, soaking, dishwasher cleaning, and unnecessary heat exposure unless expressly permitted.
Do not apply ordinary cooking oil, cutting-board wax, or an unknown clear coat over the image. These treatments may alter the appearance or introduce compatibility problems.
Best Storage and Care Practices
- Allow the board to cool completely before storage.
- Keep the decorated surface away from sharp knives.
- Use a soft, dry cloth for routine dust removal.
- Avoid prolonged exposure to water or steam.
- Keep the board away from direct stove heat.
- Follow manufacturer-approved cleaning directions.
- Inspect the surface periodically for peeling or damage.
A personalized board can remain an attractive decorative keepsake when you protect its coating and use it as intended. The goal is to preserve the artwork without compromising safety.
Recommended Products for Wooden Cutting Board Sublimation
If you’re gathering supplies, I would prioritize a verified coated blank, reliable transfer paper, and a heat press suitable for rigid materials. These three products cover different stages of the workflow.
Affiliate disclosure: As an Amazon Associate, we earn from qualifying purchases. The ratings below are editorial suitability estimates based on product features, not hands-on test results or verified customer ratings.
🏆 Best for Beginners
Coastal Bamboo Sublimation Cutting Board, 7.5 × 11.5 Inches
★★★★★ 4.7/5 suitability
This bamboo blank comes with a sublimation-compatible coating and published heat-press instructions. I would consider it for a first decorative project because the supplier provides a defined transfer process. Confirm its intended food-contact limitations before use.
🎨 Best for Transfer Paper
A-SUB 125gsm Sublimation Transfer Paper
★★★★☆ 4.5/5 suitability
A-SUB offers 125gsm transfer paper in several sheet sizes, including letter-size options. I would consider it for detailed designs, provided the selected paper works with the printer, sublimation ink, and blank.
🛠️ Best for Adjustable Pressing
VEVOR 15 × 15 Inch Swing-Away Heat Press
★★★★☆ 4.4/5 suitability
This heat-press model offers digital controls and a swing-away upper heating element. I would consider this style for flat decorative blanks, while checking thickness clearance and manufacturer compatibility before purchasing.
Frequently Asked Questions
Can You Sublimate on Any Wooden Cutting Board?
No. Conventional sublimation requires a compatible polymer coating, so ordinary unfinished wood is not a dependable blank. Choose a product specifically labeled for sublimation and follow its pressing instructions. A board suitable for food preparation is not necessarily suitable for heat-transfer printing.
How Long Do You Heat Press a Wooden Cutting Board?
Pressing time depends on the exact blank and equipment. One Coastal bamboo sublimation board specifies 120–180 seconds at 385–400°F, while Sawgrass lists 60 seconds at 400°F for coated MDF. Never apply these settings interchangeably without checking the manufacturer’s instructions.
Can You Use a Household Iron for Wood Sublimation?
A household iron is generally unsuitable because it cannot reliably deliver controlled, even pressure and consistent heat across a rigid wooden blank. A compatible flat heat press is a better choice. Check the board’s thickness and pressing requirements before selecting equipment.
Do You Need to Seal a Sublimated Wooden Cutting Board?
Not necessarily. Purpose-made sublimation blanks already contain a receptive coating. Adding an unapproved sealant can damage the image or create additional safety concerns. Never assume a clear finish is suitable for food contact simply because it appears dry or transparent.
Can You Wash a Sublimated Wooden Cutting Board?
Only according to the finished product manufacturer’s care instructions. Decorative printed surfaces may not tolerate soaking, abrasive cleaning, or dishwashers. For an ordinary kitchen board, cleaning requirements differ. Never use a printed decorative surface for food preparation without explicit manufacturer approval.
Final Thoughts: How to Sublimate a Wooden Cutting Board Successfully
Learning how to sublimate a wooden cutting board starts with selecting the correct coated blank. From there, careful artwork preparation, secure paper placement, and accurate heat-press settings make the biggest practical difference.
Start with one small decorative project before preparing several personalized gifts. Most importantly, keep the printed surface out of direct food preparation unless its manufacturer confirms that use is safe.
With a suitable blank and a carefully planned transfer, you can create an attractive custom kitchen decoration that reflects your own design style.