How to Put Vinyl on a Cutting Board: Easy Step-by-Step Guide
Quick Answer
To put vinyl on a cutting board, clean and dry the surface, cut your adhesive vinyl design, remove the excess material, and apply it using transfer tape. Smooth the decal with a scraper and carefully remove the transfer tape. For a functional glass cutting board, place the vinyl on the underside, away from food and knives. Standard craft vinyl should never cover the food-cutting surface because, as Avery’s adhesive vinyl safety guidance explains, ordinary craft vinyl isn’t intended for direct food contact.
Quick Application Steps
- Choose your board: Select smooth glass for a functional reverse-side design or wood for decorative display.
- Clean thoroughly: Remove dust, grease, and moisture from the application area.
- Prepare the design: Size your artwork and mirror it when applying underneath clear glass.
- Cut and weed: Cut permanent adhesive vinyl and remove unwanted pieces.
- Transfer carefully: Position the decal with transfer tape and smooth it from the center outward.
- Finish the project: Remove the tape slowly and follow the vinyl manufacturer’s adhesion and care instructions.
Important Safety Reminder
- Food-contact protection: Never place ordinary decorative vinyl where food or knife blades will touch it.
- Wooden boards: Treat vinyl-decorated wooden cutting boards as decorative items rather than everyday chopping surfaces.
A personalized cutting board can transform an ordinary kitchen accessory into a thoughtful gift or attractive decoration. With a little preparation, you can create clean lettering, monograms, and decorative patterns without complicated equipment.
I prefer starting with simple designs because they’re easier to align and transfer. In this guide, I’ll explain how to put vinyl on a cutting board, which materials work best, and how to avoid common mistakes.
Can You Put Vinyl on a Cutting Board?
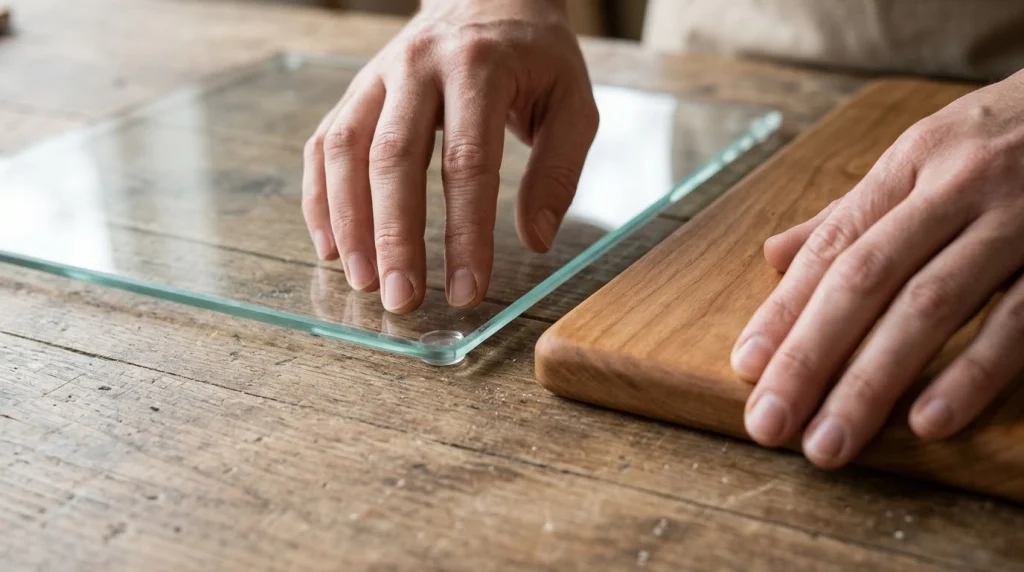
Yes, you can apply adhesive vinyl to glass, wood, and some other cutting board materials. However, the board’s intended use determines where you should place the decoration.
For food preparation, vinyl must remain completely separate from the cutting surface. A decorated board isn’t automatically safe for chopping simply because the decal uses permanent adhesive.
What Is Adhesive Vinyl?
Adhesive vinyl is a thin decorative film with a pressure-sensitive adhesive backing. Crafters use it to create lettering, labels, logos, and designs on compatible surfaces.
Permanent adhesive vinyl generally offers stronger, longer-lasting adhesion than removable vinyl. However, permanent doesn’t mean food-safe, heatproof, or suitable for direct knife contact.
Which Cutting Boards Work Best?
- Clear glass: An excellent choice for applying mirrored designs underneath the board.
- Finished wood: Suitable for decorative signs when the finish supports adhesive bonding.
- Bamboo: Can work for decoration, although its grain and surface finish may affect adhesion.
- Plastic: Adhesion depends on the plastic type, texture, and vinyl manufacturer’s compatibility guidance.
- Unfinished wood: Often requires preparation because rough, porous fibers can prevent reliable adhesion.
My first choice for this project is a smooth, clear glass board. It allows the artwork to remain visible while keeping the vinyl underneath the food-preparation surface.
What Supplies Do You Need to Put Vinyl on a Cutting Board?
You need permanent adhesive vinyl, transfer tape, a clean cutting board, and a few basic crafting tools. A cutting machine helps with detailed artwork, but you can cut simple designs manually.
Essential Materials and Tools
- Cutting board: Choose glass for reverse-side applications or wood for decorative projects.
- Permanent adhesive vinyl: Select a compatible material from a reputable craft brand.
- Transfer tape: Holds individual letters and shapes in their original arrangement during application.
- Cricut or Silhouette machine: Cuts lettering and detailed patterns accurately.
- Weeding tool: Removes unwanted vinyl around and inside the design.
- Scraper or squeegee: Presses the vinyl into contact with the surface.
- Measuring tape or ruler: Helps center and position the artwork.
- Lint-free cloth: Removes dust without leaving fibers.
- Rubbing alcohol: Cleans compatible glass surfaces before vinyl application.
- Scissors and masking tape: Help trim the transfer sheet and hold designs in position.
For glass, I would use smooth permanent vinyl with standard-grip transfer tape. The combination is practical for basic lettering and designs without heavy textures.
Cricut’s official vinyl application instructions explain the cutting tools, mats, and transfer materials used for different vinyl types.
Permanent vs. Removable Vinyl: Which Is Better?
Permanent adhesive vinyl is usually the better choice for a decorative cutting board intended for long-term display. Removable vinyl makes more sense for temporary designs that you expect to replace.
The right choice also depends on the surface finish and application conditions. Neither category makes the decorated surface suitable for direct food contact.
| Feature | Permanent Vinyl | Removable Vinyl |
|---|---|---|
| Adhesive | Designed for longer-lasting bonding | Designed for easier removal |
| Best purpose | Long-term decorations | Temporary designs |
| Removal | May require more effort and leave residue | Generally easier to remove |
| Moisture resistance | Varies; many products resist water | Varies by product |
| Food-contact safe | Not assumed safe | Not assumed safe |
| My preferred use | Glass underside and decorative wood | Short-term display projects |
For an everyday craft project, permanent vinyl offers a useful balance of durability and design flexibility. Always check the specific manufacturer’s instructions before applying it.
How to Put Vinyl on a Cutting Board Step by Step
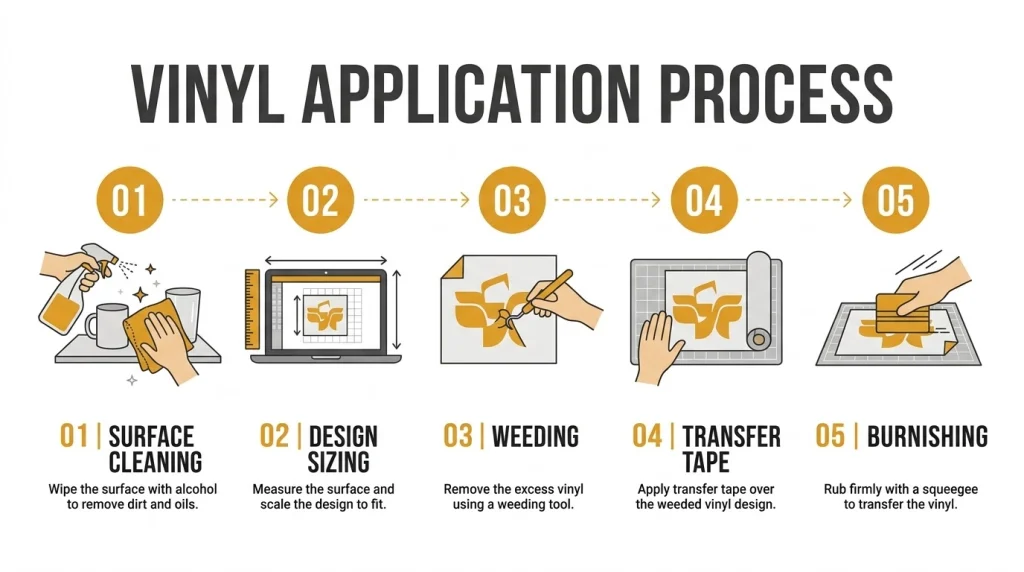
The basic process involves surface preparation, cutting, weeding, positioning, and transfer. For a glass cutting board, you’ll also need to account for the design’s direction.
These steps focus on permanent adhesive vinyl rather than heat-transfer vinyl. The methods aren’t interchangeable.
Step 1: Choose and Inspect Your Cutting Board
Start with a board that has a suitable application surface. Check for cracks, peeling finishes, rough patches, and other imperfections.
A 12-by-16-inch glass board provides a useful example for a medium-sized decorative design. Confirm the actual board dimensions before choosing artwork proportions.
- Choose a smooth application area.
- Inspect glass for chips or damage.
- Check wooden boards for rough grain and loose coatings.
- Identify which side will carry the vinyl.
- Keep handles, feet, and raised edges in mind.
For a functional glass board, the vinyl belongs underneath the glass. If you’re using wood, plan the project for decorative display instead.
Step 2: Clean and Dry the Surface
Adhesive vinyl needs a clean surface for consistent bonding. Dust, grease, fingerprints, and moisture can interfere with adhesion.
For compatible, uncoated glass, rubbing alcohol can remove oily residue. Use a lint-free cloth and allow the surface to dry completely.
- Remove visible dirt and dust.
- Clean the application area using a material-compatible cleaner.
- Wipe away remaining residue.
- Allow the surface to air-dry.
- Inspect the area under bright lighting.
Avoid applying rubbing alcohol to an unfamiliar painted or sealed wooden finish without checking compatibility. Some finishes can discolor or soften when exposed to solvents.
Step 3: Create and Size Your Vinyl Design
Open Cricut Design Space, Silhouette Studio, or another compatible design program. Import your design or create lettering directly in the software.
Simple artwork is easier for beginners. Names, short phrases, monograms, and basic botanical designs are useful starting options.
Example Design Measurements
Suppose you have a 12-by-16-inch cutting board and want a centered 8-inch-wide design. That leaves approximately 4 inches of space on each side when centered across the 16-inch dimension.
The actual margins depend on the board’s orientation and design height. Measure both dimensions before cutting.
- Keep text large enough to weed comfortably.
- Avoid extremely thin decorative lines.
- Leave clearance around rounded edges.
- Use high-contrast vinyl colors.
- Check the finished orientation before cutting.
Should You Mirror the Design?
Mirror the artwork when you want to read it through clear glass from the opposite side. The adhesive will attach to the underside while the lettering appears correctly oriented from above.
For ordinary front-facing decals on decorative wood, don’t mirror the design. The lettering should face the viewer directly during application.
Step 4: Cut the Adhesive Vinyl
Place regular adhesive vinyl onto a compatible cutting mat with the colored film facing upward and the backing liner facing the mat. Select the appropriate material setting in your cutting software.
Use a fine-point blade when supported by your machine and vinyl. Run a small test cut before cutting the final artwork.
- Load the vinyl onto the cutting mat.
- Confirm the correct material type.
- Select the appropriate blade setting.
- Check whether the artwork needs mirroring.
- Run a test cut.
- Cut the complete design after confirming the settings.
A proper cut goes through the vinyl film without unnecessarily cutting through its backing paper. If the blade cuts too deeply, adjust the settings before proceeding.
Step 5: Weed the Excess Vinyl
Weeding means removing unwanted vinyl while leaving the finished design attached to its backing liner. It reveals the exact shapes that will transfer onto the board.
Begin at an outside corner and work slowly. Pay particular attention to the small spaces inside letters.
- Remove the vinyl surrounding the main design.
- Use a weeding hook for small openings.
- Hold delicate letters in place while removing waste.
- Check for leftover pieces around fine details.
- Keep the finished artwork flat on its backing.
Good lighting makes this stage easier. Rushing can lift narrow lines or damage small decorative elements.
Step 6: Apply the Transfer Tape
Transfer tape keeps separate vinyl pieces aligned when moving them onto the board. Clear tape with a printed grid can help position lettering accurately.
Choose standard-grip tape for most smooth, regular adhesive vinyl. Textured films may need a different tape strength.
- Cut transfer tape slightly larger than the artwork.
- Remove the transfer tape’s release liner.
- Position the tape over the weeded design.
- Lower it gradually to reduce trapped air.
- Rub across the surface with a scraper.
- Flip the sheet and burnish the backing side.
According to Cricut’s transfer tape instructions, standard transfer tape works with most smooth vinyl types. StrongGrip tape is primarily intended for specialty textured vinyl.
Step 7: Position the Vinyl on the Board
Place the prepared decal over the clean application area before removing the final backing. Use a ruler to check its alignment.
For precise placement, secure one edge of the transfer sheet with masking tape. This creates a temporary hinge that helps prevent shifting.
- Center the design visually.
- Check its distance from the edges.
- Secure the position with a tape hinge if needed.
- Peel the vinyl backing away slowly.
- Keep the adhesive from touching unintended areas.
- Lower the decal onto the surface gradually.
When decorating underneath glass, double-check the mirrored text before pressing it down. Once permanent vinyl bonds firmly, repositioning may damage the artwork.
Step 8: Smooth the Vinyl and Remove the Transfer Tape
Use a scraper to press the vinyl onto the surface. Start near the center and work outward with firm, controlled strokes.
Peel the transfer tape back slowly at a low angle. Watch for any lettering that begins lifting with the tape.
- Burnish the entire design before removing tape.
- Apply extra attention to narrow lettering.
- Keep the transfer tape close to the surface while peeling.
- Stop and press down any lifting sections.
- Inspect the final edges for incomplete adhesion.
Don’t rush this last step. Careful tape removal often makes the difference between an uneven decal and a clean finished design.
Step 9: Allow the Adhesive to Develop Its Bond
Permanent adhesive vinyl can need time to develop its intended bond. The required period varies by product, temperature, and application surface.
Follow the specific manufacturer’s instructions rather than assuming every vinyl needs the same curing period. Keep the decoration dry and avoid unnecessary handling during the recommended wait.
How Do You Put Vinyl on the Underside of a Glass Cutting Board?
Apply mirrored permanent adhesive vinyl to the clean underside of a transparent glass board. The finished artwork will appear correctly oriented when viewed through the glass from above.
This approach is especially useful for personalized kitchen gifts because the design stays away from the upper food-preparation surface.
Reverse-Side Glass Application
- Choose a transparent glass board with a smooth underside suitable for vinyl.
- Measure the available space, including any feet or raised areas.
- Create the design and mirror all lettering.
- Cut and weed the permanent adhesive vinyl.
- Use transfer tape to lift the entire design.
- Clean and completely dry the underside of the glass.
- Apply the mirrored decal with its adhesive facing the glass.
- Burnish and remove the transfer tape carefully.
- Turn the board over and inspect the design from above.
The design should appear readable through the glass. If letters look backward, the artwork wasn’t mirrored correctly before cutting.
Keep all vinyl away from the top cutting surface and knife-contact edges. Also make sure the underside decoration doesn’t interfere with the board’s non-slip feet or stable positioning.
How Do You Apply Vinyl to a Wooden Cutting Board?
Wooden cutting boards need a slightly different approach because wood can be porous, textured, or coated with oils. Vinyl typically adheres more predictably to a smooth, clean, compatible finished surface.
For this method, I recommend treating the finished board as decorative wall art or a display piece. That avoids exposing the vinyl to knives, food preparation, and repeated washing.
Preparing Wood for Adhesive Vinyl
- Choose dry, smooth wood without loose fibers.
- Lightly sand rough decorative wood when appropriate.
- Remove all sanding dust.
- Check whether existing paint or sealer is fully cured.
- Test vinyl adhesion on an inconspicuous area.
- Avoid freshly oiled or greasy surfaces.
Oil and wax can interfere with adhesive bonding. A regularly conditioned wooden chopping board may therefore be a poor candidate for vinyl decoration.
If you want a reusable wooden cutting surface, consider decorating a separate display board instead. For an alternative personalization method, see my guide on how to laser engrave a cutting board.
Is Vinyl on a Cutting Board Food Safe?
Ordinary adhesive craft vinyl should not be treated as a food-safe cutting surface. Knife contact can scratch, cut, or lift the film, while adhesive and vinyl fragments may contaminate food.
Food-contact suitability depends on the exact material and its intended use. The FDA’s food-contact material guidance explains why the safety of materials that contact food must be evaluated for their intended conditions.
Safer Ways to Decorate a Cutting Board
- Reverse-side glass decoration: Keep the vinyl beneath the glass and away from the cutting face.
- Decorative wooden display: Use the board as kitchen wall art or a personalized gift.
- Non-food decorative accessories: Apply vinyl to a separate sign, frame, or kitchen organizer.
- Engraving: Personalize the reverse side of suitable wood without using adhesive film.
- Separate functional board: Use an undecorated food-contact-approved board for everyday chopping.
Adding a clear coating doesn’t automatically make vinyl food-safe. A product must be suitable for its complete intended use, including cleaning and contact with knives.
For regular meal preparation, follow my detailed guide on how to use a cutting board safely. It covers handling, cleaning, and avoiding cross-contamination.
What Are the Most Common Vinyl Application Problems?
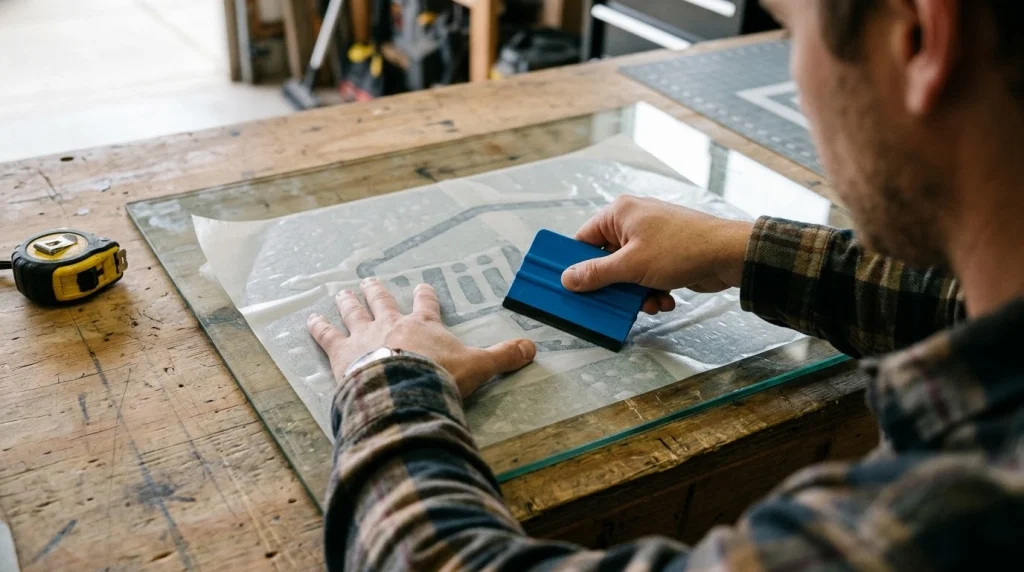
Most application problems come from poor surface preparation, unsuitable transfer tape, or incorrect positioning. Many are preventable with a small test before the final transfer.
Common Problems and Practical Fixes
| Problem | Likely Cause | Solution |
|---|---|---|
| Vinyl won’t stick | Dust, oil, moisture, or incompatible surface | Clean, dry, and test the surface |
| Air bubbles | Uneven transfer pressure | Apply gradually and smooth outward |
| Letters lift with tape | Insufficient bonding or overly strong tape | Re-burnish and peel slowly |
| Crooked design | Poor alignment | Use measurements and a tape hinge |
| Backward lettering | Incorrect mirroring | Mirror before reverse-glass cutting |
| Peeling edges | Poor adhesion, moisture, or abrasion | Inspect compatibility and avoid damaging conditions |
When vinyl begins peeling repeatedly, applying more pressure may not solve the problem. Check the material, surface coating, and exposure conditions before trying again.
How Do You Make Vinyl Last Longer on a Cutting Board?
Long-lasting results start with compatible materials and a carefully prepared surface. Cleaning habits also play a major role after the design is attached.
Vinyl Care and Maintenance Tips
- Follow curing guidance: Allow the adhesive to develop its bond according to the label.
- Avoid direct cutting: Never chop food on vinyl-decorated areas.
- Reduce water exposure: Avoid soaking the vinyl or repeatedly immersing the decorated underside.
- Use gentle cleaning: Follow the board and vinyl manufacturers’ care instructions.
- Avoid abrasive scrubbing: Rough cleaning tools can catch and lift decal edges.
- Limit excessive heat: Do not place decorated boards in ovens or microwaves.
- Inspect the adhesive: Replace or retire decorations that begin lifting or deteriorating.
Don’t assume a vinyl product is dishwasher-safe simply because it’s labeled permanent or waterproof. Different vinyl brands have different heat, moisture, and washing requirements.
The University of Maine Cooperative Extension’s cutting board care guidance also emphasizes regular cleaning, drying, and appropriate surface maintenance.
Maintaining the Wooden Part of a Decorative Board
Wood still needs appropriate care even when the board is intended for display. Keep it dry, avoid extended moisture exposure, and follow the manufacturer’s finishing recommendations.
For an undecorated functional wooden board, my guide on how to oil a wooden cutting board explains conditioning methods. Keep oil away from areas where vinyl needs to bond.
Creative Vinyl Cutting Board Design Ideas
Simple, readable designs often make the most attractive finished projects. They also require less complicated weeding and alignment.
Popular Personalization Ideas
- Family monogram: Add a large initial with a surname.
- Wedding gift: Include a couple’s names and wedding date.
- Housewarming decoration: Create a welcoming kitchen message.
- Botanical artwork: Use herbs, leaves, or simple plant outlines.
- Seasonal decoration: Make removable or replaceable holiday displays.
- Favorite recipe theme: Use a short recipe title or cooking-related illustration.
- Minimalist kitchen design: Combine one elegant word with a small graphic.
For a first project, I would choose a single-color monogram or short family name. A straightforward design is easier to transfer cleanly than a complex illustration with many narrow details.
Best Tools and Materials for Vinyl Cutting Board Projects
If you’re preparing your first vinyl cutting board project, these three products cover the main material and application needs. My selections are based on their stated features and intended uses, not hands-on laboratory testing.
The scores below are editorial suitability assessments, not customer review averages. Prices and availability may change.
🏆 Best for Beginners
Cricut Premium Vinyl – Permanent
★★★★★ 4.5/5 Editorial Fit
Cricut Premium Permanent Vinyl is a water-resistant, UV-resistant adhesive film designed for durable decorative applications. Its compatibility with Cricut’s standard vinyl workflow makes it my preferred starting option for beginner glass decorating projects.
🎨 Best for Detailed Designs
ORAFOL ORACAL 651 Permanent Adhesive Vinyl
★★★★☆ 4.5/5 Editorial Fit
ORACAL 651 is a 2.5-mil calendered adhesive vinyl designed for plotter-cut graphics and lettering. I would consider it for precise names, decorative borders, and monograms on compatible non-food-contact surfaces.
🛠️ Best for Easy Alignment
Cricut Transfer Tape
★★★★★ 4.5/5 Editorial Fit
Cricut’s regular Transfer Tape is designed to move most smooth adhesive vinyl designs onto project surfaces. Its clear, gridded format makes it my practical choice for keeping lettering aligned during application.
Affiliate disclosure: As an Amazon Associate, we earn from qualifying purchases. Product ratings above reflect editorial suitability rather than verified customer review averages.
Frequently Asked Questions
Can You Put Permanent Vinyl on a Cutting Board?
Yes, permanent adhesive vinyl can be applied to compatible cutting board surfaces for decoration. For clear glass, place mirrored designs on the underside, away from food and knives. Treat wooden boards with vinyl decals as decorative pieces rather than functional chopping surfaces.
Do You Need to Seal Vinyl on a Cutting Board?
Permanent adhesive vinyl generally doesn’t need an additional sealer when used as directed on a compatible decorative surface. A clear coating does not automatically make the design food-safe. Avoid applying an unknown coating over vinyl, especially when the finished board might contact food.
Can You Put Vinyl on a Wooden Cutting Board?
Yes, vinyl can adhere to a suitably prepared wooden board, particularly when its surface is smooth, dry, and compatible with the adhesive. However, oils, waxes, and uneven grain may reduce bonding. I recommend using vinyl-decorated wooden boards for display rather than chopping.
Can You Wash a Cutting Board with Vinyl on It?
Cleaning depends on the cutting board material and the vinyl manufacturer’s instructions. Avoid soaking or scrubbing decorative decals, and don’t assume they can withstand dishwashing. A reverse-decorated glass board should be cleaned carefully while protecting the vinyl from moisture and abrasion.
Can You Put Vinyl on a Cutting Board Without a Cricut?
Yes, you can create simple vinyl designs without an electronic cutting machine. Use scissors or a sharp craft knife to cut basic letters and shapes, then apply them with transfer tape. Intricate lettering and detailed patterns are easier to produce with a cutting machine.
Final Thoughts: How to Put Vinyl on a Cutting Board Successfully
Learning how to put vinyl on a cutting board is straightforward when you choose compatible materials and prepare the surface carefully. Clean application, accurate alignment, and patient transfer-tape removal are the most important practical steps.
For my preferred beginner setup, I’d choose a clear glass cutting board, smooth permanent adhesive vinyl, and standard-grip transfer tape. Placing a mirrored design underneath the glass keeps the decoration separate from the working surface.
Most importantly, remember that decorative vinyl isn’t a substitute for a food-safe cutting surface. Use an undecorated board for chopping whenever you cannot confidently keep vinyl and adhesive away from food.
Start with a simple design, take your time with each step, and enjoy creating a personalized kitchen decoration or thoughtful handmade gift.