How to Make a Wooden Cutting Board: A Step-by-Step Beginner’s Guide
Quick Answer
To make a wooden cutting board, choose untreated hardwood, cut it into straight strips, glue the edges together, clamp until cured, flatten and sand the surface, then finish with food-grade mineral oil. For beginners, an edge-grain board made from maple, walnut, or cherry is a practical starting point. Use a waterproof glue suitable for indirect food contact, such as the product described in Titebond’s woodworking glue guidance.
Seven Simple Steps
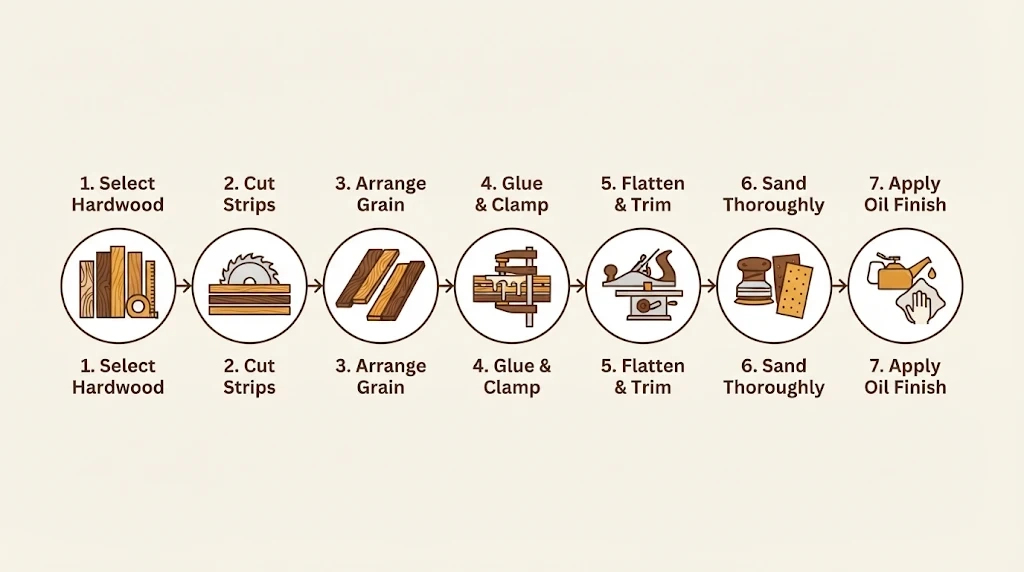
- Choose hardwood: Select dry, untreated maple, walnut, or cherry.
- Measure and cut: Prepare matching wooden strips.
- Arrange the grain: Lay out the strips for appearance and stability.
- Glue and clamp: Assemble the strips with waterproof wood glue.
- Flatten the board: Remove uneven areas and square the edges.
- Sand thoroughly: Smooth every cutting surface, edge, and corner.
- Apply the finish: Use food-grade mineral oil on all sides.
Beginner tip: Start with a board measuring approximately 12 × 18 inches and 1 inch thick. Allow at least 24 hours after gluing before heavily working the panel, subject to the adhesive manufacturer’s instructions.
Making your own wooden cutting board is a rewarding way to improve your kitchen while learning basic woodworking skills. You can choose the wood, dimensions, grain pattern, and finish to match your needs.
I’ll walk you through a straightforward edge-grain project, including the tools, common mistakes, and maintenance techniques that matter most.
What Is a Wooden Cutting Board?
A wooden cutting board is a food preparation surface made from solid wood or joined hardwood pieces. Its primary purpose is to provide a stable, knife-friendly surface for chopping, slicing, and preparing ingredients.
Unlike plastic cutting boards, wooden boards have natural grain patterns and can often be resurfaced when worn. However, they require proper cleaning, drying, and occasional conditioning.
What Makes a Good Homemade Cutting Board?
- Hardwood construction: Fine-grained hardwood provides strength and durability.
- Flat cutting surface: Even thickness keeps the board stable.
- Strong glue joints: Properly bonded strips resist separation.
- Smooth edges: Rounded corners improve handling and comfort.
- Food-appropriate finish: Mineral oil helps reduce moisture absorption.
- Suitable dimensions: A practical size provides room for everyday chopping.
Which Wood Is Best for Making a Cutting Board?
 Save
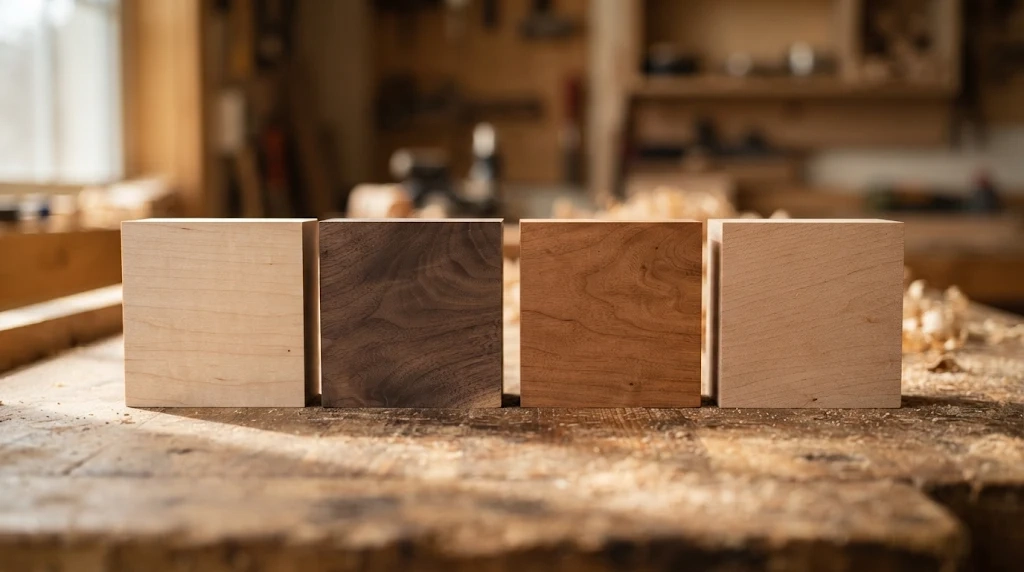
Hard maple, walnut, and cherry are among the most practical wood choices for homemade cutting boards. They offer useful combinations of hardness, appearance, and workability.
For a first project, I’d choose hard maple because it provides a durable cutting surface and a classic kitchen appearance.
Wood Comparison Table
| Wood Type | Janka Hardness | Appearance | Best For |
|---|---|---|---|
| Hard Maple | 1,450 lbf | Light cream | Durable everyday boards |
| Black Walnut | 1,010 lbf | Dark brown | Decorative boards |
| Black Cherry | 950 lbf | Warm reddish brown | Beginner projects |
| American Beech | 1,300 lbf | Pale tan | Utility cutting boards |
Note: Janka hardness measures resistance to indentation, not overall food safety. Values are typical reference figures, and individual pieces of wood vary.
Which Woods Should You Avoid?
Avoid pressure-treated, painted, stained, or chemically contaminated lumber. Reclaimed wood with an unknown treatment history is also unsuitable for a food preparation surface.
- Pressure-treated lumber: May contain preservatives unsuitable for cutting surfaces.
- Pine: Relatively soft and prone to knife marks.
- Unknown exotic woods: Some species contain irritating substances or have unsuitable characteristics.
- Damaged lumber: Cracks, decay, or contamination can compromise the board.
Choose clean, dry hardwood from a reputable supplier. Whenever possible, verify the exact species before purchasing.
What Tools and Materials Do You Need?
You don’t need an industrial workshop to make a wooden cutting board. Accurate cutting, proper clamping, and careful sanding matter more than owning expensive equipment.
Essential Materials
- Untreated, kiln-dried hardwood boards
- Waterproof woodworking glue suitable for indirect food contact
- Food-grade mineral oil
- 120-, 180-, and 220-grit sandpaper
- Clean, lint-free finishing cloths
- Clean water for raising the wood grain
Essential Tools
- Table saw, circular saw with guide, or another suitable woodworking saw
- Measuring tape and pencil
- Combination or carpenter’s square
- At least three suitable woodworking clamps
- Random orbital sander or sanding block
- Work surface with proper clamping support
- Eye protection, hearing protection, and appropriate dust protection
A planer, jointer, or router can improve efficiency, but these tools are optional. If you’re inexperienced with power tools, ask a lumber supplier to prepare straight, square strips.
How to Make a Wooden Cutting Board Step by Step
 Save
The following method creates an edge-grain cutting board with hardwood strips joined side by side. It avoids the additional cutting and gluing stages required for end-grain construction.
Step 1: Plan the Size and Select Your Wood
Start by deciding how much counter space your cutting board can occupy. For general kitchen use, a finished size of 12 × 18 inches is a useful target.
For this example, aim for a finished thickness of approximately 1 inch.
- Target length: 18 inches
- Target width: 12 inches
- Target thickness: 1 inch
- Construction: Edge grain
- Recommended species: Hard maple
Purchase enough additional material for cutting, trimming, and flattening. A little extra stock provides room to correct minor mistakes.
Step 2: Measure and Cut the Wooden Strips
Cut your hardwood into strips slightly longer than the final board. Keep their edges straight and square so the pieces join without gaps.
For example, eight strips measuring roughly 1.5 inches wide can produce a 12-inch-wide panel before final trimming.
- Mark the strip dimensions carefully.
- Check the saw setup and blade guard.
- Secure the wood using an appropriate cutting method.
- Cut the strips with consistent dimensions.
- Inspect each edge for gaps, burns, or uneven areas.
Never put your hands near an exposed saw blade. Use push sticks, guides, and other safety equipment appropriate for the tool.
Step 3: Arrange the Grain Pattern
Place the strips side by side on a clean workbench before applying glue. Rotate and rearrange them until the grain and colors create a balanced appearance.
This dry layout is also your chance to check the fit between every strip.
- Keep the intended edge-grain faces upward.
- Check that adjacent joints close without visible gaps.
- Consider alternating growth-ring orientation where practical.
- Mark the strip order with pencil on a non-cutting edge.
Don’t rely on alternating grain alone to prevent warping. Proper wood moisture, joint preparation, and balanced drying are equally important.
Step 4: Glue and Clamp the Cutting Board
Apply an even layer of suitable waterproof wood glue along each mating edge. Bring the strips together and clamp the panel using firm, balanced pressure.
Titebond III is one commonly used option for cutting boards because its manufacturer identifies it as suitable for indirect food contact.
- Spread glue across the full length of each joint.
- Assemble the strips in the planned order.
- Position clamps along the panel.
- Tighten gradually until the joints close.
- Check for twisting, bowing, or uneven strips.
- Remove excess glue using the manufacturer’s recommended method.
- Allow sufficient curing time before machining the panel.
For a simple project, allowing at least 24 hours before further heavy work is a sensible approach. Always follow the specific glue’s temperature, clamping, and curing instructions.
Step 5: Flatten and Trim the Board
After the adhesive cures, remove the clamps and inspect the assembled panel. The surface should feel solid, with no loose joints or visible separation.
Use an appropriate planer, hand plane, or sanding method to flatten both faces.
- Check the panel for twisting with a straightedge.
- Remove raised glue and uneven transitions.
- Flatten the top and bottom evenly.
- Trim the ends square to the sides.
- Measure the finished thickness and dimensions.
For an edge-grain panel, a planer can work when used correctly and according to the machine’s instructions. Never feed an assembled end-grain board through a conventional thickness planer.
Step 6: Sand the Board Smooth
Sanding removes machining marks and prepares the surface for finishing. Start with the coarsest grit needed and progress gradually to finer abrasives.
- 120 grit: Remove minor scratches and uneven spots.
- 180 grit: Refine the surface and edges.
- 220 grit: Create a smooth final texture.
- Raise the grain: Lightly dampen the board with clean water.
- Dry completely: Allow the lifted fibers to dry.
- Final sanding: Lightly sand again with 220 grit.
Run your hand gently over the dry surface to identify rough spots. Ease the corners with a sanding block so the board feels comfortable to lift.
Step 7: Apply a Food-Safe Finish
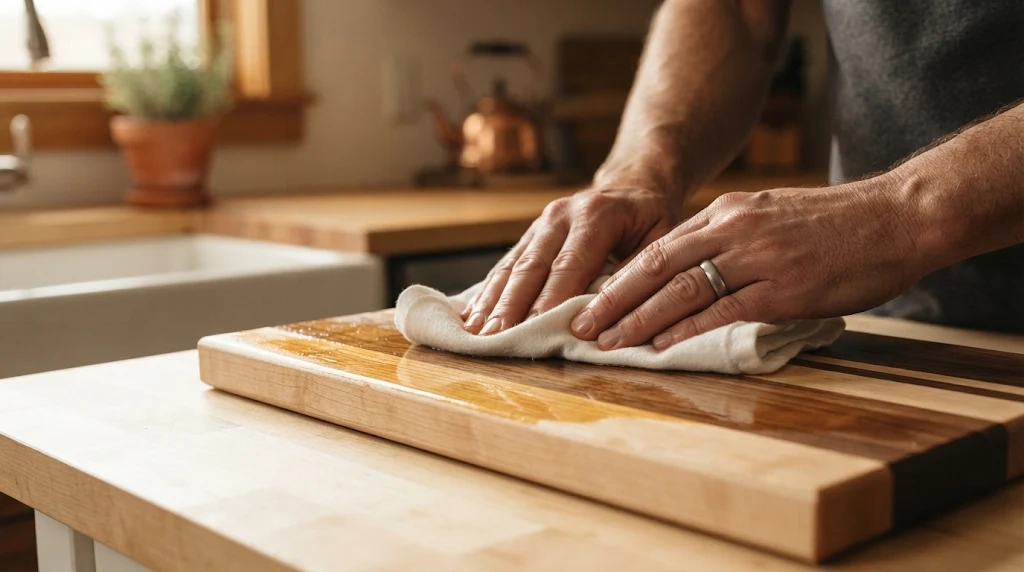
Food-grade mineral oil is one of the easiest finishes for a homemade cutting board. It penetrates the wood without leaving a brittle film on the cutting surface.
Apply the oil to every face, including the edges and underside.
- Remove sanding dust with a clean cloth.
- Confirm that the wood is completely dry.
- Pour a small amount of food-grade mineral oil onto a clean cloth.
- Spread it evenly across all exposed surfaces.
- Allow the wood to absorb the oil for several hours.
- Wipe away any remaining surface oil.
- Repeat if the wood continues to absorb oil readily.
For additional water resistance, apply a cutting-board conditioner containing mineral oil and beeswax. Buff off the excess so the finished board doesn’t feel greasy.
Should You Make an Edge-Grain or End-Grain Cutting Board?
Edge-grain cutting boards are generally easier for beginners because they require fewer machining and glue-up stages. End-grain boards require more accurate cuts and assembly work but offer a distinctive cutting surface.
| Feature | Edge Grain | End Grain |
|---|---|---|
| Construction | Long grain faces upward | Wood fiber ends face upward |
| Difficulty | Beginner-friendly | Intermediate to advanced |
| Glue-up | Usually one main assembly | Usually multiple assemblies |
| Knife marks | Often more visible | Often less noticeable |
| Best use | Everyday kitchen prep | Premium chopping blocks |
I recommend making an edge-grain board first, then trying end-grain construction after gaining confidence. That progression makes it easier to practice accurate joinery and sanding.
How Much Does It Cost to Make a Wooden Cutting Board?
The total cost depends on your lumber choice, board dimensions, available tools, and local material prices. Hardwood is usually the main material expense.
Here’s an illustrative budget for a small DIY project in the United States, excluding major tool purchases.
| Material | Estimated Budget |
|---|---|
| Hardwood lumber | $20–$50 |
| Wood glue | $5–$12 |
| Sandpaper | $5–$10 |
| Mineral oil | $5–$12 |
| Estimated Total | $35–$84 |
These figures are planning estimates, not verified current retail quotes. You may spend less if you already own glue, abrasives, and finishing oil.
What Mistakes Should You Avoid When Making a Cutting Board?
Most beginner problems come from poor material preparation, gaps between strips, or insufficient drying. Correcting these issues early can save significant repair work.
- Using damp lumber: Excessive moisture increases the risk of later movement and distortion.
- Leaving gaps: Poorly prepared joints can weaken the finished panel.
- Overtightening clamps: Excessive pressure can shift pieces or distort the assembly.
- Rushing the cure: Machining a newly glued panel too early may compromise its joints.
- Skipping sanding grits: Deep scratches can remain visible after finishing.
- Using unsuitable finishes: Ordinary cooking oils may become rancid, while film finishes can be damaged by knives.
- Ignoring the underside: Uneven moisture exposure can contribute to movement.
Before applying oil, inspect the board under bright light. Repairing surface problems at this stage is easier than discovering them during kitchen use.
How Do You Clean and Maintain a Homemade Wooden Cutting Board?
 Save
Wash a wooden cutting board with soap and water after use, rinse thoroughly, and dry it promptly. Store it where air can circulate around both faces.
The CDC’s food safety guidance also recommends separating boards used for raw animal products from those used for ready-to-eat foods.
Daily Cleaning Routine
- Remove leftover food immediately.
- Wash with warm water and dish soap.
- Scrub away food residue.
- Rinse with clean water.
- Dry with a clean towel.
- Stand upright or use a rack for complete drying.
Avoid leaving a wooden board submerged in the sink. I also recommend handwashing homemade glued boards rather than putting them in a dishwasher.
How Often Should You Oil the Board?
Apply food-grade mineral oil whenever the wood looks dry or absorbs water more readily than usual. Monthly conditioning is a reasonable starting schedule for many household boards.
- Clean and dry the board thoroughly.
- Apply a thin, even layer of mineral oil.
- Allow time for absorption.
- Wipe away the excess.
- Repeat when the surface appears dry again.
Oil helps maintain the wood’s appearance and moisture resistance, but it does not replace cleaning or sanitizing.
When Should You Replace the Board?
Replace a cutting board when it develops deep, hard-to-clean grooves, extensive cracks, or damaged joints that cannot be safely repaired. These defects can trap food residue and complicate cleaning.
The USDA’s cutting-board advice specifically recommends replacing excessively worn cutting surfaces.
Can You Make a Wooden Cutting Board Without Power Tools?
Yes, you can make a cutting board using hand tools, especially when the lumber supplier prepares straight strips. However, accurate hand-planing and joint preparation require patience.
For an easier first project, consider purchasing a single suitable hardwood blank and shaping it with hand tools.
- Use a handsaw for cutting the blank to length.
- Use a hand plane to flatten and square surfaces.
- Use clamps and a stable workbench for support.
- Use sanding blocks for smoothing and rounding edges.
- Apply mineral oil by hand after final sanding.
A solid single-piece board eliminates glue-up, although wide hardwood slabs can move with humidity. Select stable, properly dried lumber and allow for normal wood movement.
Recommended Products for Making a Wooden Cutting Board
Once you’ve chosen your wood, a few reliable supplies can simplify the build. These three products address different stages: gluing, sanding, and finishing.
Product ratings below are editorial suitability scores, not verified customer ratings or hands-on test results. Prices and availability may change.
🏆 BEST FOR GLUING
Titebond III Ultimate Wood Glue
★★★★★ 5/5 suitability
This waterproof wood glue is manufacturer-rated for indirect food contact and is well suited to edge-grain glue-ups. It’s my first choice to consider when planning a board with multiple hardwood strips.
🛠️ BEST FOR SANDING
DEWALT DWE6423 Random Orbit Sander
★★★★☆ 4.5/5 suitability
This 5-inch variable-speed random orbital sander can help smooth larger board surfaces efficiently. I’d consider it for repeated woodworking projects where hand sanding would take considerably longer.
🌿 BEST FOR FINISHING
Howard Cutting Board Oil
★★★★☆ 4.5/5 suitability
This mineral-oil-based conditioning product is designed for wooden cutting boards and butcher blocks. I recommend considering it when you want a straightforward finish that can be reapplied during routine maintenance.
Affiliate disclosure: As an Amazon Associate, we earn from qualifying purchases. This does not affect your purchase price.
Frequently Asked Questions
What is the easiest wooden cutting board to make?
A simple edge-grain cutting board made from pre-cut hardwood strips is one of the easiest beginner projects. You can focus on arranging, gluing, flattening, and finishing the panel without learning complex joinery.
A single-piece hardwood board is another practical option if you want to avoid gluing altogether.
Can I make a cutting board from any wood?
No. Choose untreated wood with suitable hardness, grain characteristics, and a known species. Hard maple, walnut, and cherry are common choices for food preparation surfaces.
Avoid pressure-treated lumber, contaminated reclaimed wood, and species with uncertain safety characteristics.
What is the best finish for a homemade cutting board?
Food-grade mineral oil is a dependable finish because it’s easy to apply and maintain. A conditioner made with mineral oil and beeswax can add another layer of moisture resistance.
Avoid using conventional cooking oils that may become rancid over time.
How long does it take to make a wooden cutting board?
A basic edge-grain project may require a few hours of hands-on work across multiple sessions. Glue curing, sanding, and finishing extend the overall process.
Plan for at least two days rather than trying to complete every stage in one session.
Can I use a homemade wooden cutting board for raw meat?
Yes, provided the board is sound, cleanable, and maintained properly. However, using separate boards for raw meat and ready-to-eat foods reduces the risk of cross-contamination.
Follow appropriate washing and sanitizing practices, and retire boards with extensive cracks or hard-to-clean grooves.
Final Thoughts: Make Your First Wooden Cutting Board with Confidence
Learning how to make a wooden cutting board is an approachable introduction to practical woodworking. A well-made hardwood board can become a useful kitchen tool that reflects your preferred design and craftsmanship.
Start with a simple edge-grain design, prioritize accurate joints, and take your time during sanding and finishing. The result will be more satisfying when you focus on stability, safety, and long-term care rather than unnecessary decorative details.
Ready to begin? Choose your hardwood, prepare your workspace, and build a cutting board sized for your kitchen. Keep the first design simple, then experiment with more complex grain patterns as your skills improve.